
Audax Artifex was our January 2012 Daring Bakers’ host. Aud worked tirelessly to master light and fluffy scones (a/k/a biscuits) to help us create delicious and perfect batches in our own kitchens!
I have had quite the month since the last challenge. Honestly, I probably didn't even look at the challenge for about a week after it had been posted. Over the holidays we took a trip to Iowa to see my family and spend some time with them. What began as a quick visit to my grandfather in the hospital became two days, and a certainty that we would be coming back to Iowa very soon. We got back to Wisconsin on a Friday and the following Friday found us driving to Iowa to attend my grandfather's visitation and funeral. It was a very difficult beginning to 2012 to say the least.
I like to think that my grandfather would have enjoyed the fruits of this challenge. Whenever I think of biscuits I think of down-home cooking (although, I know that when titled as "scones" as in Britain and elsewhere you eat them at tea time) and that certainly makes me think of my grandmother. She grew up on a farm and learned her cooking there. Grandma's version of cooking was make it from scratch and don't hold the butter. My earliest cooking memories are of making bread or cookies with my grandmother, calling my grandpa on the phone (somehow we called him when he was upstairs in the same house. Without a cell phone. I still don't know how that worked) and telling him to come down to get some warm cookies.
 |
| Delicious Amish Jam |
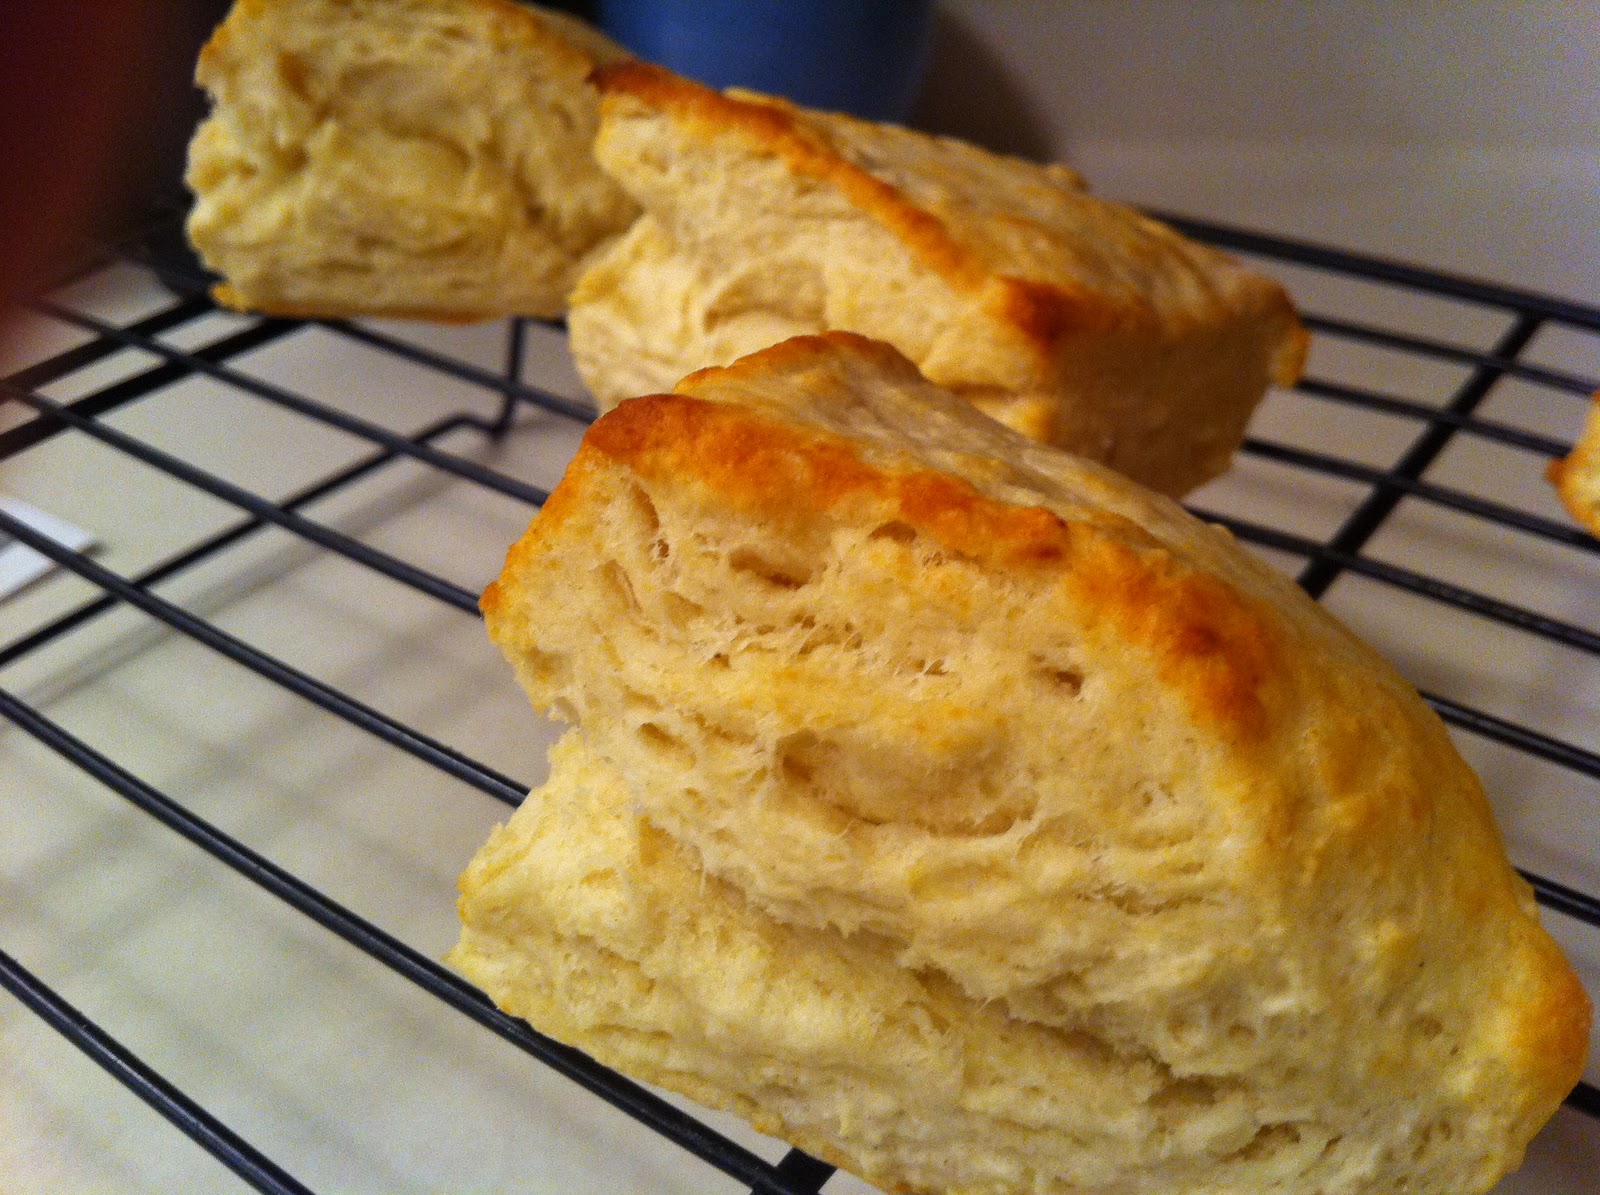
Perhaps it is just me feeling nostalgic and trying to find connections to the grandfather I miss deeply, but I really do think that he would appreciate these made from scratch, delicious biscuits. I was very preoccupied this month, so the most I managed was the basic biscuit recipe. No frills, no additions, but I can tell you even this "naked" form of biscuit was delicious. When paired with the Amish- made raspberry jam I got for Christmas, they were heaven. I also appreciated that these took so little time to make. I like foods that you can have a craving for and be eating them within the hour.
 |
| Old Baking Powder Biscuit |
 |
| New Baking Powder Biscuit! Magic! |
Basic Biscuits (makes about 8 2-inch biscuits)
1 cup all-purpose flour
2 teaspoons fresh baking powder
1/4 teaspoon salt
2 tablespoons frozen butter cut into small pieces
Approx. 1/2 cup cold milk
optional 1 tablespoon milk for glazing the tops of the biscuits
1. Preheat oven to 475.
2. Triple sift dry ingredients into a large bowl (or if you don't have a sifter like me, whisk them really really well)
3. Rub the frozen butter into the dry ingredients until it resembles very coarse bread crumbs with some pea-sized pieces if you want flaky biscuits or until it resembles coarse beach sand if you want tender biscuits.
4. Add nearly all of the liquid at once into the flour/butter mixture and mix until it just forms a sticky dough (add remaining liquid if needed). The wetter the dough the lighter the biscuits will be!
5. Turn the dough out onto a lightly floured board, lightly flour the top of the dough. To achieve an even homogeneous crumb to your scones knead very gently about 4 or 5 times until the dough is smooth. To achieve a layered effect in your biscuits knead very gently once (don't press too firmly) then fold and turn the kneaded dough about 3 or 4 times until the dough has formed a smooth texture.
6. Pat or roll dough out into a 6 inch by 4 inch rectangle about 3/4 inch thick. Using a well floured biscuit cutter cut into rounds, or use a well floured, sharp knife to form squares or wedges as you desire.
7. Place the biscuits just touching on a dish if you want soft sided biscuits or place them spaced widely apart if you want to have crisp-sided biscuits. Glaze the tops with milk if you want a golden color or lightly flour if you want a more traditional look.
8. Bake in the preheated oven for about 10 minutes (check at 8 since at this temperature home ovens are quite unreliable) until the biscuits are well risen and are lightly colored on the tops. The biscuits are ready when the sides are set.
9. Immediately place onto cooling rack to stop the cooking process, serve while still warm.
Sometimes naked biscuits are the best. And I love that you're having them at tea time. Baking and cooking seems like a great way to commemorate a life. No better way to honour a loved one. Hugs.
ReplyDeleteThese look like great old fashioned biscuits! Great job!!
ReplyDeleteI feel like as good of friends as we are, this is a really lame comment to say, but I really really mean it. Your biscuits look superb!!