Showing posts with label dessert. Show all posts

Monday, May 27, 2013

The Daring Bakers May 2013:Traditional Swedish Prinsesstårta

Korena of Korena in the Kitchen was our May Daring Bakers’ host and she delighted us with this beautiful Swedish Prinsesstårta!


This one came in just under the wire, kids. As in, I finished the recipe about 5 minutes ago. This month was truly a challenge (as they all have been recently- I know, I know, quit whining about being pregnant and tired) in more ways than one. First, I didn't quite get the sponge cake spongey enough, so it didn't rise as much as it should. Second, I had to make two batches of pastry cream and neither one was up to my standards (although, the second was usable where the first was just disgusting.) Third, I had plans to make and use marshmallow fondant rather than marzipan, which is great, but I've never made nor used marshmallow fondant before so there was a bit of swearing and tantrum throwing before I finally wised up and used enough icing sugar to make it not stick to the counter.
Updated to add this photo of the awesome layers!
We haven't cut into it yet, but I'm excited to try it. I'll edit this post with more photos after we have some. The best part is all the layers inside! I think that with practice this would not be a very difficult cake to make, and it sure looks impressive. I'll put this recipe into the "try again another time" pile and hopefully in the future give it another go. Until then, I'm going to put my feet up and wait the 5 or so more weeks until my own little baking projects arrive!

Here is a link to the recipe on The Daring Kitchen website.

Sunday, September 30, 2012

Autumn Dessert: Butternut Squash & Pear Crisp


I'm really enjoying the cool weather and yummy fall foods that we've been having lately. I love that fall weather actually encourages you to be outside and be comfortable while you're there, unlike summer where you're sweating and sticky the whole time. The air feels nice and crisp and the leaves are beginning to burst into color. Autumn is my favorite season, hands down.

I also love the puppy cuddles that come with cool mornings and evenings, even if they are just using you for warmth.


I was in the mood last weekend for a crisp of some kind and went sleuthing for something other than just your run of the mill apple crisp. When I stumbled upon a Bon Appetit recipe for pumpkin and pear crisp, I knew I had found the one. I substituted butternut squash for the pumpkin, and pecans for the walnuts because that's what I had. This was a delicious dessert that we enjoyed for a few days. I especially appreciated that you bake the crisp in ramekins. It made my weekday post dinner ritual that much easier. 

Butternut Squash and Pear Crisp (adapted from Bon Appetit)
Streusel Ingredients:
¼ cup old fashioned oats
¼ cup pecans
1 large egg white
¼ cup packed dark brown sugar
¼ cup (½ stick) chilled unsalted butter, cut into ½" cubes
3 tablespoons unbleached all purpose flour
3 tablespoons whole wheat flour
½teaspoon ground cinnamon

Compote Ingredients:
2 cups ¼" cubes peeled, seeded butternut squash (about ½lb)
¼ cup pure maple syrup
¼ cup golden raisins
2 tablespoons fresh lemon juice
1 tablespoon packed dark brown sugar
2 teaspoons ground cinnamon
¼ teaspoon ground cloves
1 ½ cup water
3 large pears, peeled, cored, cut into 1/4" cubes 
½ teaspoon vanilla extract

Streusel Directions:
1. Preheat oven to 375℉. Combine all ingredients in the bowl of a food processor and pulse until crumble forms. 
2. Spread on a rimmed baking sheet. Bake until golden and crispy, occasionally breaking up clumps, 18-20 minutes. Let cool. 

Compote Directions:
1. Preheat oven to 375℉. Bring first 8 ingredients to a simmer in a large saucepan over medium heat. Cover and simmer until squash is just tender, about 7 minutes. 

2. Add pears and vanilla; cook uncovered, stirring often, until pears are tender, about 10 minutes. 

3. Transfer pumpkin and fruit mixture to a medium bowl. Simmer syrup in pan until reduced to ½ cup, 3-5 minutes. 

4. Arrange 8 6 oz. ramekins on a rimmed baking sheet. Divide compote among ramekins. Drizzle each with 1 tablespoon reserved syrup.

5. Bake until filling is bubbling at edges, 25-30 minutes. Top with streusel and serve. 

Monday, August 27, 2012

Daring Bakers August 2012: Pate a choux Swans


Kat of The Bobwhites was our August 2012 Daring Baker hostess who inspired us to have fun in creating pate a choux shapes, filled with crème patisserie or Chantilly cream. We were encouraged to create swans or any shape we wanted and to go crazy with filling flavors allowing our creativity to go wild!


I knew as soon as I saw this challenge that I would be using this to introduce my neighbors to my baking obsession. I could have made a half batch that would have still been too much for just me and my husband, but when you can take something like this over to the neighbors, what an introduction! They all looked at me kind of strange and asked "you just did this.... for no reason?" and I had to explain about the monthly challenges I do with the assurance that this would be the first of many food presents.

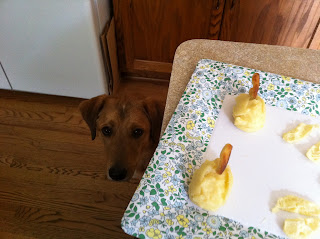
Bingley would like a swan, please.


I have never done pate a choux before, and looking at other bakers' pictures I think mine was a little runny. It didn't take too much time and wasn't all that difficult so I'm not too intimidated to give this another try. I think that these would be so much fun for baby showers or similar events.


Pate a choux
Ingredients
½ cup (120 ml) (115 gm) (4 oz) butter
1 cup (240 ml) water
¼ teaspoon (1½ gm) salt
1 cup (240 ml) (140 gm) (5 oz) all-purpose flour
4 large eggs

Directions:
Line at least two baking sheets with silicone mats or parchment paper, or grease pans well.
Preheat oven to moderately hot 375°F/190°C/gas mark 5 .
In a small saucepot, combine butter, water, and salt. Heat over until butter melts, then remove from stove.
Add flour all at once and beat, beat, beat the mixture until the dough pulls away from the sides of the pot.
Add one egg, and beat until well combined. Add remaining eggs individually, beating vigorously after each addition. Resulting mixture should be somewhat glossy, very smooth, and somewhat thick.
Using a ¼” (6 mm) tip on a pastry bag, pipe out about 36 swan heads. You’re aiming for something between a numeral 2 and a question mark, with a little beak if you’re skilled and/or lucky.
Remove the tip from the bag and pipe out 36 swan bodies. These will be about 1.5” (40 mm) long, and about 1” (25 mm) wide. One end should be a bit narrower than the other.
Bake the heads and bodies until golden and puffy. The heads will be done a few minutes before the bodies, so keep a close eye on the baking process.
Remove the pastries to a cooling rack, and let cool completely before filling.

Assembly
Take a swan body and use a very sharp knife to cut off the top 1/3rd to ½.
Cut the removed top down the center to make two wings.
Dollop a bit of filling into the body, insert head, and then add wings.

Vanilla Crème Patissiere

(Half Batch)

Ingredients:
1 cup (225 ml.) whole milk
2 Tbsp. cornstarch
6 Tbsp. (100 g.) sugar
1 large egg
2 large egg yolks
2 Tbsp. (30 g.) unsalted butter
1 Tsp. Vanilla

Directions:
Dissolve cornstarch in ¼ cup of milk. Combine the remaining milk with the sugar in a saucepan; bring to boil; remove from heat.
Beat the whole egg, then the yolks into the cornstarch mixture. Pour 1/3 of boiling milk into the egg mixture, whisking constantly so that the eggs do not begin to cook.
Return the remaining milk to boil. Pour in the hot egg mixture in a stream, continuing whisking.
Continue whisking (this is important – you do not want the eggs to solidify/cook) until the cream thickens and comes to a boil. Remove from heat and beat in the butter and vanilla.
Pour cream into a stainless steel/ceramic bowl. Press plastic wrap firmly against the surface. Chill immediately and until ready to use.

Friday, June 3, 2011

Strawberry Tart


When I went grocery shopping this week I saw 2lb packages of strawberries on sale. I thought, these can't possibly be good, they're probably selling them at a discount because they're about to go bad or something. Surprisingly though, they looked really good! Then I had to figure out what the heck I was going to do with 2 lbs of strawberries! 


A visit to Confessions of a Tart and the gorgeous photos of her fresh strawberry tart gave me a pretty good idea.

The recipe starts with a Sweet Tart Dough that is frozen before you bake it so no pie weights are necessary (although I just got some at a bridal shower that I have been dying to use)

Ingredients: 
1 ½ Cup all purpose flour
½ cup confectioner's sugar
¼ teaspoon salt
1 stick plus 1 tablespoon cold unsalted butter, cut into small pieces
1 large egg yolk

1. Combine flour, sugar and salt. Scatter butter pieces over dry ingredients and combine with a pastry cutter. (Confessions of a Tart has directions for doing this with a food processor. I am not lucky enough to have one, but it works just as well by hand.) Stir egg yolk to break it up and add to the dough.  Turn dough onto a work surface and very lightly knead dough to finish incorporating dry ingredients.

2. Butter a 9 inch tart pan (I have an 11 inch, it worked really well, so either would be fine) and lightly press dough evenly into pan. 

3. Prick dough with a fork 4-5 times. Freeze for 30 minutes or preferably longer.

4. To bake crust, center a rack in your oven and preheat to 375˚. Butter the shiny side of aluminum foil and fit, buttered side down, tightly against the crust. Put the tart pan on a baking sheet and bake crust for 25 minutes. Remove from oven and carefully remove foil. If the crust has puffed, press down gently with the back of a spoon. Bake for another 8 minutes without the foil until firm and golden brown.  Transfer pan to a rack and cool to room temperature. 

The next part is a Pastry Cream. I've never made a pudding or custard, except from those instant pudding packages that you really can't mess up. I'll admit that the first batch I tried of this sat, sadly liquid, in the fridge with me hoping it would magically firm up. It ended up going down the drain. I guess while waiting for your milk to almost boil is not the most opportune time to begin talking to your fiancé about where you may someday move for some job that you don't even have yet. The second time when I actually stayed in the same room as the stove, the custard turned out just right. 
Ingredients: 
2 cups whole milk
½ cup plus 1 tablespoon sugar
2 large eggs
4 tablespoons unsalted butter
¼ teaspoon salt
3 tablespoons cornstarch
1 teaspoon vanilla extract

1. Pour milk into a heavy saucepan. Add salt, place over medium-high heat and cook until just before boiling point, stirring occasionally. Meanwhile, whisk together cornstarch and sugar. Add the eggs and whisk until smooth (don't let the eggs and sugar stand for long). 

2. When milk is ready, slowly drizzle a third of the hot milk into the egg mixture, whisking continuously. Pour the egg- milk mixture back into the hot milk and continue whisking until the custard is as thick as lightly whipped cream, about 2 minutes. 

3. Remove from heat and immediately pour through a sieve into a bowl. Stir in vanilla extract. Let cool 10 minutes, stirring occasionally. 

4. Cut butter into 1 tablespoon pieces and whisk into pastry cream 1 tablespoon at a time until smooth. 

5. Cover bowl with plastic wrap, pressing directly onto top of cream to prevent skin from forming and put into fridge to cool.

Then assemble the tart! 

Fill the tart shell with pastry cream

Hull and slice 1 lb of strawberries (more for an 11in. tart pan), reserving one perfect strawberry for the center

Arrange strawberry slices in circles on top of the pastry cream. Put the reserved whole strawberry in the middle. 


Saturday, April 2, 2011

Carrot Cake Cupcakes

After teaching all week (I know, I know, everyone else in the world with a full time job is sick of hearing me complain about ACTUALLY working) I was exhausted. Too exhausted to document my cooking experience with these delicious carrot cake cupcakes.

I was a little anxious about having planned to make these for a benefit we are going to on Saturday, mostly because when I decided to make them I thought I was going to have plenty of time to play in the kitchen on Friday. Thank goodness the recipe was so ridiculously simple that I kept having to re-read it to make sure I wasn't missing anything.

My only issue with the recipe was that my carrots must have had a lot of moisture, because the cooking time listed in the original recipe didn't turn out to be enough. The first dozen, which I was planning on keeping at home anyway, turned out a little soggy at first and one cup that I overfilled didn't really cook all the way through even after additional time in the oven. The second dozen turned out fine after a few more uninterrupted minutes in the oven.

I snuck tastes of enough of the frosting and batter before washing the bowls that I haven't eaten one yet, but Dave had one and said it was delicious. That's always a good sign.

For the actual recipe, you'll have to go over to Smitten Kitchen and check out her beautiful rendition of these cupcakes. Pretend mine look like that too. Because I totally did all that piping rather than just spread the frosting on with a knife. Yeah.

Sunday, February 13, 2011

Happy Valentine's Day!

I realize that the last post on this blog is from November. I've been thinking about blogging since the last post, but what with the whirlwind of the holidays and then devouring most meals before I have time to photograph them, it's been a bit of a difficult task to complete. I did quite a bit of baking and cooking over the holidays, made special cookies for the Superbowl (with Green Bay in the game this year it was practically a holiday around here), and various meals in between. I received "Mastering the Art of French Cooking" as a Christmas present this year, so I've been cooking quite a bit out of that too (mmm butter!). I made a pact with myself that I wouldn't post any of those recipes on this blog, although it is quite tempting.

The time has definitely come to post again. For Valentine's Day this year, the fiance and I are having a lovely dinner at home and enjoying each other's company. I've been thinking a lot about our Valentine's celebration last year, when we lived 450 miles apart, and I think I prefer this year's celebration infinitely better. He had a gig the night before and I had to teach on the Monday following, so we ended up meeting in the middle and walking around a mall. We had a nice dinner at a certain Australian restaurant, but having to drive to our respective cities alone afterwards was quite a let-down.

My Valentine's present to the fiance is a meal of his favorites, so that means lasagna, and also Red Velvet Cupcakes for dessert. I'll eat ANYTHING that has cream cheese frosting, so the Red Velvet Cupcakes were a double positive. I do have a wedding dress to start thinking about fitting into, so I used a recipe from Cooking Light to help make these a little less guilt-inducing. The end result is moist, delicious, and gorgeously red, oh and did I mention, CREAM CHEESE FROSTING?! That alone is make-your-knees-weak delicious. All in all, this recipe is getting filed away for many, many future uses. So enough with the backstory and on to the recipe!


Red Velvet Cupcakes
Ingredients:
2 1/2 cups cake flour
3 tablespoons unsweetened cocoa
1 teaspoon baking soda
1 teaspoon baking powder
1 teaspoon kosher salt
1 1/2 cup sugar
6 tablespoons unsalted butter, softened
2 large eggs
1 1/4 cup buttermilk
1 1/2 teaspoon white vinegar
1 1/2 teaspoon vanilla extract
2 tablespoons red food coloring

1. Preheat oven to 350° F.
2. Place 24 cup liners in muffin pan, coat with cooking spray.
3. Combine cake flour, cocoa, baking soda, baking powder, and salt in a medium bowl. Stir with a whisk.
4. Place sugar and butter in a large bowl, beat until blended (about 3 minutes). Add eggs, one at a time, beating well after each addition.
5. Add flour and buttermilk alternately to the sugar mixture, beginning and ending with flour. 
6. Add vinegar, vanilla, and food coloring; beat well.
7. Spoon into prepared muffin cups. Bake for 20 minutes, until toothpick inserted in center comes out clean.
8. Cool in pan for 10 minutes on wire rack; remove from pan. Cool completely before frosting. 

Cream Cheese Frosting
Ingredients:
5 tablespoons unsalted butter, softened
4 teaspoons buttermilk
1 8 oz block cream cheese, softened
3 1/2 cups powdered sugar
1 1/4 teaspoon vanilla

1. Beat butter, buttermilk, and cream cheese with mixer on high until fluffy.
2. Gradually add powdered sugar; beat until smooth.
3. Add vanilla; beat well.

Saturday, July 31, 2010

Pound Cake

I woke up this morning feeling a little sad that I didn't have a reason to bake this weekend. After the marathon of pie-cake-and banana bread baking day I took a week or so off, but then made a cheesecake for my dad's birthday. Who doesn't love cheesecake? But I haven't been able to think of another reason to bake- until inspiration hit while making the grocery list this week. 

While looking at the ad for this week's sales at the grocery store, I saw that strawberries were on sale. So, the baking muse whispered in my ear and said "pound cake, fresh strawberries, and whipped cream". Of course, I had to oblige. 

Last summer, when the relationship with the fiancé was fairly new,  we were supposed to go to his parents' for dinner (and a first meeting). I thought I'd make a great first impression and bake something to take along for dessert. Well, the only issue here was that the knobs on the stove in the fiancé's apartment had all the numbers and wording rubbed off.... so I was guessing on where "bake" was and the temperature too. After twice the amount of time called for in the recipe, I came to the realization that only the top burner had been going the whole time, hence my burned on top and still batter on the bottom pound cakes... well, let's just say I wouldn't advise broiling your pound cake. We've since had the knobs replaced and baking has been much easier since. 

So, about a year later, I got up the guts to try the pound cake recipe again, this time with the stove securely set to "bake".  

Pound Cake
1/2 lb butter
1/2 cup shortening
3 cups sugar
5 eggs
3 cups flour
1/2 teaspoon salt
1/2 teaspoon baking powder
1 cup milk
1 teaspoon vanilla

1. Preheat oven to 350. Cream butter and shortening together. Add sugar, a little at a time. Add eggs, one at a time, beating after each addition.

2. Stir dry ingredients together, add to mix alternately with milk. Begin adding with flour, end with flour. 

3. Mix in vanilla. Pour batter into 2 greased and floured 9 inch bread pans. Bake 1- 1.5 hours, until toothpick comes out clean. Cool in pan for 10 minutes, then take out and let cool completely.


Sunday, July 18, 2010

Peanut Butter Popcorn


Anyone who spent time at my house while I was growing up is probably familiar with my mother's peanut butter popcorn. It is the stuff of legends, something you'll just all of a sudden have a craving for that NOTHING can sate, other than the real thing. The first time my fiancé had it, he immediately looked at my mom and said "Dana knows how to make this too, right?". It is addictive, to say the least.

My mom usually makes a huge turkey roaster full of the stuff, but when it's just me and the fiancé, it's safer to make a smaller batch. He and I are trying to eat more "real foods" so this is a difficult recipe to justify- it does involve high-fructose corn syrup- but it's totally worth breaking our "real food" rule.

You need to make a ton of popcorn for this, 3-4 bags if you're using microwave, or that many batches if you make it the old fashioned way on the stove. It's important to make sure you sift through each batch of popcorn to get all the un-popped seeds out before adding the peanut butter sauce.

In a medium sauce pan, melt 1 cup peanut butter, 1 cup sugar, and 1 cup light corn syrup. You need to be stirring this pretty constantly so the bottom doesn't burn. When it's pretty well mixed and liquid-ish, add a touch of vanilla extract. Stir for about one minute after adding vanilla, make sure to get all the edges so it doesn't scorch. Pour peanut butter mixture over popcorn. Mix the popcorn and melted peanut butter well.

Eat while still warm... and after cooled.... and if there's any left the next day, well you should eat it then too.