Patri of the blog, Asi Son Los Cosas, was our September 2012 Daring Bakers’ hostess and she decided to tempt us with one of her family’s favorite recipes for Empanadas! We were given two dough recipes to choose from and encouraged to fill our Empanadas as creatively as we wished!
I know, I know. I'm two days late in posting. Blame my job or my procrastination, either way I'm late. One of my goals now that school has been happening for a full month is to do a better job blogging. Right now that means two specific things: posting on time for challenges and taking the time to take better photos. Hold me to those things, people! Please!
This was a delicious recipe that was perfect for the cooler weather we've been having lately. Something about meat and veggies baked in dough just screams autumn comfort food. We had the inaugural fire in the fireplace in our house and enjoyed the feeling of bellies full of yummy empanada as we relaxed last weekend.
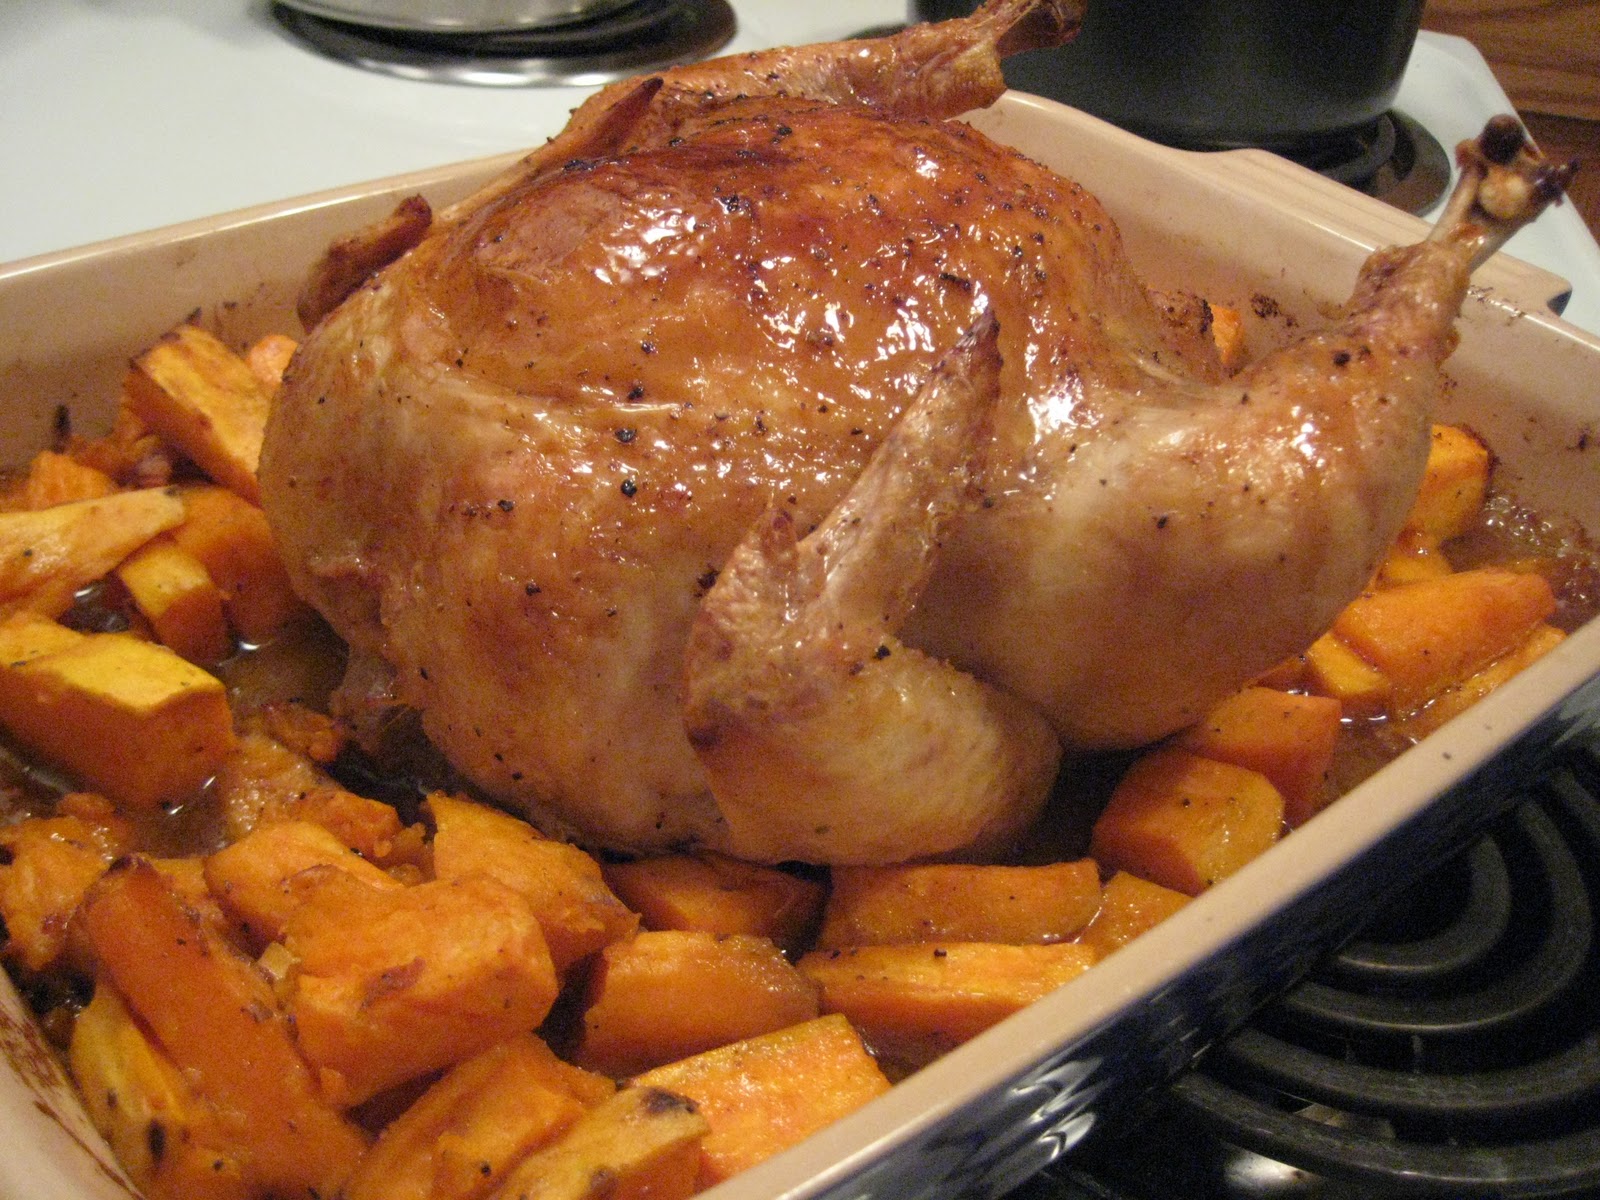
I'd made dessert empanadas before (okay, I mostly cheated with canned apple pie filling and probably store-bought dough) and was looking forward to trying the savory kind. I could have made this a little easier on myself by buying a rotisserie chicken instead of roasting my own, but with whole chickens under a dollar a pound I couldn't really justify not doing the whole recipe from scratch.
Chicken and Bell Pepper Empanadas
Dough Ingredients:
5-1/3 cups (1280 ml) (750 gm) bread flour
2 cups (480 ml) of lukewarm water (about 85°F/30oC)
approximately
1 satchel (1 tablespoon) (15 gm) dry yeast or (1 oz) (30 gm) fresh yeast
2 teaspoons (10 ml) (11 gm) salt
4 tablespoons (60 ml) oil (you can use oil from the pan where you have cooked the filling)
1 large egg, for egg wash
For the filling:
1 3-pound chicken
Sea salt and black pepper to taste
½ cup extra-virgin olive oil
1 green bell pepper, seeded and thinly sliced
1 red bell pepper, seeded and thinly sliced
1 medium Spanish onion, thinly sliced
4 garlic cloves, minced
8 ripe plum tomatoes
1 fresh thyme sprig
2 bay leaves
½ cup dry white wine
2 teaspoons sweet pimentón (Spanish smoked paprika)
Dough Directions:
1. Measure out all the ingredients. Sift the flour into a big bowl and make a well in the middle. Rub the yeast in with your fingers.
2. In a small bowl, mix the water and the salt. Using your fingers or a wooden spoon, start adding the water and mixing it with the
flour-yeast mixture. Keep on working with your fingers or spoon until you have added
enough water and all the flour has been incorporated and you have a messy ball of dough.
3. On a clean counter top, knead the dough for approximately 10 minutes
(You could do all the above using a stand mixer, in that case mix the ingredients with the
paddle attachment until mixed and then switch to a dough hook and knead on low for about 6
minutes.)
4.Clean and oil the big bowl you used for mixing and place the kneaded dough in it. Cover it
with a napkin or piece of linen and keep it in a warm, draught-free place for approximately 40 to 50 minutes.
5. Once risen, turn the dough back into a floured counter and cut it in half. Cover one half with the napkin to prevent drying.
6. Spread the other half of the dough using a rolling pin. You can use a piece of wax paper over the counter, it will make it easier to move the dough around. Depending on the shape of your oven pan or cookie sheet, you will make a rectangle or a round.
7. Now, the thinness of the dough will depend on your choice of filling and how much bread you like in every bite. For your first time, make it about 3mm thin (about 1/10th of an inch) and then adjust from that in the next ones you make.
Filling Directions:
1. Preheat the oven to 375℉
2. Season the chicken, inside and out, with salt and pepper and place on a rack set on top of a baking sheet. Roast the chicken for 45 minutes and let cool. Remove all of the meat from the chicken, discarding the skin and bones. Shred the meat and set aside.
3. Heat the olive oil in a medium saucepan over medium-low heat. Add the peppers, onions and garlic and cook, stirring occasionally, until the onions and peppers are tender and golden brown, about 30 minutes.
4. Meanwhile, slice the tomatoes in half. Place a grater over a mixing bowl. Rub the cut surface of the tomatoes over the grater until all of the flesh is grated. Set the pulp aside and discard the skins.
5. Add the thyme and bay leaves to the onions and peppers and continue to cook until the mixture turns brown, about 5 minutes more. Add the wine and cook until it evaporates.
6. Stir in the tomato pulp and pimentón, reduce the heat to medium and cook slowly until the oil separates from the mixture and the tomato becomes dark brown in color, about 20 minutes more.
7. Add the shredded chicken and cook for 5 more minutes. Remove from the heat, season to taste with salt. Transfer the mixture to a strainer set over a mixing bowl to drain and let cool. Discard liquid.
To Assemble:
1. Turn a 13x18 inch baking sheet over on a work surface and brush the back of the pan with olive oil. Transfer one rectangle of dough to the baking sheet.
2. Spoon the filling into the center of the dough and spread to about 1 inch from the edge. Beat the egg in a small bowl with a little water and brush the egg wash along the edge of the dough.
3. Place the second rectangle of the dough on top of the filling. Fold the dough over, crimping the edges to seal. Brush the top of the dough with the remaining egg wash and prick the dough with a fork to allow the steam to escape.
4. Bake until golden brown, about 30 minutes. Allow the empanada to come to room temperature before slicing.
Showing posts with label Chicken. Show all posts
Saturday, September 29, 2012
Sunday, September 16, 2012
Daring Cooks September 2012: Paella
I know, I'm a little late in this posting, but better late than never, right? I swear, now that school has started I'm lucky to remember my name at the end of the day much less how to cook.
Our Daring Cooks’ September 2012 hostess was Inma of la Galletika. Inma brought us a taste of Spain and challenged us to make our very own delicious Paella!
I was so excited when this challenge was posted, paella is a dish I love to eat, love to make, and I have fond memories of my trip in Spain every time I eat it. The first time I ate paella I was a little nervous when the waiter put the plate down in front of me- there were crawfish placed around the lip of the plate just staring at me. I avoided the crawfish and their creepy eyes, but as soon as I had my first mouthful I was enamored.
When I got back from the trip my first request for a birthday present was a paella pan. Since then I've made the dish quite a few times but always when I know I'm going to be feeding quite a few people. This time around we invited friends over and planned a night of sangria, paella and Monopoly. One of our guests is not a big fan of seafood so I adjusted the recipe to accommodate his tastes as well as those of us who love shrimp. I am saving the recipe that Inma gave us for another time, I'm very interested to try another very authentic recipe.
I have one very yellow photo of this dish because I was too busy cooking and talking and drinking sangria to take more. But this is really a beautiful dish and wonderful to eat!
Paella (adapted from Williams Sonoma)
½ tsp saffron threads
1lb large shrimp, peeled and deveined
¼ cup olive oil
salt and freshly ground pepper, to taste
1 yellow onion, finely chopped
3 garlic cloves, minced
½ cup roughly chopped canned peeled tomatoes
2-3 lbs chicken pieces (I used thighs because that's what I had this time, I've also done it with a whole chicken that I broke down into pieces)
2 cups short grain rice
2 tsp smoked paprika
½ cup dry white wine
4 cups chicken broth
½ cup water
½ cup red bell pepper strips, 1/4 inch wide
½ cup thawed frozen peas
2 lemons, each cut into 8 wedges
1. Preheat oven to 350℉.
2. In a paella pan (or large skillet) over medium heat, cook chicken pieces in 1-2 Tbs olive oil for 15 minutes, turning from time to time. Remove and keep warm.
3. Toast saffron in paella pan, stirring constantly until fragrant, about 1 minute. Transfer to a small bowl, let cool and crumble with fingers, set aside.
4. In another bowl, combine the shrimp, 2 Tbs of olive oil, salt and pepper. Stir to coat. Cover and refrigerate until ready to use.
5. In the paella pan over medium heat, warm 2 Tbs olive oil. Add the onion and cook, stirring occasionally, until soft and translucent, about 7 minutes. Stir in the garlic and cook for 30 seconds. Add the tomatoes and cook, stirring, until most of the liquid has evaporated and the tomatoes have darkened slightly, 6-7 minutes.
6. Add the rice, saffron, and paprika and cook, stirring constantly, until the grains are evenly coated with the tomato mixture, about 2 minutes. Add the wine, chicken broth, and water and season with salt and pepper. Spread the rice evenly over the bottom of the pan, increase the heat to medium-high and bring to a boil.
7. Cover the pan tightly with aluminum foil and transfer to the oven. Cook until rice has absorbed most of the liquid, about 20 minutes. Remove the pan from the oven.
8. Arrange the chicken evenly around the pan and press into the rice. Place the shrimp on top. Lay the bell pepper strips over the seafood and scatter the peas on top. Re-cover the pan with the foil and return the pan to the oven. Cook until the shrimp are opaque and the chicken is cooked through, 17-20 minutes, removing the foil during the last 5 minutes of cooking.
9. To create a brown crust on the bottom of the rice, set the pan over medium-high heat and cook, turning the pan occasionally so the bottom browns evenly, 4-6 minutes. Remove from the heat and let stand for 5 minutes. Serve the paella with lemon wedges alongside.
Tuesday, October 4, 2011
Lemon-Chicken Soup with Orzo
This month my goal was to make a different soup every weekend, freeze half of it, and enjoy while the weather got colder. While I was growing up, my mom would make a dozen different kinds of soup as it started to get colder and freeze them. We ate homemade soup all winter and all we had to do was take a container out of the freezer. I thought that since neither my husband nor I are at home as much this winter, we could get our own soup bank started.
We made chili the last weekend of September and it was glorious to sit under a blanket on the couch, cuddle up with the husband, and warm up with some chili. Of course, this past weekend was really too warm to truly enjoy soup, but at least the recipe I picked was a nice light chicken soup.
This soup starts with making your own chicken stock. After making my own, I will never go back to store-bought stock. It is ridiculously easy and ridiculously delicious. Plus, I like to manage the amount of sodium I'm taking in, so making my own stock is the way to go!
Lemon-Chicken Soup with Orzo
adapted from Cooking Light
Stock Ingredients:
1 4lb whole chicken
2 carrots, peeled and cut into 1 inch pieces
2 celery stalks, cut into 1 inch pieces
1 medium onion, peeled and sliced
6 garlic cloves, crushed
4 sprigs fresh flat-leaf parsley
2 teaspoons whole black peppercorns
2 bay leaves
6 cups water
1. Remove and discard giblets and neck from chicken. Place chicken in a large Dutch oven. Add the rest of the ingredients to the pan and bring to a simmer. Reduce heat and simmer for 45 minutes.
2. Remove chicken from pan, place aside to cool for about 15 minutes. Discard the skin. Remove meat from the bones, discarding the bones. Chop (or shred with your fingers) chicken into bite-sized pieces. Place meat into a covered container and refrigerate.
3. Strain broth mixture through a sieve into a large bowl. Discard the solids. Cool broth to room temperature. Cover and chill for 8-24 hours (allowing the fat to rise to the surface and solidify). Skim fat from surface and discard.
Lemon-Chicken Soup Ingredients
1 ⅓ cups chopped carrot
1 ¼ cups chopped onion
1 cup chopped celery
2 teaspoons salt
8 oz uncooked orzo
¼ cup chopped fresh flat-leaf parsley
2 ½ teaspoons grated lemon rind
¼ cup fresh lemon juice
4. Add water to broth to equal 9 cups, place broth mixture in a large Dutch oven. Add the carrot, onion, celery and salt to pan and bring to a boil. Cover, reduce heat and simmer for about 15 minutes or until vegetables are tender. Add the chicken meat and simmer for about 3 minutes.
5. Meanwhile, cook the orzo according to the package directions, omitting salt and fat. Add the pasta to the pan with the chicken and broth mixture. Stir in parsley, lemon rind and lemon juice.
Monday, November 22, 2010
Maque Choux
It's officially feeling like November. We haven't had any snow yet, but I'm sure it is coming. I just hope it holds off until after I get to go home for Thanksgiving. At work we've been gearing up for Black Friday- it will be my first Black Friday actually stepping foot in a mall or doing any shopping. I usually avoid the craziness of that shopping day, but it cannot be helped this year.
At home we did some winterizing this afternoon. It hasn't been too cold yet, but I'm sure when old man winter comes knocking we'll be glad. We have had some blustery days and I noticed the vertical blinds swaying after a few of the strong gusts in our living room. Needless to say, our windows are old and very drafty. So now we have a cozy home and are in need of something to warm our tummies.
Enter Maque Choux. Not only is this dish stomach warming and filling, the colors of the ingredients and cajun flavors warm everything right up.
Maque Choux with chicken and hot Italian sausage
6 ears corn (I used a package of frozen corn instead)
3 lbs chicken thighs with skin and excess fat trimmed
1 tablespoon oil
1/2 lb hot italian sausage links, cut into 1/2 inch slices
3 medium onions, chopped
1 orange or red bell pepper, chopped
1 green bell pepper, chopped
1 large celery rib, sliced
2 fresh thyme sprigs
1/2 teaspoon cayenne pepper
3/4 pound cherry tomatoes (1 1/2 pints) halved
1/4 c chopped fresh basil
1. If using fresh corn, cut kernels off cobs and, working over a large bowl, scrape cobs with knife to extract all juices. Discard cobs.
2. Pat chicken dry and season with salt and pepper. Heat oil in a heavy 8 qt pot over moderately high heat until hot but not smoking, then brown sausage, transferring to a plate. Brown chicken in batches, transferring to another plate.
3. Pour off all but 1 tbs fat from pot, then saute onions, bell peppers, celery, thyme, cayenne and salt to taste over moderately high heat, stirring occasionally, 4 minutes. Add corn with juices and cook, stirring, 2 minutes. Stir in tomatoes and sausage.
4. Nestle chicken into mixture and simmer, covered, stirring occasionally, until chicken is cooked through, about 40 minutes. If the maque choux is soupier than you like, simmer uncovered until juices are reduced. Stir in basil and season with salt and pepper. Serve with sliced bread to soak up the liquids.
Wednesday, October 27, 2010
Rapide Coq Au Vin
Although I have more time than I'd like currently, Sunday was one of the only days in this past week that I got to spend some time with the fiance. It's been a busy couple weeks and most of our time has been spent at work (opposite schedules, always, ugh!). He did have two gigs, one his usual Sunday morning gig, and another benefit this afternoon, but I finally get to spend time with him this evening. I did NOT want to spend a majority of that time stuck in front of the stove, so I found a recipe for Coq Au Vin that cheats a bit. I'm totally fine with this, having sworn to myself that I will make the real thing ASAP.
Again, I've been thinking about wanting to make this for quite a while. There's a scene in the movie "The Namesake" (fantastic movie, by the way, and an even better book by Jhumpa Lahiri) where one of the characters tries to make this. Ever since I saw that, I've really wanted to make this myself. Also, the wine. Any dish that is just a vehicle for a good wine is fine by me. I picked up a Burgundy I love (cheap, but trustworthy) to use in this recipe.
The end result was me saying "I'm going to be dreaming of this food tonight!" and it being marked as a definite "make again" recipe. The chicken was melt in your mouth tender, the vegetables were flavorful, and the whole thing just was a symphony of yum! The next time I have a craving for this, I do plan on making the full out traditional recipe, but in a situation with less time, this is definitely an amazing dish on its own!
Rapide Coq Au Vin
1/4 cup flour
1 teaspoon thyme
1/2 teaspoon salt
6 (4 ounce) skinless, boneless chicken thighs
1 tablespoon olive oil
6 cups quartered cremini mushrooms
2 cups (1/4 inch thick) slices carrot
1/3 cup (1/4 inch thick) slices canadian bacon
1 cup dry red wine
1 cup fat-free, less sodium chicken broth
1 tablespoon tomato paste
1. Combine flour, thyme and salt in a ziploc plastic bag; add chicken. Seal and shake to coat. Remove chicken from bag, shaking off excess flour.
2. Heat oil in a large skillet over medium-high heat. Add chicken; cook 9 minutes or until browned, turning frequently. Remove chicken from pan.
3. Add mushrooms, carrot and bacon to pan; saute 2 minutes. Stir in wine, broth and tomato paste. Cook for 9 minutes. Return chicken to pan; cook 8 minutes or until chicken is done.
Saturday, October 16, 2010
Roast Chicken
My father was visiting last week. He loves to cook. No, wait, let me clarify. He loves to try new outlandish recipes with surprising ingredients. I think I inherited a bit of this, minus the penchant for every dish to include salmon or lamb and always cranberries. In light of his visit, I wanted to find something that I could make that would serve as a tip of the hat to my father's adventurousness in the kitchen, as well as serve as a great meal.
We actually didn't end up having this while he was here- time just got away from us & we ended up going out instead. It worked out well anyway because Friday night is one of the only nights the fiance and I get to eat dinner together, so this was a good one for him to come home to!
Everything went pretty smoothly in the making, it's a lovely recipe for putting it in the oven, setting the timer for the glazings, and picking up a good book. Overall, a success! It's definitely going in the "try again" file.
Roast Chicken with Maple Pepper Glaze
We actually didn't end up having this while he was here- time just got away from us & we ended up going out instead. It worked out well anyway because Friday night is one of the only nights the fiance and I get to eat dinner together, so this was a good one for him to come home to!
Everything went pretty smoothly in the making, it's a lovely recipe for putting it in the oven, setting the timer for the glazings, and picking up a good book. Overall, a success! It's definitely going in the "try again" file.
I'm caught! No, I didn't tie the legs or twist the wings, oops! |
2 lbs sweet potatoes (about 3) peeled and cut into 1 1/2 inch pieces
2 tablespoons cooking oil
1 teaspoon salt
1 1/4 teaspoon fresh ground black pepper
1 chicken (3- 3 1/2 pounds)
1 tablespoon butter, cut into small pieces
6 tablespoons pure maple syrup
1. Heat the oven to 425. In a large roasting pan, toss the sweet potatoes with 1 tablespoon of the oil, 1/2 teaspoon of the salt and 1/4 teaspoon of pepper. Push them to the edges of the pan, leaving room in the middle of the pan for the chicken.
2. Rub the cavity of the chicken with 1/4 teaspoon of the salt and 1/8 teaspoon of the pepper. Twist the wings behind the back and tie the legs together. Put the chicken, breast side up, in the center of the roasting pan. coat the chicken with the remaining tablespoon of oil, sprinkle with the remaining 1/4 teaspoon salt and 1/8 teaspoon pepper and dot with the butter. Roast for 30 minutes.
3. Meanwhile, in a small bowl, combine the maple syrup and the remaining 3/4 teaspoon pepper. Remove the roasting pan from the oven and stir potatoes. Brush the chicken with about 2 tablespoons of the glaze. Return the pan to the oven and cook, stirring the potatoes and brushing the chicken with the remaining glaze 2 more times, until chicken and potatoes are just done, about 30 minutes longer. Transfer to a plate and keep warm for 10 minutes.
Friday, October 1, 2010
StirFryday!
Aaaand... I'm back!
I'm looking forward to doing a lot of cooking now that the weather is starting to get cooler.. there is just something about fall that makes you want to begin the hibernation with a homemade soup or stomach-warming dish and a tasty dessert of the season like apple crisp. I was talking to a friend today and she brought up apple crisp and I swear I started salivating from just hearing the words "apple crisp"!
Tonight I'm easing myself back into the kitchen with a simple but tasty stir-fry and my first crack at egg drop soup. I've been wanting to try making my own egg drop soup for a long time, so I'm pretty excited about tonight's dinner. When we went grocery shopping today I was also on the look out for the little crispy "noodles" that you'll often get as a topping in a Chinese restaurant when you order the egg drop soup. I'm not talking about the chow mein noodles that come in a can that my grandpa always used to tell me were worms that he was putting on his salad. These are sort of like the Chinese restaurant version of tortilla strips. If anyone knows what you call them, let me know.
I started thinking about the noodles, and I vaguely remember them being similar to the part of crab rangoon that doesn't have the crab in it. HMMM.... I'm trying out frying little rectangles of wonton dough tonight to see if I can replicate the restaurant soup even further.
Egg Drop Soup
4 cups chicken broth
1/8 teaspoon ground ginger
2 tablespoons chopped chives (I omitted these because the chives at the store looked a little wilty and old- spring project: herb garden!)
1/4 teaspoon salt
1 1/2 tablespoons cornstarch
2 eggs
1 egg yolk
1. Reserve 3/4 cup chicken broth, pour the rest into a large sauce pan. Stir the salt, ginger and chives into saucepan, bring to a rolling boil. In a cup or small bowl stir together remaining broth and cornstarch until smooth. Add cornstarch mixture gradually until soup is at the desired consistency (careful here, or as a friend warned me, you'll end up with "Egg Drop Gravy")
2. In a small bowl, whisk together eggs and yolk using a fork. Drizzle egg a little at a time from fork into boiling broth mixture. The egg should cook immediately. Stir in clockwise motion to mix soup together.
This soup can be frozen and reheated if you want to make a big batch and just have some on reserve for an easy meal later!
Stir-Fry
I find that the best stir-frys (stir-fries?)really come down to the sauce. You can use any vegetables you like- we're big fans of red peppers and mushrooms- and any meat you like, but the sauce makes the dish. Tonight I'm using one of my favorites that works well with shrimp or chicken stir-frys.
Sauce Ingredients:
1/2 cup water
1/4 cup soy sauce
2 tablespoons rice vinegar
1 tablespoon cornstarch
1 1/2 teaspoons sugar
1 tablespoon cooking oil
2 cloves garlic, minced
1. Cut desired meat up into bite sized chunks. In a small bowl combine water, soy sauce, vinegar, cornstarch and sugar; set aside.
2. Heat oil in a wok over medium-high heat. (Add more oil as necessary during cooking.) Cook and stir the garlic in the hot oil for 15 seconds. Add vegetables of your choosing; cook and stir for 5 minutes or until vegetables are crisp-tender. (Add firmer vegetables first, if using mushrooms add after about 3 minutes.) Remove vegetables from wok with a slotted spoon. Add meat to wok; cook and stir for 2 to 3 minutes or until no longer pink. Push meat from the center of the wok. Stir soy sauce mixture; add to center of wok. Cook and stir until thickened and bubbly.
3. Return cooked vegetables to wok. Cook and stir about 1 minute more, or until heated through. Serve with hot cooked rice.
I'm looking forward to doing a lot of cooking now that the weather is starting to get cooler.. there is just something about fall that makes you want to begin the hibernation with a homemade soup or stomach-warming dish and a tasty dessert of the season like apple crisp. I was talking to a friend today and she brought up apple crisp and I swear I started salivating from just hearing the words "apple crisp"!
Tonight I'm easing myself back into the kitchen with a simple but tasty stir-fry and my first crack at egg drop soup. I've been wanting to try making my own egg drop soup for a long time, so I'm pretty excited about tonight's dinner. When we went grocery shopping today I was also on the look out for the little crispy "noodles" that you'll often get as a topping in a Chinese restaurant when you order the egg drop soup. I'm not talking about the chow mein noodles that come in a can that my grandpa always used to tell me were worms that he was putting on his salad. These are sort of like the Chinese restaurant version of tortilla strips. If anyone knows what you call them, let me know.
I started thinking about the noodles, and I vaguely remember them being similar to the part of crab rangoon that doesn't have the crab in it. HMMM.... I'm trying out frying little rectangles of wonton dough tonight to see if I can replicate the restaurant soup even further.
![]() |
Egg Drop Soup with the crunchy noodles! |
4 cups chicken broth
1/8 teaspoon ground ginger
2 tablespoons chopped chives (I omitted these because the chives at the store looked a little wilty and old- spring project: herb garden!)
1/4 teaspoon salt
1 1/2 tablespoons cornstarch
2 eggs
1 egg yolk
1. Reserve 3/4 cup chicken broth, pour the rest into a large sauce pan. Stir the salt, ginger and chives into saucepan, bring to a rolling boil. In a cup or small bowl stir together remaining broth and cornstarch until smooth. Add cornstarch mixture gradually until soup is at the desired consistency (careful here, or as a friend warned me, you'll end up with "Egg Drop Gravy")
2. In a small bowl, whisk together eggs and yolk using a fork. Drizzle egg a little at a time from fork into boiling broth mixture. The egg should cook immediately. Stir in clockwise motion to mix soup together.
This soup can be frozen and reheated if you want to make a big batch and just have some on reserve for an easy meal later!
Stir-Fry
I find that the best stir-frys (stir-fries?)really come down to the sauce. You can use any vegetables you like- we're big fans of red peppers and mushrooms- and any meat you like, but the sauce makes the dish. Tonight I'm using one of my favorites that works well with shrimp or chicken stir-frys.
![]() |
Dinner tonight! |
1/2 cup water
1/4 cup soy sauce
2 tablespoons rice vinegar
1 tablespoon cornstarch
1 1/2 teaspoons sugar
1 tablespoon cooking oil
2 cloves garlic, minced
1. Cut desired meat up into bite sized chunks. In a small bowl combine water, soy sauce, vinegar, cornstarch and sugar; set aside.
2. Heat oil in a wok over medium-high heat. (Add more oil as necessary during cooking.) Cook and stir the garlic in the hot oil for 15 seconds. Add vegetables of your choosing; cook and stir for 5 minutes or until vegetables are crisp-tender. (Add firmer vegetables first, if using mushrooms add after about 3 minutes.) Remove vegetables from wok with a slotted spoon. Add meat to wok; cook and stir for 2 to 3 minutes or until no longer pink. Push meat from the center of the wok. Stir soy sauce mixture; add to center of wok. Cook and stir until thickened and bubbly.
3. Return cooked vegetables to wok. Cook and stir about 1 minute more, or until heated through. Serve with hot cooked rice.
Saturday, July 31, 2010
Chicken with Tarragon...
or "We've got chicken and I don't know what to do with it, so, hey what else is in the fridge?!"
I've been really enjoying the last few months in the kitchen. I've enjoyed planning the meals, making the grocery lists, and cooking. It's not that I didn't cook before, I did, but there's just something so difficult about cooking for one. Especially since I hate leftovers. Today, though, I took chicken out of the freezer without knowing what I was going to do with it. I just ended up throwing it together with some herbs, etc, and some steamed vegetables, but it was a really tasty conglomeration.
I had the fiancé pound the chicken breasts with the meat mallet first. They were still a little frozen, so they weren't quite as pliable as I wished, but it turned out nicely. We were going for a thickness of around 1/4 inch, didn't quite get it that thin, but hey, it still tasted amazing. After he finished with this, I sprinkled some sea salt over the chicken.
I made a sauce for the chicken and then pan fried it. Simple, but delicious.
Sauce:
2 tablespoons extra-virgin olive oil
2 tablespoons lemon juice
1 garlic clove, minced
2 teaspoons minced fresh tarragon
1/8 teaspoon salt
Whisk all ingredients for the sauce together in a small bowl. Heat a large skillet over medium-high heat.
Add 2 teaspoons of the sauce to the pan, spreading evenly over the bottom of pan with a spatula. Add chicken, cook 2 minutes. Drizzle chicken with 2 teaspoons of the sauce mixture. Turn chicken over, cook 2 minutes. Drizzle remaining sauce over chicken; reduce heat to low. Cover and cook 2 minutes or until done. Transfer chicken to a serving platter. Pour pan drippings over chicken and serve immediately.
You'll notice I only did two pieces of chicken, but the sauce would easily cover 4 chicken breasts. |
Such an easy recipe, with a gorgeous finished product. The chicken had a nice golden color and was moist and very tasty. Definitely something you could throw together in a matter of minutes and still have an impressive dish.
Wednesday, July 7, 2010
Lemon chicken pt. 2
So, after the hot, hot day of making tortellini, I was looking forward to actually getting to eat this meal. The fiance works over dinner on Monday and Tuesday, so I wanted to wait until today so we could actually eat it together.
After my interesting adventure on Monday with the wonton wrappers basically melting into the table while I tried to fold everything up, I was a little trepidatious about the actual cooking of them. I was worried they'd be too doughy (they were), and skeptical about how well they'd cook through. I'm sure the issue with an excess of dough I experienced was due, at least in part, to my not getting the dough thin enough. But also, the ratio of filling produced versus the amount of dough produced with these recipes seemed a little out of whack. So, if I do try this again I may make smaller dough squares, or up the amount of filling in each tortellini.
The chicken, though. Oh so simple to make, and I found it absolutely delicious. It had the perfect ratio of moist meat to crispy, salty, lemony skin (I know, this in itself seems horrible to some people, but it really is one of life's wonderfully guilty pleasures). For the record- the fiance commented on the skin being sort of blah tasting, while I found it to have quite a bit of flavor. I don't know if this is simply a difference in our palates, or if I missed his piece of chicken when seasoning. I somehow doubt it being the latter.
So without further ado: the rest of the recipe!
Lemon Chicken
1 lemon, 1/2 thinly sliced crosswise, 1/2 squeezed into juice
4 chicken leg quarters
1 tablespoon vegetable oil
salt and pepper
1. Preheat oven to 425 degrees. Arrange the lemon slices in a single layer down the center of a roasting pan. Rub the chicken with the oil and season with salt and pepper. Place the chicken skin side up on the lemon slices and bake for 35 minutes. Transfer to the broiler and cook until the skin is crisp, about 3 minutes.
Drizzle the chicken with the lemon juice.
2. Divide the chicken and roasted lemon slices among 4 plates and top with the pan juices. Sprinkle with the remaining tarragon.

So. Simple. And delicious. Win on the chicken end, needs improvement on the tortellini end.
After my interesting adventure on Monday with the wonton wrappers basically melting into the table while I tried to fold everything up, I was a little trepidatious about the actual cooking of them. I was worried they'd be too doughy (they were), and skeptical about how well they'd cook through. I'm sure the issue with an excess of dough I experienced was due, at least in part, to my not getting the dough thin enough. But also, the ratio of filling produced versus the amount of dough produced with these recipes seemed a little out of whack. So, if I do try this again I may make smaller dough squares, or up the amount of filling in each tortellini.
The chicken, though. Oh so simple to make, and I found it absolutely delicious. It had the perfect ratio of moist meat to crispy, salty, lemony skin (I know, this in itself seems horrible to some people, but it really is one of life's wonderfully guilty pleasures). For the record- the fiance commented on the skin being sort of blah tasting, while I found it to have quite a bit of flavor. I don't know if this is simply a difference in our palates, or if I missed his piece of chicken when seasoning. I somehow doubt it being the latter.
So without further ado: the rest of the recipe!
Lemon Chicken
1 lemon, 1/2 thinly sliced crosswise, 1/2 squeezed into juice
4 chicken leg quarters
1 tablespoon vegetable oil
salt and pepper
1. Preheat oven to 425 degrees. Arrange the lemon slices in a single layer down the center of a roasting pan. Rub the chicken with the oil and season with salt and pepper. Place the chicken skin side up on the lemon slices and bake for 35 minutes. Transfer to the broiler and cook until the skin is crisp, about 3 minutes.
2. Divide the chicken and roasted lemon slices among 4 plates and top with the pan juices. Sprinkle with the remaining tarragon.
So. Simple. And delicious. Win on the chicken end, needs improvement on the tortellini end.
Monday, July 5, 2010
Lemon Chicken and Sweet Pea Tortellini
It's been about a month since I totally uprooted myself and experienced some huge life changes. I've moved 450 miles to an entirely different state, from a tiny little town to an actual city. I've gotten engaged and jumped into the whole whirlwind of wedding planning (in a new and unfamiliar place no less!).
Since my day job was being a music teacher I've had a lot of time since the move to do... nothing. My awesome future mother-in-law handed me a big stack of magazines the last time I saw her, I think to help combat the threat of constant boredom. I now have a stack of great magazines to check out AND a bunch of meal ideas for the fiance and myself.
The current recipe I'm trying out: Lemon Chicken and Sweet Pea Tortellini. It looks simple enough: roast herbed chicken on slices of lemon in the oven, and make a tortellini filling to be put in wonton wrappers. During our trip to the grocery store yesterday, the fiance and I searched everywhere for wonton wrappers- with no luck. So, I figured, how hard can it be to make little squares of pasta? Technically not difficult, but when you don't have air conditioning, making any kind of dough in the summer is brutal. (Must remember this for later in the week when I'm making a pie crust for the fiance's birthday pie! Midnight cooking, anyone?) Needless to say, the tortellini that in the magazine looks like a cute little pasta envelope looked more like dumplings in my hot kitchen. I'll just have to try this recipe again when the inside temp isn't 82 degrees if I want them to look better.
As a way to make the project of this meal last longer, I decided to make the tortellini today and freeze them until Wednesday when I'll make the final dish. Thank goodness, I did. Due to the heat this has turned into quite a time consuming project!
Wonton wrapper recipe:
1 egg
3/4 tsp salt
2 cup all-purpose flour
1/3-1/2 cup water
extra flour as needed
1. Lightly beat the egg with the salt. Add 1/4 cup water
2. Sift the flour into a large bowl. Make a well in the middle and add the egg and water mixture. Mix in with the flour. Add as much of the remaining water as necessary to form a dough (add more than called for if recipe is too dry).
3. Form the dough into a ball and knead for about 5 minutes, or until it forms a smooth, workable dough. Cover and let rest for 30 minutes. Turn the dough out onto a lightly floured surface. Roll out until very thin and cut into 3 1/2 inch squares. Store in a plastic bag in freezer until ready to use.
Makes: 24 wonton wrappers
Tortellini filling recipe:
1/2 cup frozen peas, thawed
1/4 cup ricotta cheese
1/2 teaspoon chopped fresh tarragon
1/4 teaspoon salt
1. Using a food processor, mix together the peas, ricotta, 1/2 tsp tarragon and 1/4 tsp salt.
2. On a work surface, working with 2 wonton wrappers at a time, spoon a teaspoon of pea mixture onto the center of each wrapper. Moisten the edges with water and fold the wrapper in half diagonally to form a triangle, pushing out any air bubbles and pressing the edges firmly to seal. With the long side of the triangle facing you, fold the top point back toward you, then fold the right and left points to meet it and press all three points together securing them with more water.
3. IF COOKING RIGHT AWAY: In a large pot of boiling water, cook the tortellini until they float to the top, about 5 minutes. Use slotted spoon to remove from water.
IF FREEZING: Uncooked tortellini can be frozen on a baking sheet until solid, then transferred to a resealable freezer bag. Cook frozen tortellini in boiling water for about 6 minutes.
Makes: 24 tortellini
I'll post the rest of the recipe after Wednesday's experiment with cooking the tortellini and the chicken. Also, look for a slew of recipes toward the weekend- The fiance and I are having our birthday celebration with his family on Sunday and I'm making my grandma's secret recipe potato salad, mango salsa, a birthday pie for the fiance (who prefers pie so much, he's asked for wedding pie instead of cake....), and a lovely chocolate cake borrowed from my good friend at The Gingered Whisk (I'll just link to that one, she's got it posted, and everyone should know about her fabulous blog!)
Since my day job was being a music teacher I've had a lot of time since the move to do... nothing. My awesome future mother-in-law handed me a big stack of magazines the last time I saw her, I think to help combat the threat of constant boredom. I now have a stack of great magazines to check out AND a bunch of meal ideas for the fiance and myself.
The current recipe I'm trying out: Lemon Chicken and Sweet Pea Tortellini. It looks simple enough: roast herbed chicken on slices of lemon in the oven, and make a tortellini filling to be put in wonton wrappers. During our trip to the grocery store yesterday, the fiance and I searched everywhere for wonton wrappers- with no luck. So, I figured, how hard can it be to make little squares of pasta? Technically not difficult, but when you don't have air conditioning, making any kind of dough in the summer is brutal. (Must remember this for later in the week when I'm making a pie crust for the fiance's birthday pie! Midnight cooking, anyone?) Needless to say, the tortellini that in the magazine looks like a cute little pasta envelope looked more like dumplings in my hot kitchen. I'll just have to try this recipe again when the inside temp isn't 82 degrees if I want them to look better.
As a way to make the project of this meal last longer, I decided to make the tortellini today and freeze them until Wednesday when I'll make the final dish. Thank goodness, I did. Due to the heat this has turned into quite a time consuming project!
Wonton wrapper recipe:
1 egg
3/4 tsp salt
2 cup all-purpose flour
1/3-1/2 cup water
extra flour as needed
1. Lightly beat the egg with the salt. Add 1/4 cup water
2. Sift the flour into a large bowl. Make a well in the middle and add the egg and water mixture. Mix in with the flour. Add as much of the remaining water as necessary to form a dough (add more than called for if recipe is too dry).
3. Form the dough into a ball and knead for about 5 minutes, or until it forms a smooth, workable dough. Cover and let rest for 30 minutes. Turn the dough out onto a lightly floured surface. Roll out until very thin and cut into 3 1/2 inch squares. Store in a plastic bag in freezer until ready to use.
Makes: 24 wonton wrappers
Tortellini filling recipe:
1/2 cup frozen peas, thawed
1/4 cup ricotta cheese
1/2 teaspoon chopped fresh tarragon
1/4 teaspoon salt
1. Using a food processor, mix together the peas, ricotta, 1/2 tsp tarragon and 1/4 tsp salt.
3. IF COOKING RIGHT AWAY: In a large pot of boiling water, cook the tortellini until they float to the top, about 5 minutes. Use slotted spoon to remove from water.
IF FREEZING: Uncooked tortellini can be frozen on a baking sheet until solid, then transferred to a resealable freezer bag. Cook frozen tortellini in boiling water for about 6 minutes.
Makes: 24 tortellini
I'll post the rest of the recipe after Wednesday's experiment with cooking the tortellini and the chicken. Also, look for a slew of recipes toward the weekend- The fiance and I are having our birthday celebration with his family on Sunday and I'm making my grandma's secret recipe potato salad, mango salsa, a birthday pie for the fiance (who prefers pie so much, he's asked for wedding pie instead of cake....), and a lovely chocolate cake borrowed from my good friend at The Gingered Whisk (I'll just link to that one, she's got it posted, and everyone should know about her fabulous blog!)
Subscribe to:
Posts (Atom)