Wednesday, March 14, 2012

The Daring Cooks, March 2012: Braising

The March, 2012 Daring Cooks’ Challenge was hosted by Carol, a/k/a Poisonive – and she challenged us all to learn the art of Braising! Carol focused on Michael Ruhlman’s technique and shared with us some of his expertise from his book “Ruhlman’s Twenty”.


Man, I was excited when I saw that this month's challenge was such a basic technique. That I hadn't yet tried, not really, because, well it takes time, you know? But, like making croissants, the time is one of those false fronted, seemingly imposing buildings. If you see it from the right angle, you see that it is just a big distraction from the truth: braising gives you a delicious, tender meat (if you're using meat) and you don't have to stand over the stove for the entire time. Totally worth it!


All the recipes that were provided for us looked truly delicious. But we had some pork chops in the freezer, so I turned to the ever trustworthy Julia Child. I found a recipe for pork chops and red cabbage braised in red wine that looked pretty promising. I wasn't so sure about the cabbage- I hate to say I haven't had a lot of experience with cooking, eating or even choosing cabbage. I figured, hey, there's red wine in here, I'll try cabbage for that. The resulting dish was truly delicious, although we only had 4 pork chops, so the ratio of pork to cabbage was a little off. It was yummy, but a little too much cabbage for me.


Side note- when this challenge was announced, I told my husband "see I need one of those Le Creuset dutch ovens." Proof he is the best husband ever: "okay, so go buy one." We didn't. But sometime it is just knowing that he supports everything you do that is important. I think the fact that he gets to eat everything I make for these challenges helps a little :)


Pork Chops and Red Cabbage braised in Red Wine (Julia Child)
  • 1 package boneless pork chops (1/2" thick - about 5 chops)
  • 1 Tbsp. Olive Oil
  • Salt & pepper
  • 1/4 lb. bacon
  • 1/2 cup thinly sliced carrots
  • 1 cup slice onion
  • 3 Tbsp. butter
  • 2 lbs (6 or 7 cups) red cabbage, cut into 1/2" slices
  • 2 cups diced tart apples
  • 2 cloves mashed garlic
  • 1/4 tsp ground bay leaf
  • 1/8 tsp clove
  • 1/8 tsp nutmeg
  • 1/2 tsp salt
  • 1/8 tsp pepper
  • 2 cups good, young red wine (Bordeaux, Chianti)
  • 2 cups beef stock
  • Salt & pepper to taste

Preheat oven to 325 degrees and tie on the apron - It's time to cook with Julia!

Remove the rind (if you get a chunk of bacon) and cut into strips 1 1/2" long & 1/4" across. Simmer for 10 minutes in 1 quart of water. Drain.

Cook the bacon, carrots and onion in the butter slowly in an oven-proof pan for 10 minutes without browning. Stir in the cabbage leaves and when well covered with the butter and vegetables, cook slowly for 10 minutes. Add all additional ingredients. Bring to a simmer on top of the stove. Cover and place in middle of preheated oven. Regulate heat so cabbage bubbles slowly for 3 to 3 1/2 hours. 


Season the pork chops with salt and pepper and brown in 1 Tbsp. olive oil. Add to cabbage, cover and return pan to oven for 1 to 1 1/2 hours more and all the liquid has been absorbed by the cabbage. Taste carefully for seasoning. 

Can be made ahead - this is even better when reheated the next day! Serves 6 people.

Monday, February 27, 2012

The Daring Bakers February 2012: Quick Breads

The Daring Bakers’ February 2012 host was – Lis! Lisa stepped in last minute and challenged us to create a quick bread we could call our own. She supplied us with a base recipe and shared some recipes she loves from various websites and encouraged us to build upon them and create new flavor profiles.

Maple Filling is Happy
What is the first thing you think when you hear "quick bread"? Usually for me, it is banana bread. But I've made that so many times I wanted to try something new. I love lemon poppy seed muffins, so I thought why not make a lemon poppy seed loaf? There was also a recipe for a pumpkin bread with a maple cream cheese filling included in the challenge recipes, and I've never done a filled quick bread, so I thought why not? 

I love how easy quick breads come together. The recipes are easy to follow, don't make too much of a mess in the kitchen, and are easy to share when you realize that you've made 4 loaves of sweet bread and just stared a new exercise regimen and you really shouldn't be eating all of that stuff. Probably the hardest thing about making quick breads is waiting for them to cool (the lemon poppy seed has to sit overnight!) before you can break into them and have a slice. 

Lemon Poppy Seed Bread
(Joy of Baking)

Bread
3 large eggs
1 ½ teaspoon vanilla extract
¼ cup milk
1 ½ cups all-purpose flour, sifted
¾ cup sugar
1 teaspoon baking powder
¼ teaspoon salt
1 tablespoon grated lemon zest
3 tablespoons poppy seeds
13 tablespoons (1 ½ sticks) unsalted butter, softened

Lemon Syrup
¼ cup fresh lemon juice
⅓ cup granulated sugar

Any reason to go to Penzy's....
1. Preheat oven to 350℉ and place the oven rack in the center of the oven. Butter and flour the bottom and sides of a loaf pan (8x4x 2½ inches).

2. In a separate bowl, whisk together the eggs, vanilla and milk.

3. In the bowl of your mixer, beat the flour, sugar, baking powder, salt, lemon zest, and poppy seeds until combined. Add the softened butter and half the egg mixture and mix on low until moistened. Increase the speed to medium and beat for about one minute. Scrape down the sides of the bowl and add the remaining egg mixture in two batches, beating about 30 seconds after each addition. 

4. Scrape the batter into the prepared pan and bake for 55-65 minutes, or until the bread is golden brown and a toothpick inserted in the center comes out clean. (Check on it about halfway through and cover with foil if necessary to prevent over-browning.)

5. Meanwhile, in a small saucepan, bring the sugar and lemon juice to a boil, stirring until the sugar dissolves. 

6. When the bread is done, remove from the oven and place on a wire reach. Pierce the hot loaf all over with a toothpick and brush the top of the loaf with half of the lemon syrup. Cool the loaf in the pan for 10 minutes. 

7. Invert loaf onto a greased wire rack. Brush the remaining syrup onto the bottom and sides of the loaf. Reinvert the bread so it is right side up and cool the bread completely before wrapping. Store at least overnight before serving.


Pumpkin Bread with Maple Cream Cheese Filling
makes 3 loaves

Filling
2 packages cream cheese, softened
¼ cup white sugar
1 large egg
1 tablespoon milk
1 teaspoon maple extract or 1 tablespoon maple syrup

Bread
3 cups white sugar
1 ¾ cup pumpkin purée (not pumpkin pie filling)
1 cup light or non flavored oil
1 cup water
4 large eggs
4 cups all purpose, unbleached flour
2 teaspoons baking soda
1 teaspoon baking powder
2 teaspoons ground cinnamon
½ teaspoon ground nutmeg
1 teaspoon salt
¼ teaspoon ground cloves

1. Preheat oven to 350℉. Spray three loaf pans with cooking spray.

2. Beat the cream cheese, sugar, egg and milk in a small bowl until creamy, add the maple and blend. Set aside for now. 
The maple made a pretty design in the cream cheese :)

3. In a large bowl, beat the sugar, pumpkin, oil, water and eggs. In another large bowl mix the flour, baking soda, baking powder, salt and spices.  Gradually add the dry ingredients to the wet. 

4. Pour half the batter into the three pans. Spoon the filling over the batter. Use a spatula to spread it out carefully. Add the remaining batter, making sure you cover the filling completely. 

5. Bake for 50-60 minutes or until a toothpick inserted near the center comes out clean. Cool 10 minutes in the pans before removing the bread to a wire rack to cool completely.

Store bread wrapped in plastic wrap in the refrigerator. 


Tuesday, February 14, 2012

The Daring Cooks February 2012: Pleasing Patties!


The Daring Cooks’ February 2012 challenge was hosted by Audax & Lis and they chose to present Patties for their ease of construction, ingredients and deliciousness! We were given several recipes, and learned the different types of binders and cooking methods to produce our own tasty patties!

The extent of my patty making experience prior to tackling this challenge was slapping together ground beef for hamburgers. Nothing else. Just ground beef. I couldn't imagine the vast, delicious array of patty types that existed. I did some research because I wanted to really try something different. I love this challenge because the possibilities really are endless and is only as complicated as you want to make it.

You may have figured out that my husband loves sweet potatoes. Any time a sweet potato is an option, he takes it. At Red Robin the sweet potato fries are the only type of fry that touches his plate. So when I saw a recipe for a patty made with sweet potatoes, I knew it was the one I was going to make.

There was just one slight snag- the recipe was written only in grams. I still do not have a food scale. And cannot think in grams. So when I saw "800g sweet potato"  I had no idea of how many to buy. Then the recipe called for a 400g can of lentils. The only lentils I could find were dried in the bag. I thought that's fine- the bag says how many grams is in it, I'll just eyeball it. Without realizing that when I cooked them in the water I was going to end up getting way more than 400g. So I made way too much of both ingredients for these patties. If you do make it, I can't tell you what the real amounts are if you're also not used to working in grams, but you're probably better at that game than me and won't mess it up. At least we really liked these patties, because there are about 10 of them in the freezer just waiting for a lazy night when I don't feel like mixing anything else up.

We paired these with freshly baked ciabatta rolls, and a generous slice of tomato. They were very delicious. I'm very glad we have some more left over (and that I don't have to turn my kitchen into the giant mess that happened the first time.)

Sweet Potato and Lentil Patties
with Sour Cream Coriander Dressing

For the Patties
800g sweet potato, peeled and cut into cubes
2 tablespoons of oil plus extra to fry
1 medium yellow onion, finely chopped
2 cloves of garlic, crushed
1/2 teaspoon ground cinnamon
400g can brown lentils, rinsed
1/4 cup flour
1 egg, lightly beaten
2 tablespoons milk
2 cups dried breadcrumbs

For the dressing
1/2 cup low-fat sour cream
1 clove garlic, crushed
2 tablespoons coriander

1. Preheat oven to 350°F, place sweet potatoes on a large baking sheet and drizzle with a tablespoon of oil, season with salt and pepper. Roast for about 20 minutes or until golden and soft.

2. Meanwhile, heat one tablespoon oil in a large frying pan over moderately high heat. Add onion, cook and stir for 5 minutes or until soft. Add garlic and cinnamon; cook and stir for 2 minutes until fragrant. (and this is seriously delicious smelling!)

3. Transfer mixture into a bowl. Add lentils and sweet potato. Mash coarsely and season with salt and pepper. I actually ended up running the mix through the blender to get it combined. Allow to cool  enough to touch.

Seriously too much sweet potato and lentil!
4. Shape into patties. Place each patty on a square of plastic wrap, cover and allow to cool for 30 minutes in the fridge. (these patties can be stored in the fridge at this point for a day or so if you don't want to cook them all right then)
An out of focus view of my patty wraps
5. Place flour on a plate. Coat patties in flour, shake off excess. Dip in the egg and coat evenly in the breadcrumbs.

6. Pour oil into a frying pan about an inch and a half deep. Heat over medium heat (oil will be ready when a cube of bread crisps without absorbing the oil). Fry patties in batches for 2-3 minutes each side or until golden brown.


7. Combine ingredients for dressing in a bowl. Serve with the patties.

Saturday, February 4, 2012

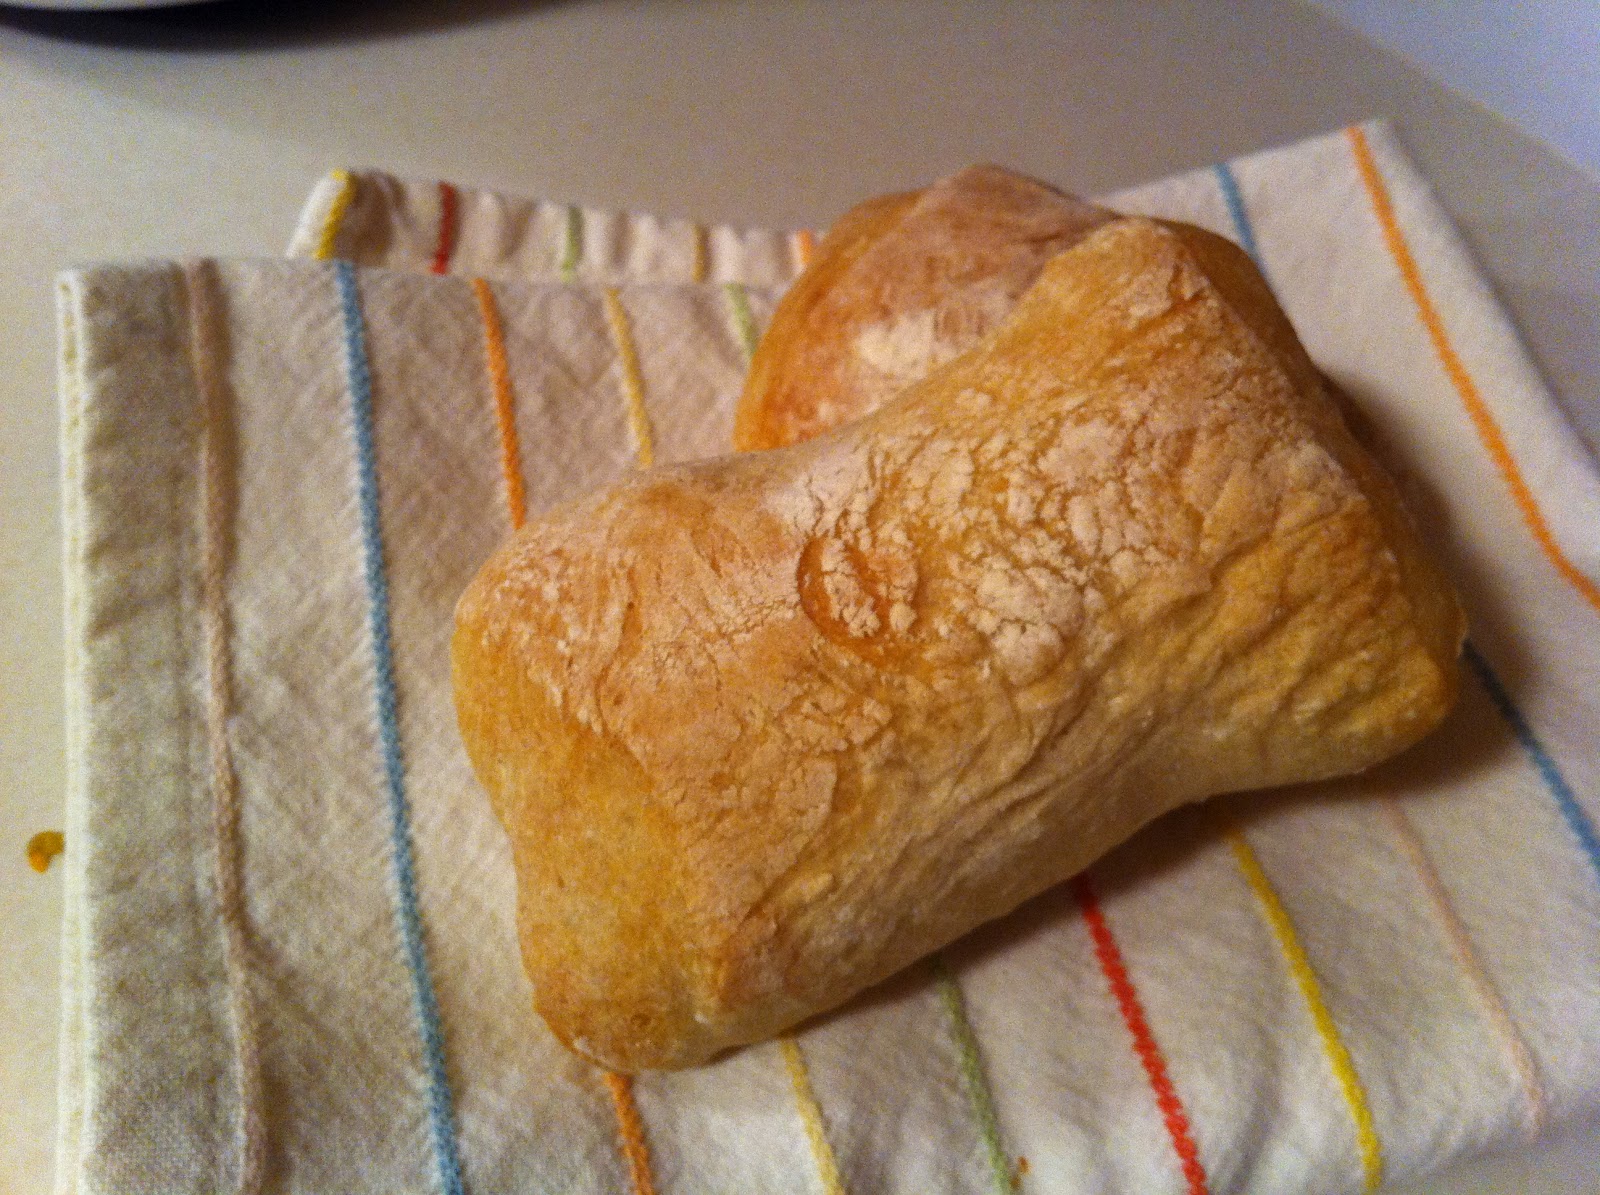
Ciabatta Rolls


I have a serious food crush on ciabatta bread. I think it is the light, airy inside paired with the lovely chewy, firm crust. I'm big on textures with my food, sometimes I just don't feel like the meal is done until I've had something crunchy. I like anything that combines multiple textures.

I have been looking for a good ciabatta roll recipe for a while. These are fantastic for any kind of sandwich, as well as for simply using them as a side with butter. I particularly like them for tuna sandwiches with a healthy amount of lettuce and tomato. The recipe is fairly easy, there is no sponge to prepare the day before, so you can start these at lunch and be eating them at dinner! Plus, you use a KitchenAid to do the kneading so no messy hands and flour all over the kitchen.

Ciabatta Rolls (makes 6-8 rolls)
4.5 C bread flour
2 cups water
2 teaspoons yeast
3 teaspoons salt

1. Mix together all the ingredients in the bowl of a KitchenAid mixer (or similar brand) with a paddle attachment until just combined. Let rest for 10 minutes.

2. With the paddle, beat dough well. When the dough combined and working like a very sticky dough (climbing up the paddle), change to the dough hook. Continue beating dough until it separates from the sides of the bowl and is almost coming off the bottom of the bowl.

3. Place into a well oiled container and let it triple. (about 2.5 hours)

4. Empty onto a floured counter and cut into squares. Spray with oil and dust with flour. Let rolls proof for about 45 minutes. During this time, preheat oven to 500° F.

5. After 45 minutes rolls should be puffy. Pick up and flip over onto a parchment covered baking sheet. This distributes the bubbles in the dough so you get even bubbles in the roll. You want to do the flip in one gentle motion so as not to disturb the bubbles too much.

6. Bake at 500° about 15-20 minutes, rotating halfway through. Check on them often, you want to take them out when they are golden. The oven is ridiculously hot, so it may be better to base your baking time off of color than the timer. Transfer to a rack. Try to allow them to cool a little before eating, but good luck with that!

Friday, January 27, 2012

The Daring Bakers January 2012- Scones (Biscuits)


Audax Artifex was our January 2012 Daring Bakers’ host. Aud worked tirelessly to master light and fluffy scones (a/k/a biscuits) to help us create delicious and perfect batches in our own kitchens!

I have had quite the month since the last challenge. Honestly, I probably didn't even look at the challenge for about a week after it had been posted. Over the holidays we took a trip to Iowa to see my family and spend some time with them. What began as a quick visit to my grandfather in the hospital became two days, and a certainty that we would be coming back to Iowa very soon. We got back to Wisconsin on a Friday and the following Friday found us driving to Iowa to attend my grandfather's visitation and funeral. It was a very difficult beginning to 2012 to say the least.

I like to think that my grandfather would have enjoyed the fruits of this challenge. Whenever I think of biscuits I think of down-home cooking (although, I know that when titled as "scones" as in Britain and elsewhere you eat them at tea time) and that certainly makes me think of my grandmother. She grew up on a farm and learned her cooking there. Grandma's version of cooking was make it from scratch and don't hold the butter. My earliest cooking memories are of making bread or cookies with my grandmother, calling my grandpa on the phone (somehow we called him when he was upstairs in the same house. Without a cell phone. I still don't know how that worked) and telling him to come down to get some warm cookies.
Delicious Amish Jam

Perhaps it is just me feeling nostalgic and trying to find connections to the grandfather I miss deeply, but I really do think that he would appreciate these made from scratch, delicious biscuits. I was very preoccupied this month, so the most I managed was the basic biscuit recipe. No frills, no additions, but I can tell you even this "naked" form of biscuit was delicious. When paired with the Amish- made raspberry jam I got for Christmas, they were heaven. I also appreciated that these took so little time to make. I like foods that you can have a craving for and be eating them within the hour.


Old Baking Powder Biscuit
I actually made two batches of these. The first I made with my baking powder of undetermined age. That alone means it was far too old. You could definitely tell, as the first batch of biscuits didn't rise quite as much as I had hoped. So I bought a new container of baking powder and it really made a difference!
New Baking Powder Biscuit! Magic!

Basic Biscuits (makes about 8 2-inch biscuits)
1 cup all-purpose flour
2 teaspoons fresh baking powder
1/4 teaspoon salt
2 tablespoons frozen butter cut into small pieces
Approx. 1/2 cup cold milk
optional 1 tablespoon milk for glazing the tops of the biscuits

1. Preheat oven to 475.
2. Triple sift dry ingredients into a large bowl (or if you don't have a sifter like me, whisk them really really well)
3. Rub the frozen butter into the dry ingredients until it resembles very coarse bread crumbs with some pea-sized pieces if you want flaky biscuits or until it resembles coarse beach sand if you want tender biscuits.
4. Add nearly all of the liquid at once into the flour/butter mixture and mix until it just forms a sticky dough (add remaining liquid if needed). The wetter the dough the lighter the biscuits will be!
5. Turn the dough out onto a lightly floured board, lightly flour the top of the dough. To achieve an even homogeneous crumb to your scones knead very gently about 4 or 5 times until the dough is smooth. To achieve a layered effect in your biscuits knead very gently once (don't press too firmly) then fold and turn the kneaded dough about 3 or 4 times until the dough has formed a smooth texture. 
6. Pat or roll dough out into a 6 inch by 4 inch rectangle about 3/4 inch thick. Using a well floured biscuit cutter cut into rounds, or use a well floured, sharp knife to form squares or wedges as you desire. 
7. Place the biscuits just touching on a dish if you want soft sided biscuits or place them spaced widely apart if you want to have crisp-sided biscuits. Glaze the tops with milk if you want a golden color or lightly flour if you want a more traditional look.
8. Bake in the preheated oven for about 10 minutes (check at 8 since at this temperature home ovens are quite unreliable) until the biscuits are well risen and are lightly colored on the tops. The biscuits are ready when the sides are set. 
9. Immediately place onto cooling rack to stop the cooking process, serve while still warm.

Wednesday, January 25, 2012

Blueberry Muffins, no topping


I am fully aware that there is a Blueberry Muffin recipe already on this blog. But that one has a topping. And while good, it tastes different from this one? Okay, I know that some people think a blueberry muffin is a blueberry muffin, good however it was prepared. But I am one of those people that truly appreciates the nuances of different blueberry muffin recipes. As long as I get to eat a great many blueberry muffins in gaining that appreciation, that is. 


When I was making this recipe I was surprised. The batter had an almost cookie like consistency that literally has to be scooped into the muffin tin. If you overturned the bowl and tried to pour it, you'd probably just end up with a whole bowl's worth of muffin batter on your counter. I didn't know what to expect, because the texture of muffins and the texture of cookies just doesn't really seem the same to me. When I brought these out of the oven, I totally got it. The muffins are dense, but not hockey puckish, and they are so full of blueberries! 


Blueberry Muffins (adapted from Brown Eyed Baker and Cook's Illustrated)
1 cup all-purpose flour
1 cup whole wheat flour
1 tablespoon baking powder
½ teaspoon salt
1 egg
1 cup granulated sugar
4 tablespoons (2 ounces) unsalted butter, melted and cooled slightly
1¼ cups sour cream
1½ cups frozen or fresh blueberries
1. Preheat the oven to 350 degrees F. Grease a standard 12-cup muffin tin (or line with paper liners) and set aside.
2. Whisk the flour, baking powder and salt in a medium bowl untill combined. Whisk the egg in a separate medium bowl until well-combined and light-colored, about 20 seconds. Add the sugar and whisk vigorously until thick, about 30 seconds. Add the melted butter in 2 or 3 additions, whisking to combine after each addition. Add the sour cream in 2 additions, whisking just to combine.
3. Add the berries to the dry ingredients and gently toss just to combine. Add the sour cream mixture and fold with a rubber spatula until the batter comes together and the berries are evenly distributed, 25 to 30 seconds. Small spots of flour may remain and the batter will be very thick. Do not overmix.
4. Using a large spoon or a cookie scoop sprayed with nonstick cooking spray, divide the batter amount the muffin cups. Bake until the muffins are light golden brown and a toothpick or thin knife inserted into the center of a muffin comes out clean, 25 to 30 minutes, rotating the pan from front to back halfway through the baking time. Immediately remove muffins to a wire rack and cool for at least 5 minutes. Serve immediately or at room temperature. Store leftovers in an airtight container at room temperature.

Tuesday, December 27, 2011

Daring Bakers December 2011- Sourdough Bread

 Our Daring Bakers Host for December 2011 was Jessica of My Recipe Project and she showed us how fun it is to create Sour Dough bread in our own kitchens! She provided us with Sour Dough recipes from Bread Matters by AndrewWhitley as well as delicious recipes to use our Sour Dough bread in from Tonia George’s Things on Toast and Canteen’s Great British Food!


This month's challenge is subtitled: Letting Nature Do the Work- or, Only One of Us Has a Future That Doesn't Include Getting Cozy in a 400 Degree Oven, Sourdough, So Go Ahead, Make My Day. 


It pains me to admit this, my fellow bakers, but I am a 27 year old woman who throws tantrums when things don't go right in my kitchen. My first loaf of sourdough was almost chucked across the room in all it's flat, overly dense, hockey puck glory, sure to tear a hole all the way through the house had it not been for my husband talking me down. I realize that this is neither a rational reaction nor helpful to reaching my goal of becoming a better baker, but there it is. 

The Hockey Puck

As a teacher, I try to help my students overcome the obstacles that they meet in their playing, whether it is an easy fix or something that will take a while to change. As a baker, I sometimes don't allow myself the same room for growth. Like a 5th grader learning a new instrument, at times I expect to just be able to do it right the first time. It doesn't help that most of the time this is true for me in music as well as in the kitchen, so when I do come up against a true challenge and I'm made to feel a little uncomfortable, well I don't like it very much. Until it works. Then I'm really happy. 

As I said, the first try at this month's challenge was a disaster. A big, heavy, brick of a loaf disaster. I texted my dear friend over at The Gingered Whisk basically saying that I failed at this challenge- I wasn't going to have time to try it again, and quite frankly I didn't even want to give it another go. She has known me forever, and reassured me that even she doesn't always have perfect breads. She talked me into trying it again. I'm glad I did, even though it was kind of a race to the finish for me.

In between the first and second tries, I was out of town for three days attending The Midwest Clinic in Chicago. I went to three days of concerts, clinics, and rehearsal labs learning techniques to bring back to work with my students. I came home Saturday totally exhausted, but totally reaffirmed that teaching is what makes my heart glad. Oh yeah, and I was in Chicago, land of Deep Dish Pizza. I ate so well while I was gone! Then it was back to meet the sourdough bread again. 

Deep Dish Pizza from Giordano's on Jackson in Chicago. Delicious!
This second time, I put the starter right in front of the warmest heat vent in the house, put the dough in the oven with the light on to rise, and just hoped that it would turn out better this time. I have to admit that I didn't take many pictures of the process because I wasn't entirely certain that it would work out, and also when your hands are covered in dough it is hard to take a photo. 
The second loaf- most of the rising spread horizontal rather than vertically when I moved it.

I just put together an easy beef stew to eat with the bread. I ladled the stew over a couple slices, which soaked up the broth and made a really nice hearty dish for dinner. I also thought that the Italian Beef Stew recipe I posted earlier would be a good match for this bread, as well as my favorite breakfast "SOS", or Dried Beef, as my prim and proper grandmother called it.

Music for this month isn't a playlist I came up with, but a link to a full album that is lovely for the winter time, not just the holiday. My mom gifted this to me on iTunes last winter, and I think it fits really well with a warm, crusty bread, a homemade soup, fire in the fireplace and snow gently falling down. Sting's "If On A Winter's Night"

French Country Bread
Servings: 1 large loaf plus extra wheat starter for further baking
Wheat Starter - Day 1:
Ingredients
4 1/2 tablespoons (70 ml) (40 gm/1 ½ oz) stoneground breadmaking whole-wheat or graham flour
3 tablespoons (45 ml) water
Total scant ½ cup (115 ml) (3 oz/85 gm)
Directions:
1. In a Tupperware or plastic container, mix the flour and water into a paste.
2. Set the lid on top gently, cover with a plastic bag, to prevent messes in case it grows more than expected!
3. Set somewhere warm (around 86 F if possible). I sometimes put mine on a windowsill near a radiator, but even if it’s not that warm, you’ll still get a starter going – it might just take longer.

Wheat Starter - Day 2:

Ingredients
4 1/2 tablespoons (70 ml) (40 gm/1 ½ oz) stoneground breadmaking whole-wheat or graham flour
3 tablespoons (45 ml) water
scant 1/2 cup (115 ml) (3 oz/85 gm) starter from Day 1
Total scant cup (230 ml) (6 oz/170 gm)
Directions:
1. Stir the flour and water into the mixture from Day 1, cover, and return to its warm place.
Wheat Starter - Day 3:
Ingredients
4 1/2 tablespoons (70 ml) (40 gm/1 ½ oz) stoneground breadmaking whole-wheat or graham flour
4 teaspoons (20 ml) water
scant 1 cup (230 ml) (6 oz/170 gm) starter from Day 2
Total 1⅓ cup (320 ml) (230 gm/8-1/10 oz)
Directions:
1. Stir the flour and water into the mixture from Day 2, cover, and return to its warm place.
Wheat Starter - Day 4:
Ingredients
3/4 cup plus 1½ tablespoons (205 ml) (120 gm/4 ¼ oz) unbleached all-purpose flour
1/2 cup less 4 teaspoons (100 ml) water
1⅓ cup (320 ml) (230 gm/8 oz) starter from Day 3
Total scant 2⅔ cup (625 ml) (440 gm/15½ oz)
Directions:
1. Stir the flour and water into the mixture from Day 3, cover, and return to its warm place. At this point it should be bubbling and smell yeasty. If not, repeat this process for a further day or so until it is!
French Country Bread
Stage 1: Refreshing the leaven
Ingredients
1 cup less 1 tablespoon (225 ml) (160 gm/5 ⅔ oz) wheat Leaven Starter
6 tablespoons less 1 teaspoon (85 ml) (50 gm/1¾ oz) stoneground bread making whole-wheat or graham flour
1 cup plus 2 teaspoons (250 ml) (150 gm/5 ⅓ oz) unbleached all purpose flour
1/2 cup (120 ml) water
Production Leaven Total 2¾ cups plus 4 teaspoons (680 ml) (480 gm /1 lb 1 oz)
Directions:
1. Mix everything into a sloppy dough. It may be fairly stiff at this stage. Cover and set aside for 4 hours, until bubbling and expanded slightly.
French Country Bread
Stage 2: Making the final dough
Ingredients
3/4 cup less 1 teaspoon (175 ml) (100 gm/3 ½ oz) stoneground breadmaking whole-wheat or graham flour, plus more for dusting
2 cups plus 2 tablespoons (510 ml) (300gm/10 ½ oz) unbleached all-purpose flour
1¼ teaspoons (7½ ml) (7 gm/¼ oz) sea salt or ⅔ teaspoon (3⅓ ml) (3 gm/⅛ oz) table salt
1 ¼ cups (300 ml) water
1 ¾ cups (425 ml) (300 gm/10 ½ oz) production leaven – this should leave some (1 cup) for your next loaf.
Total 6 cups less 2 tablespoons 1415 ml (1007 gm/35 ½ oz/2 lb 3½ oz)
Directions:
1. Mix the dough with all the ingredients except the production leaven. It will be a soft dough.
2. Knead on an UNFLOURED surface for about 8-10 minutes, getting the tips of your fingers wet if you need to. You can use dough scrapers to stretch and fold the dough at this stage, or air knead if you prefer. Basically, you want to stretch the dough and fold it over itself repeatedly until you have a smoother, more elastic dough.
3. Smooth your dough into a circle, then scoop your production leaven into the centre. You want to fold the edges of the dough up to incorporate the leaven, but this might be a messy process. Knead for a couple minutes until the leaven is fully incorporated in the dough.
4. Spread some water on a clean bit of your work surface and lay the dough on top. Cover with an upturned bowl, lining the rim of the bowl with a bit of water. Leave for an hour, so that the gluten can develop and the yeasts can begin to aerate the dough.
5. Once your dough has rested, you can begin to stretch and fold it. Using wet hands and a dough scraper, stretch the dough away from you as far as you can without breaking it and fold it back in on itself. Repeat this in each direction, to the right, towards you, and to the left. This will help create a more ‘vertical’ dough, ready for proofing. 
 6. Heavily flour a banneton/proofing basket with whole wheat flour and rest your dough, seam side up, in the basket. Put the basket in a large plastic bag, inflate it, and seal it. Set aside somewhere warm for 3-5 hours, or until it has expanded a fair bit. It is ready to bake when the dough responds to a gently poke by slowly pressing back to shape.


7. Preheat the oven to hot 425°F/220°C/gas mark 7. Line a baking sheet with parchment, then carefully invert the dough onto the sheet. I like to put the baking sheet on top of the basket, then gently flip it over so as to disturb the dough as little as possible. Make 2-3 cuts on top of the loaf and bake for 40-50 minutes, reducing the temperature to moderately hot 400°F/200°C/gas mark 6 after 10 minutes.


8. Cool on a cooling rack.