Showing posts with label Bread. Show all posts

Saturday, April 27, 2013

The Daring Bakers April 2013: Savarin


Natalia of Gatti Fili e Farina challenges us to make a traditional Savarin, complete with soaking syrup and cream filling! We were to follow the Savarin recipe but were allowed to be creative with the soaking syrup and filling, allowing us to come up with some very delicious cakes!

Yep, still alive. Yep, still bad at updating the blog. I kept looking at all the wonderful challenges and telling myself I'd make it later, but then next thing I knew it was the posting date and I hadn't done the challenge. This month I made a concerted effort to find the time to do the challenge and we enjoyed it at a brunch with friends. This was a delicious cake that was well worth the work. This is a great recipe to make when you're in the 3rd trimester with 5 lbs of babies kicking around inside of you and you need to sit down frequently while cooking. 

I decided to simply follow the delicious looking recipe that Natalia had provided, as I was lucky to be doing the challenge in the first place. The peach flavors were a lovely fresh addition to our brunch. I'd definitely like to experiment with different flavor combinations in the future. 

Savarin Servings:8/10

Ingredients
21⁄2 cups  bread flour
2 tablespoons water, lukewarm
6 large eggs at room temperature, separated
1⁄2 satchel  instant yeast 
4 teaspoons sugar
2/3 stick  butter at room temperature
1 tablespoon  orange and lemon zest (optional) 
1 teaspoon salt
1⁄4 cup butter for greasing the work surface, hands, dough scraper & baking pan

Directions:
Sponge
In a small bowl mix 2 tablespoons lukewarm water, 3 tablespoons flour and yeast , cover with cling film and let rise 60 minutes

Dough
1. After 30 minutes put the egg whites in the mixer bowl and start working with the paddle at low speed adding flour until you have a soft dough that sticks to the bowl (about 2 cups) and work until it comes together , cover with cling film and let rest 30 min
2. Add the sponge to the mixer bowl along with a tablespoon of flour and start mixing at low speed (if you wish to add the zests do it now)
3. When it starts pulling away from the sides of the bowl add one yolk and as soon as the yolk is absorbed add one tablespoon of flour
4. Add the second yolk , the sugar and as soon as the yolk is absorbed add one tablespoon of flour
5. Raise the speed a little
6. Add the third yolk and the salt and as soon as the yolk is absorbed add one tablespoon of flour
7. Keep on adding one yolk at the time and the flour saving a tablespoon of flour for later
8. Mix the dough until is elastic and makes “threads”
9. Add the butter at room temperature and as soon as the butter is adsorbed add the last tablespoon of flour
10. Keep on mixing till the dough passes the “window pane test”
11. Cover the dough with cling film and let it proof until it has tripled in volume (2 to 3 hours)
12. You can prepare the Pastry cream now if you chose to use it, and refrigerate it
13. While you wait prepare your baking pan buttering it very carefully not leaving too much
butter on it
14. Grease your dough scraper, your hands and your work surface and put the dough on it and fold with the Dough Package Fold two or three times around (5 folds twice or three times). Cover with cling foil and let it rest 15 minutes on the counter
15. Turn the dough upside down and with the help of your buttered dough scraper shape your dough  in a rounded bun
16. Make a hole in the center with your thumb and put it in the prepared pan
17. Cover with cling film and let rise in a warm spot until the dough reaches the top of the pan (about 1 hour)
18. Pre-heat oven to moderate 340°F
19. Bake the Savarin for about 40 minutes until the top is golden brown
20. Meanwhile prepare the Syrup
21. When the Savarin is done take it out of the oven and let it cool.
22. You have two choices now : you can immerse it in syrup right now or you can let it dry out (so
it will lose some of his moisture that will be replaced by the syrup) and soak it later on.
23. To immerse it in syrup it is a good idea to place it in the mold you baked it in (I’m afraid a
spring-form one wouldn’t work for this) and keep adding ladles of syrup until you see it along the rim of the pan. Or you can just soak it in a big bowl keeping your ladle on top of it so it doesn’t float. Once the Savarin is really well soaked carefully move it on a cooling rack positioned over a pan to let the excess syrup drip.
24. The soaked Savarin gains in flavor the next day
25. Whatever you decide the day you want to serve it glaze it and fill the hole with your filling of
choice and decorate it. You can serve the Savarin with some filling on the side.
26. Enjoy it!

Peach Flavored Syrup:
Servings: 1 savarin
Ingredients
11⁄2 cups peach tea
11⁄2 cups peach juice
11⁄2 cups water
1 cup sugar 
zest of one lemon
one cinnamon stick

Directions:
1. Combine tea, water, sugar, lemon zest and cinnamon stick and bring to a boil
2. Let boil 5 minutes and remove from the stove
3. When cooled a bit add the peach juice.

Glaze:
Servings:1 savarin
Ingredients
2 tablespoons apricot Jam 
2 tablespoons water
Directions:
1. In a saucepan mix jam and water and warm up
2. When the savarin is cool and soaked brush it with the glaze

Pastry Cream and Chantilly:
Servings: 1 savarin plus some for serving
Ingredients
2 cups milk
1⁄4 cup sugar
zest of one lemon
2 large egg yolks
1 large egg
2 tablespoons cornstarch 
1⁄4 cup sugar
1 cup  heavy cream

Directions:
1. In a saucepan bring to a boil milk and sugar
2. In a bowl whisk together egg yolks, egg, cornstarch and sugar
3. Add the hot milk to the eggs one tablespoon at the time to temper it
4. Pour in the saucepan again and bring to a boil stirring constantly
5. When the cream thickens remove from the stove
6. Put cling film onto the cream (touching the surface) and cool
7. Pour 1 cup cold heavy cream in mixer bowl with the whisk attachment
8. Beat until whipped
9. Combine with the cooled pastry cream adding a tablespoon at the time of whipped cream until it gets to the right consistency. (or it looks right to you!)

Storage & Freezing Instructions/Tips:
You can store the dried savarin for 5 days in a closed container. If you have soaked it cover well with cling foil and store it in the refrigerator for up to 5 days.

Sunday, May 27, 2012

The Daring Bakers May 2012: Challah!

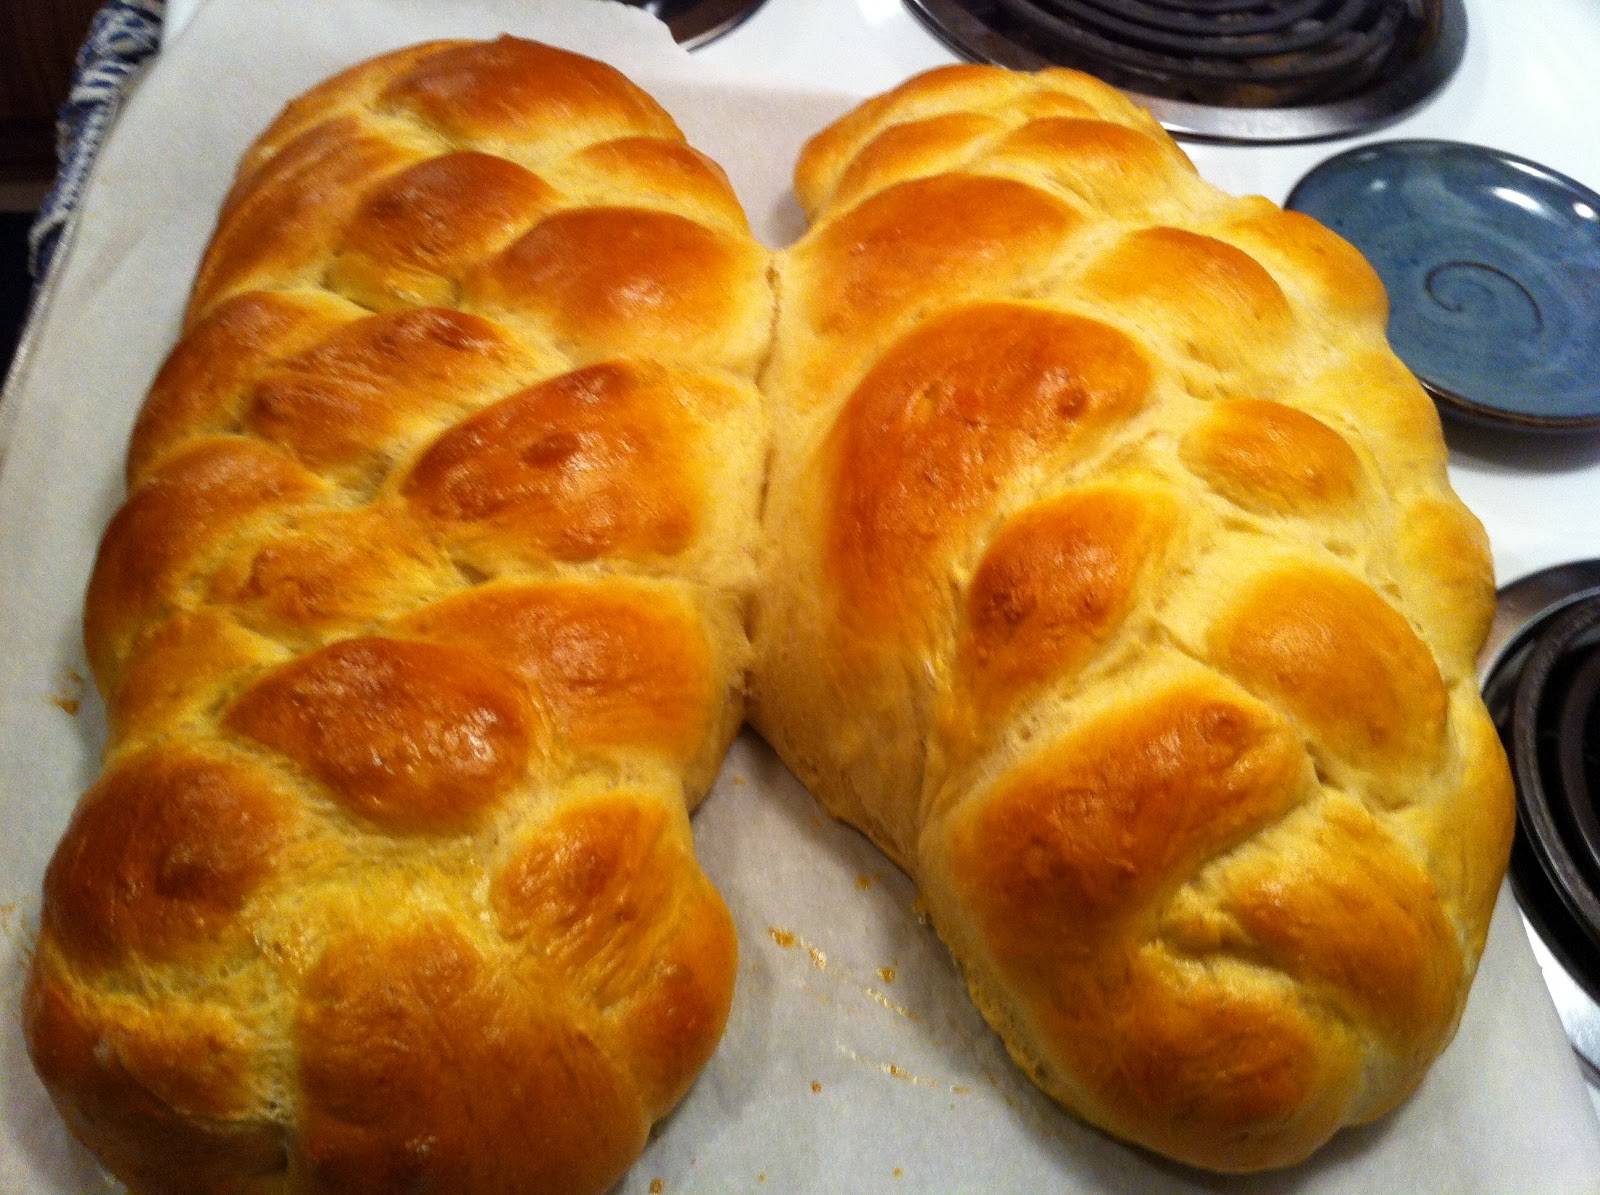
May's Daring Bakers' Challenge was pretty twisted- Ruth from The Crafts of Mommyhood challenged us to make challah! Using recipes from all over, and tips from "A Taste of Challah" by Tamir Ansh, she encouraged us to make beautifully braided breads.
4 Strand loaf in the process

Getting ready to try my hand at 6 strands!
Of course, in the month that the husband and I decide we are going to try to eat less starches (which I am certain is going to kill me, I love bread, pasta and potatoes!) the challenge is challah, which I have wanted to make for a long time. I am glad I did this challenge- the braiding was fun and turned out better than I thought it would! I hadn't ever tried doing a 4 strand braid, much less a 6! I was so pleased with how my 4 strand loaf turned out, I decided to do 6 strands on the second.
4 Strand loaf on the right, 6 on the left.
4 strand on top, 6 on bottom
This weekend we are going camping with my husband's family and we are bringing along the challah to try French Toast on the grill. I'll let you guys know how that goes. We haven't actually eaten it yet, so I can't tell you how delicious it is but if the way it made our house smell is any indication, this bread is going to be worth returning to eating starch, however temporarily!

again, 4 strand on the right, 6 on the left
I made the Honey White version of this bread, although there were many other options in our challenge recipes. It all came down to what I had on hand and the fact that I was planning on making two other baked goods in the same night. This one required less rise time, so I went with it.


Honey White Challah

1 ½ cups warm water, separated
1 tablespoon sugar
2 tablespoons (2-⅔ packets) dry active yeast
½ cup honey
1 tablespoon oil
4 large eggs
1 ½ teaspoon salt
5 cups all purpose flour, plus more as needed (up to 8-9 cups total)
1 egg beaten with 1 teaspoon water

1. In mixer bowl combine ½ cup warm water, sugar, and yeast. Allow to proof about 5 minutes until foamy.

2. To the yeast mixture add the honey, remaining water, oil, eggs, salt and 5 cups of flour. Knead until smooth, adding flour as needed. Knead for approximately 10 minutes.

3. Transfer dough to a clean, oiled bowl, turn to coat or add a bit more oil on top. Cover bowl with a kitchen towel. Leave to rise in a warm place until doubled (about 1½ hours.)

4. Punch down the dough, divide it into two sections. Use one half to make each loaf (shaped or braided as desired).

5. Place loaves on parchment lined or greased baking sheets (this is important- do use two separate sheets. I didn't and my bread rose so much in the oven the loaves ended up touching.) Cover with a towel, allow to rise 30 minutes.

6. Preheat oven to 325℉.

7. Brush top of loaves with egg wash. (sprinkle with seeds or toppings here if wanted)

8. Bake loaves 30-40 minutes until done (will be golden) and cool on wire racks.

Sunday, April 15, 2012

Skillet Flatbread

I recently saw a post on Pinterest about cast iron skillets being one of the most useful tools in your kitchen. I was lucky enough to get a nice one at a wedding shower last year, and I really have enjoyed using it. When I found a recipe for a soft flatbread made in a skillet, I knew I had to try it.

This flatbread is not of the crunchy cracker variety but is instead a soft, pillowy vehicle for sopping up sauces (we had it with baked ravioli last night), piling on the hummus or other dips, or great on its own (as we had it the first night with our maple eggplant). The bread itself is versatile, we have experimented with two different herb mixes in the past two nights.

You can either use a store-bought pizza dough, or use the quick'n easy recipe included below. Making it from scratch means starting this about an hour earlier than if you use store-bought (yeast proofing and dough rising times), but I always prefer to make things from scratch. No judgement from me if you choose to go the store-bought route though!

Quick'n Easy Flatbread Dough (good for pizzas too!)
2 ¼ teaspoons active dry yeast
1 teaspoon sugar
1 cup lukewarm water (plus a bit more if needed)
1 tablespoon olive oil
3 cups flour (combination of all purpose, wheat, whatever your pleasure is good!)
½ teaspoon garlic powder
½ teaspoon salt

1. Place yeast, water and sugar into the bowl of your mixer. Stir to combine and set aside for about 10 minutes, or until mixture is frothy.

2. Place the rest of the ingredients in the bowl and knead with a dough hook attachment on low speed for 5 to 10 minutes, until the dough pulls away from the sides of the bowl.

3. Remove dough from the bowl and knead by hand on a lightly floured surface for another minute. Pat into a circle.

4. Lightly oil a large bowl and place the dough inside, flipping once to coat with oil. Cover and let rise in a warm place for 30 minutes.

Skillet Flatbread
(adapted from Sunny Anderson's recipe)
16 oz pizza dough (store-bought or homemade)
assorted fresh or dried herbs, chopped (whatever you fancy- we've done herbs de Provence, Italian blend)
2 tablespoons olive oil, plus more for coating bowl
2 tablespoons butter
2 cloves garlic, smashed

1. Cut the dough into thirds. Roll out each piece of dough to about ½ inch thick. Sprinkle evenly with herbs. Fold into quarters and knead 3-4 times to evenly incorporate herbs. Reform the dough into a ball and place into a small bowl lightly coated with olive oil. Repeat with other dough sections. Let rest about 20 minutes.

2. Meanwhile, in a small saucepan over low heat, melt the butter with the garlic. Remove from heat and keep warm.


3. Heat a cast iron skillet over medium heat. Roll dough out to about ⅛ inch thickness. Brush one side with olive oil and put oil side down on the skillet. Cook until golden, about 4-6 minutes. Brush the other side of the dough with oil, flip and cook another 4-6 minutes. Remove from pan, brush one side with the garlic butter and sprinkle with salt. Cut into 2 inch strips.

Tuesday, March 27, 2012

The Daring Bakers March 2012: Dutch Crunch!


Sara and Erica of Baking JDs were our March 2012 Daring Baker hostesses! Sara & Erica challenged us to make Dutch Crunch bread, a delicious sandwich bread with a unique, crunchy topping. Sara and Erica also challenged us to create a one of a kind sandwich with our bread!


Dutch Crunch Topping
2 tablespoons active dry yeast
1 cup warm water (105-110℉)
2 tablespoons sugar
2 tablespoons vegetable oil
½ teaspoon salt
1 ½ cups rice flour

1. Combine all ingredients in a large bowl and beat with a whisk; beat hard to combine. The consistency should be like stiff royal icing- spreadable but not too runny. If you pull some up with your whisk it should drip off slowly. Add more water or rice flour as necessary. Let stand 15 minutes.
2. Coat the top of each roll with a thick layer of topping. Err on the side of too much- too little will not crack properly.
3. Let stand, uncovered, for any additional time your recipe recommends. For the rolls I made, I put them straight in the oven at this point.
4. When baking, place pans on a rack in the center of the oven and bake your bread as you ordinarily would. The dutch crunch topping should crack and turn a nice golden-brown color.

Soft White Roll
1 tablespoon active dry yeast
¼ cup warm water
1 cup warm milk
1 ½ tablespoons sugar
2 tablespoons vegetable oil
1 ½ teaspoons salt
up to 4 cups all purpose flour

1. In the bowl of an electric mixer or large mixing bowl, combine yeast, water, milk and sugar. Stir to dissolve and let sit for about 5 minutes (the mixture should start to bubble or foam and smell yeasty.)
2. Add in vegetable oil, salt and 2 cups of flour. Using the dough hook attachment or a wooden spoon, mix at medium speed until the dough comes together.
3. Add remaining flour a quarter cup at a time until the dough pulls away from the sides of the bowl (from  an additional 1½ to 2 cups of flour)
4. Turn out onto a lightly floured surface and knead for about 4 minutes, until smooth and elastic.
5. Place in a lightly greased bowl and cover with plastic wrap. Let rise for 1 hour, or until doubled (or more) in size.
6. Once the dough has risen, turn it out onto a lightly floured surface and divide it into 6 equal portions. Shape each into a ball and place on a parchment lined baking sheet.
7. Cover with plastic wrap and let rise for 15 minutes while you prepare the topping.
8. Coat the top of each roll with the topping as described above.
9. Bake in a preheated 380° oven for 25-30 minutes, until well browned. Let cool completely on a wire rack before eating.

Sauteed Portabella Sandwiches
4 Portabella mushrooms. Remove stems and gills, wash and wipe clean.1 ripe tomato, sliced4 slices mozzarella cheeseOlive oil
1. Heat olive oil in pan. Place portabella caps in hot oil, cap side down and allow to cook 1-2 minutes per side. 
2. Build sandwich in whatever order you wish. Really these are a simple, delicious sandwich that you can add different spices (think: basil leaves, garlic, parmesan cheese shavings, balsamic vinegar) but is pretty great in this minimalist form as well. 

Monday, February 27, 2012

The Daring Bakers February 2012: Quick Breads

The Daring Bakers’ February 2012 host was – Lis! Lisa stepped in last minute and challenged us to create a quick bread we could call our own. She supplied us with a base recipe and shared some recipes she loves from various websites and encouraged us to build upon them and create new flavor profiles.

Maple Filling is Happy
What is the first thing you think when you hear "quick bread"? Usually for me, it is banana bread. But I've made that so many times I wanted to try something new. I love lemon poppy seed muffins, so I thought why not make a lemon poppy seed loaf? There was also a recipe for a pumpkin bread with a maple cream cheese filling included in the challenge recipes, and I've never done a filled quick bread, so I thought why not? 

I love how easy quick breads come together. The recipes are easy to follow, don't make too much of a mess in the kitchen, and are easy to share when you realize that you've made 4 loaves of sweet bread and just stared a new exercise regimen and you really shouldn't be eating all of that stuff. Probably the hardest thing about making quick breads is waiting for them to cool (the lemon poppy seed has to sit overnight!) before you can break into them and have a slice. 

Lemon Poppy Seed Bread
(Joy of Baking)

Bread
3 large eggs
1 ½ teaspoon vanilla extract
¼ cup milk
1 ½ cups all-purpose flour, sifted
¾ cup sugar
1 teaspoon baking powder
¼ teaspoon salt
1 tablespoon grated lemon zest
3 tablespoons poppy seeds
13 tablespoons (1 ½ sticks) unsalted butter, softened

Lemon Syrup
¼ cup fresh lemon juice
⅓ cup granulated sugar

Any reason to go to Penzy's....
1. Preheat oven to 350℉ and place the oven rack in the center of the oven. Butter and flour the bottom and sides of a loaf pan (8x4x 2½ inches).

2. In a separate bowl, whisk together the eggs, vanilla and milk.

3. In the bowl of your mixer, beat the flour, sugar, baking powder, salt, lemon zest, and poppy seeds until combined. Add the softened butter and half the egg mixture and mix on low until moistened. Increase the speed to medium and beat for about one minute. Scrape down the sides of the bowl and add the remaining egg mixture in two batches, beating about 30 seconds after each addition. 

4. Scrape the batter into the prepared pan and bake for 55-65 minutes, or until the bread is golden brown and a toothpick inserted in the center comes out clean. (Check on it about halfway through and cover with foil if necessary to prevent over-browning.)

5. Meanwhile, in a small saucepan, bring the sugar and lemon juice to a boil, stirring until the sugar dissolves. 

6. When the bread is done, remove from the oven and place on a wire reach. Pierce the hot loaf all over with a toothpick and brush the top of the loaf with half of the lemon syrup. Cool the loaf in the pan for 10 minutes. 

7. Invert loaf onto a greased wire rack. Brush the remaining syrup onto the bottom and sides of the loaf. Reinvert the bread so it is right side up and cool the bread completely before wrapping. Store at least overnight before serving.


Pumpkin Bread with Maple Cream Cheese Filling
makes 3 loaves

Filling
2 packages cream cheese, softened
¼ cup white sugar
1 large egg
1 tablespoon milk
1 teaspoon maple extract or 1 tablespoon maple syrup

Bread
3 cups white sugar
1 ¾ cup pumpkin purée (not pumpkin pie filling)
1 cup light or non flavored oil
1 cup water
4 large eggs
4 cups all purpose, unbleached flour
2 teaspoons baking soda
1 teaspoon baking powder
2 teaspoons ground cinnamon
½ teaspoon ground nutmeg
1 teaspoon salt
¼ teaspoon ground cloves

1. Preheat oven to 350℉. Spray three loaf pans with cooking spray.

2. Beat the cream cheese, sugar, egg and milk in a small bowl until creamy, add the maple and blend. Set aside for now. 
The maple made a pretty design in the cream cheese :)

3. In a large bowl, beat the sugar, pumpkin, oil, water and eggs. In another large bowl mix the flour, baking soda, baking powder, salt and spices.  Gradually add the dry ingredients to the wet. 

4. Pour half the batter into the three pans. Spoon the filling over the batter. Use a spatula to spread it out carefully. Add the remaining batter, making sure you cover the filling completely. 

5. Bake for 50-60 minutes or until a toothpick inserted near the center comes out clean. Cool 10 minutes in the pans before removing the bread to a wire rack to cool completely.

Store bread wrapped in plastic wrap in the refrigerator. 


Saturday, February 4, 2012

Ciabatta Rolls


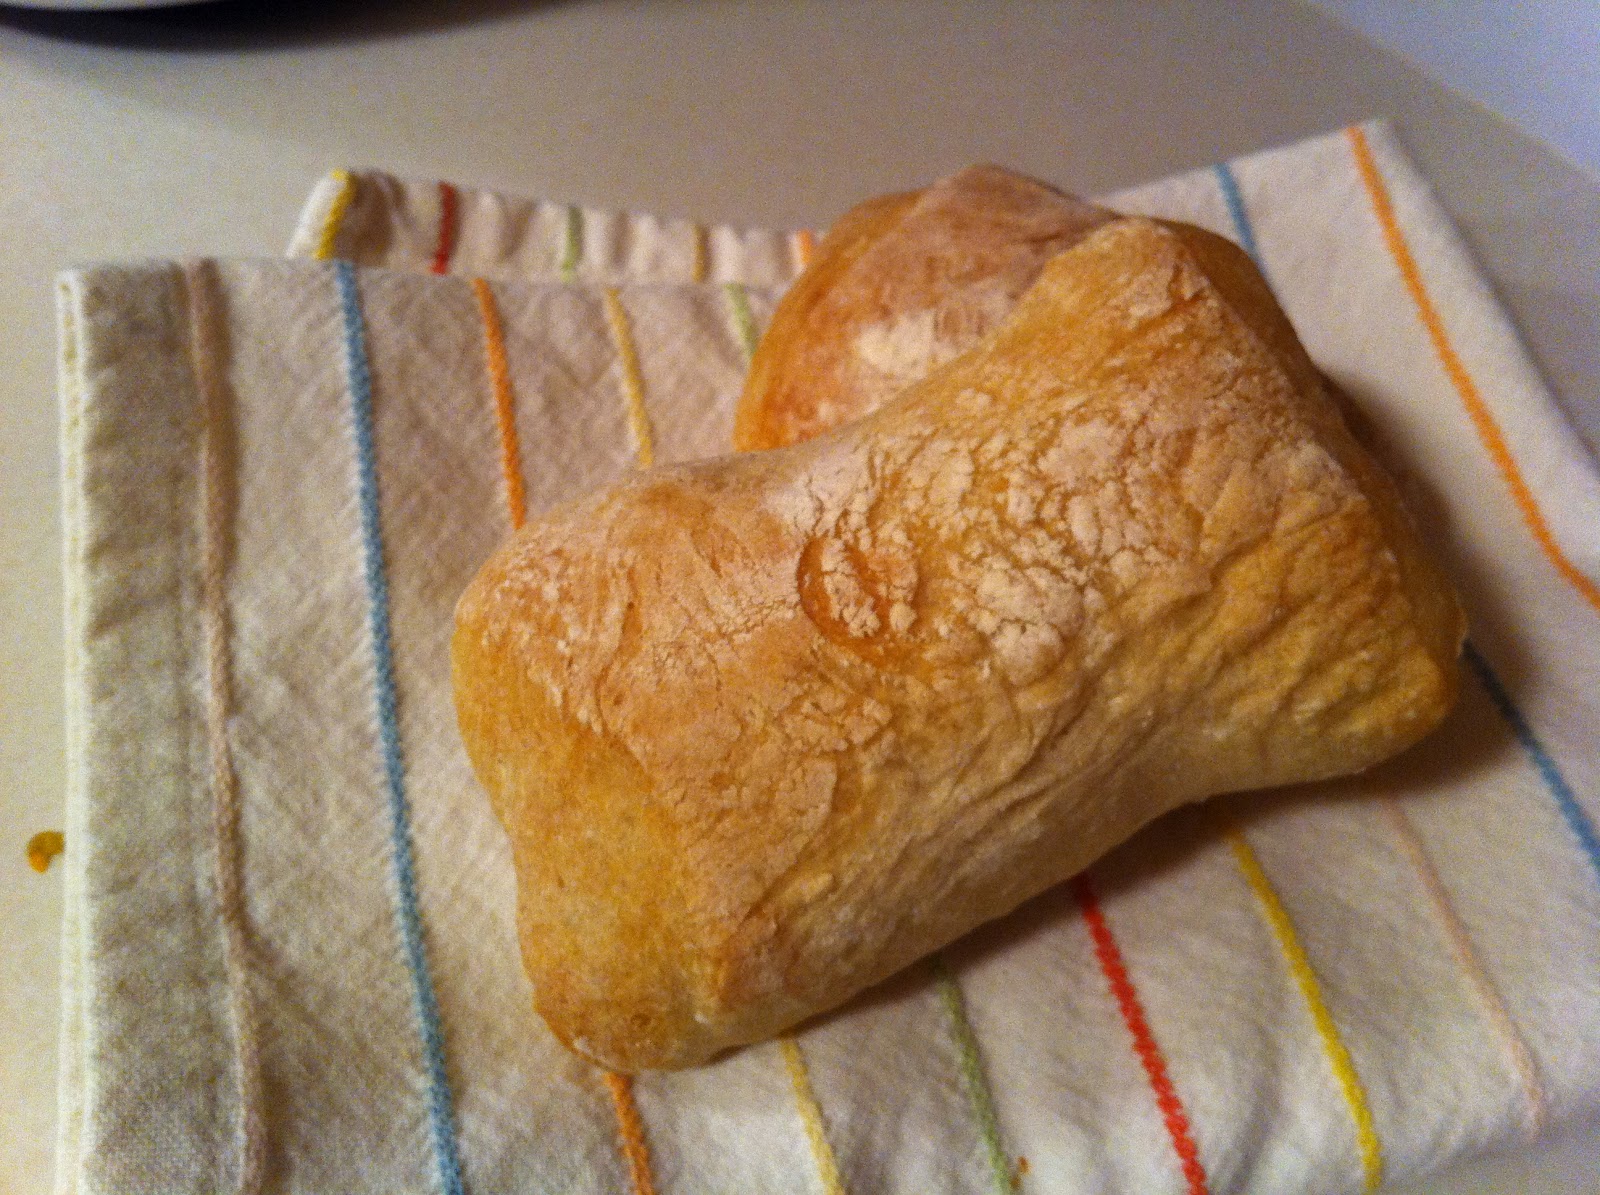
I have a serious food crush on ciabatta bread. I think it is the light, airy inside paired with the lovely chewy, firm crust. I'm big on textures with my food, sometimes I just don't feel like the meal is done until I've had something crunchy. I like anything that combines multiple textures.

I have been looking for a good ciabatta roll recipe for a while. These are fantastic for any kind of sandwich, as well as for simply using them as a side with butter. I particularly like them for tuna sandwiches with a healthy amount of lettuce and tomato. The recipe is fairly easy, there is no sponge to prepare the day before, so you can start these at lunch and be eating them at dinner! Plus, you use a KitchenAid to do the kneading so no messy hands and flour all over the kitchen.

Ciabatta Rolls (makes 6-8 rolls)
4.5 C bread flour
2 cups water
2 teaspoons yeast
3 teaspoons salt

1. Mix together all the ingredients in the bowl of a KitchenAid mixer (or similar brand) with a paddle attachment until just combined. Let rest for 10 minutes.

2. With the paddle, beat dough well. When the dough combined and working like a very sticky dough (climbing up the paddle), change to the dough hook. Continue beating dough until it separates from the sides of the bowl and is almost coming off the bottom of the bowl.

3. Place into a well oiled container and let it triple. (about 2.5 hours)

4. Empty onto a floured counter and cut into squares. Spray with oil and dust with flour. Let rolls proof for about 45 minutes. During this time, preheat oven to 500° F.

5. After 45 minutes rolls should be puffy. Pick up and flip over onto a parchment covered baking sheet. This distributes the bubbles in the dough so you get even bubbles in the roll. You want to do the flip in one gentle motion so as not to disturb the bubbles too much.

6. Bake at 500° about 15-20 minutes, rotating halfway through. Check on them often, you want to take them out when they are golden. The oven is ridiculously hot, so it may be better to base your baking time off of color than the timer. Transfer to a rack. Try to allow them to cool a little before eating, but good luck with that!

Friday, January 27, 2012

The Daring Bakers January 2012- Scones (Biscuits)


Audax Artifex was our January 2012 Daring Bakers’ host. Aud worked tirelessly to master light and fluffy scones (a/k/a biscuits) to help us create delicious and perfect batches in our own kitchens!

I have had quite the month since the last challenge. Honestly, I probably didn't even look at the challenge for about a week after it had been posted. Over the holidays we took a trip to Iowa to see my family and spend some time with them. What began as a quick visit to my grandfather in the hospital became two days, and a certainty that we would be coming back to Iowa very soon. We got back to Wisconsin on a Friday and the following Friday found us driving to Iowa to attend my grandfather's visitation and funeral. It was a very difficult beginning to 2012 to say the least.

I like to think that my grandfather would have enjoyed the fruits of this challenge. Whenever I think of biscuits I think of down-home cooking (although, I know that when titled as "scones" as in Britain and elsewhere you eat them at tea time) and that certainly makes me think of my grandmother. She grew up on a farm and learned her cooking there. Grandma's version of cooking was make it from scratch and don't hold the butter. My earliest cooking memories are of making bread or cookies with my grandmother, calling my grandpa on the phone (somehow we called him when he was upstairs in the same house. Without a cell phone. I still don't know how that worked) and telling him to come down to get some warm cookies.
Delicious Amish Jam

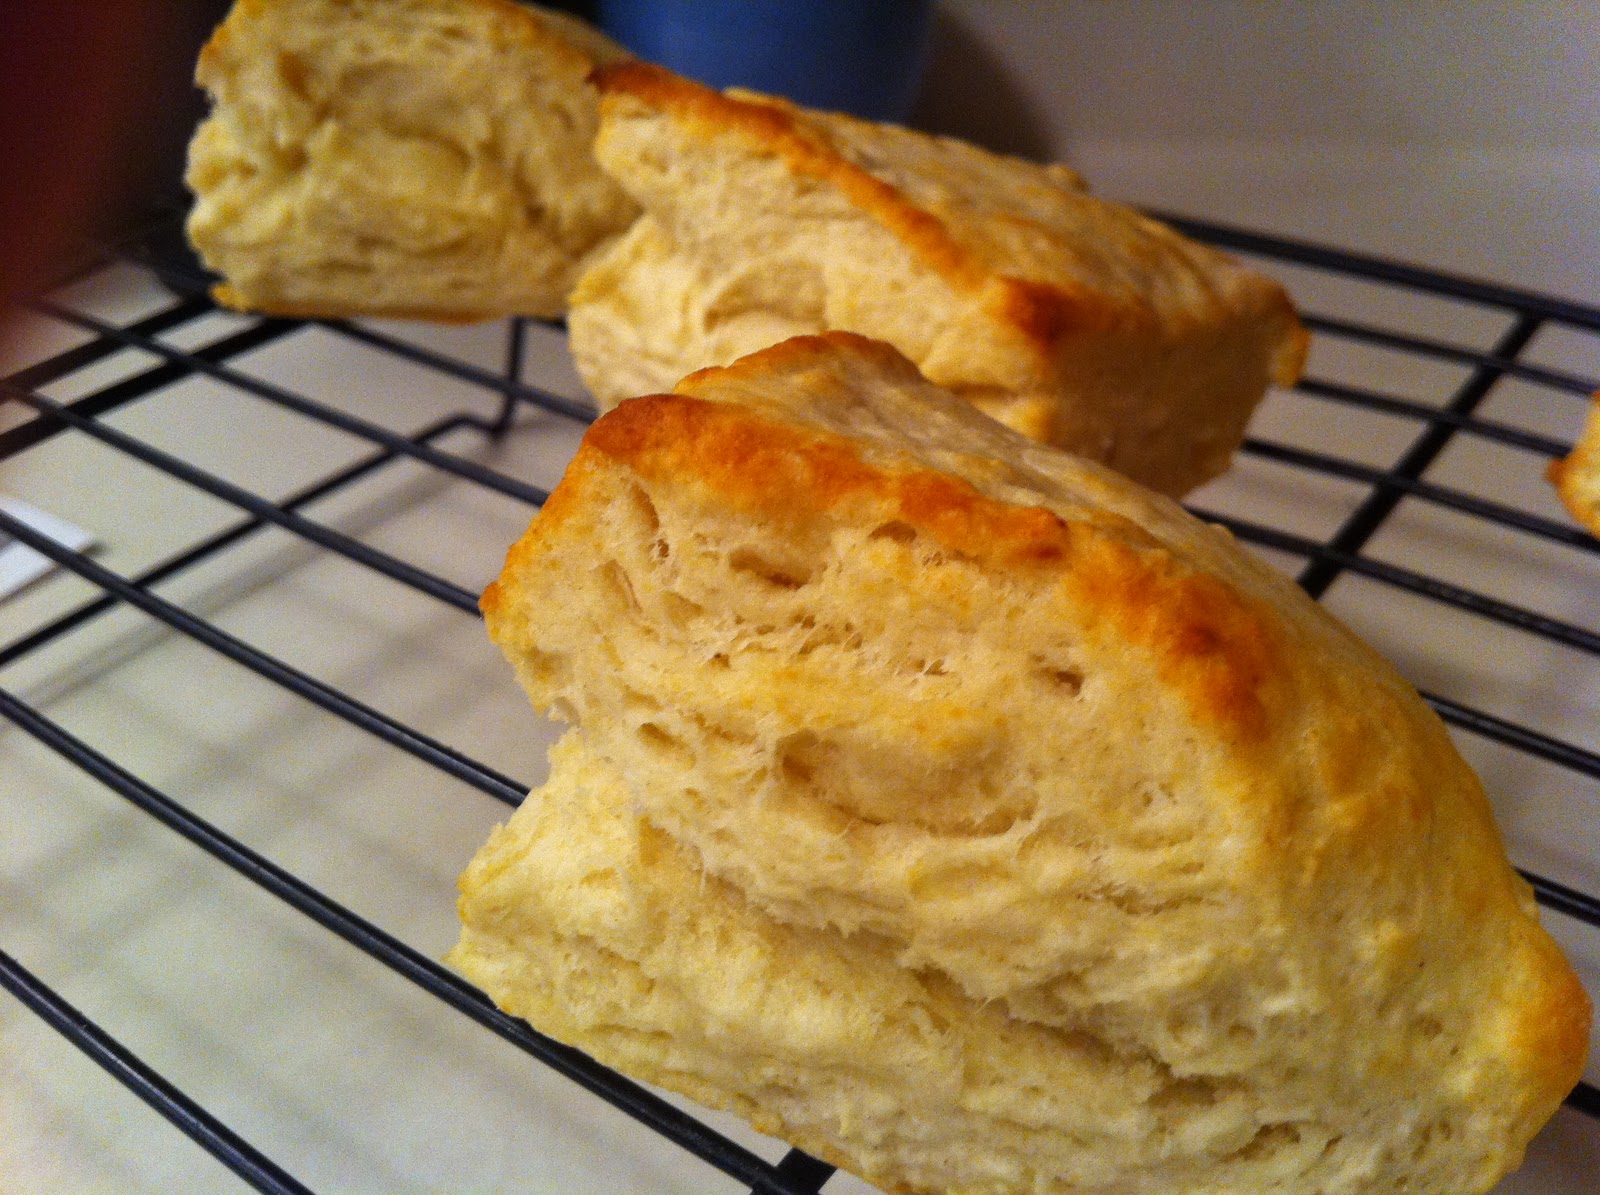
Perhaps it is just me feeling nostalgic and trying to find connections to the grandfather I miss deeply, but I really do think that he would appreciate these made from scratch, delicious biscuits. I was very preoccupied this month, so the most I managed was the basic biscuit recipe. No frills, no additions, but I can tell you even this "naked" form of biscuit was delicious. When paired with the Amish- made raspberry jam I got for Christmas, they were heaven. I also appreciated that these took so little time to make. I like foods that you can have a craving for and be eating them within the hour.


Old Baking Powder Biscuit
I actually made two batches of these. The first I made with my baking powder of undetermined age. That alone means it was far too old. You could definitely tell, as the first batch of biscuits didn't rise quite as much as I had hoped. So I bought a new container of baking powder and it really made a difference!
New Baking Powder Biscuit! Magic!

Basic Biscuits (makes about 8 2-inch biscuits)
1 cup all-purpose flour
2 teaspoons fresh baking powder
1/4 teaspoon salt
2 tablespoons frozen butter cut into small pieces
Approx. 1/2 cup cold milk
optional 1 tablespoon milk for glazing the tops of the biscuits

1. Preheat oven to 475.
2. Triple sift dry ingredients into a large bowl (or if you don't have a sifter like me, whisk them really really well)
3. Rub the frozen butter into the dry ingredients until it resembles very coarse bread crumbs with some pea-sized pieces if you want flaky biscuits or until it resembles coarse beach sand if you want tender biscuits.
4. Add nearly all of the liquid at once into the flour/butter mixture and mix until it just forms a sticky dough (add remaining liquid if needed). The wetter the dough the lighter the biscuits will be!
5. Turn the dough out onto a lightly floured board, lightly flour the top of the dough. To achieve an even homogeneous crumb to your scones knead very gently about 4 or 5 times until the dough is smooth. To achieve a layered effect in your biscuits knead very gently once (don't press too firmly) then fold and turn the kneaded dough about 3 or 4 times until the dough has formed a smooth texture. 
6. Pat or roll dough out into a 6 inch by 4 inch rectangle about 3/4 inch thick. Using a well floured biscuit cutter cut into rounds, or use a well floured, sharp knife to form squares or wedges as you desire. 
7. Place the biscuits just touching on a dish if you want soft sided biscuits or place them spaced widely apart if you want to have crisp-sided biscuits. Glaze the tops with milk if you want a golden color or lightly flour if you want a more traditional look.
8. Bake in the preheated oven for about 10 minutes (check at 8 since at this temperature home ovens are quite unreliable) until the biscuits are well risen and are lightly colored on the tops. The biscuits are ready when the sides are set. 
9. Immediately place onto cooling rack to stop the cooking process, serve while still warm.

Thursday, October 27, 2011

Daring Bakers October, 2011- Povitica!

Pecan, Pumpkin Spice, Apple Cinnamon and Traditional Walnut Povitica

The Daring Baker's October 2011 challenge was Povitica, hosted by Jenni of The Gingered Whisk. Povitica is a traditional Eastern European Dessert Bread that is as lovely to look at as it is to eat!


I have the distinct honor to call this month's challenge host my close friend. In fact, she was the matron of honor at my wedding this past summer. Jenni's parents and my parents were friends in college, and we have been best friends probably for as long as I can remember! So you might think I had an inkling of what this challenge was before it officially dropped on the 1st. You'd be wrong. I have no idea how she kept this fabulous challenge a secret, but all I heard from her was "I'm hosting in October, wait until you see what I've got in store for you!" She wasn't kidding. I was super excited for the croissant challenge, and a little nervous about the chocolates challenge, but making Povitica is probably going down on the "I can't believe I made this!" list.

The recipe Jenni gave us produces 4 loaves of this beautiful sweet bread. She asked us to make at least one of the four with the traditional walnut filling, but left the other three fillings up to us. Although the weather decided to take a strange turn back to summer, I refuse to give up on Autumn. I thought perhaps if I make some seriously Autumn inspired fillings, the weather would go ahead and cool back down from the upper 70's (in Wisconsin. In October. What is this madness?!). I looked to some of my favorite Autumn desserts for inspiration: apple pie, pecan pie and pumpkin pie.

I'll put the recipe for the basic dough and assembly first and follow up with my filling recipes. Because I made 4 different fillings, I found it easiest to simply have them all made before making the dough. If the nut fillings become too thick and set before you want to spread them, you can stir in some warm milk until it is at a spreadable consistency. *Note: the pumpkin and apple fillings make much more than necessary for the bread recipe, but then you have some lovely homemade apple and pumpkin butter  to continue ushering in the cooler weather!

This month's playlist is fairly eclectic. I tried to pick some Eastern European inspired artists, but most of the ones I am familiar with aren't actually on Spotify. So, I did some searching and found a fun mix of artists I already knew and some brand new finds. There are also two classical pieces by Borodin and Mussorgsky that just screamed "play me!" while I was planning this recipe. Also, be sure to check out the Serbian group doing a cover of "Living La Vida Loca"!! So to check it out, click here: Povitica Playlist on Spotify Again, let me know what you think, I am having fun finding music to listen to while I go about each challenge! I think having "The Great Gate of Kiev" playing as you take the povitica out of the oven is the perfect fanfare for this amazing bread!
*Warning: "Immigrant Punk" by Gogol Bordello has a few- quickly passing- obscenities. You may not want to listen to that one with impressionable ears around.*

Povitica (makes 4 loaves)

To activate the yeast:
2 teaspoons sugar
1 teaspoon all-purpose flour
1/2 cup warm water
2 tablespoons dry yeast

Dough:
2 cups whole milk
3/4 cup sugar
3 teaspoons table salt
4 large eggs, beaten
1/2 cup unsalted butter, melted
8 cups all purpose flour, measure first, then sift, divided

Activate Yeast:
1. In a small bowl, stir sugar, flour, warm water and yeast together.
2. Allow to stand for 5 minutes

Make Dough
3. In a medium saucepan, heat the milk to just below boiling (180℉), stirring constantly so that a film does not form on the top of the milk. You want it hot enough to scald you, but not boiling. Allow to cool slightly, until it is about 110℉.
4. In a large bowl, mix the scalded milk, ¾ cup sugar and the salt until combined.
5. Add the beaten eggs, yeast mixture, melted butter and 2 cups of flour.
6. Blend thoroughly and slowly add remaining flour, mixing well until the dough starts to clean the bowl.
7. Turn dough out onto floured surface and knead, gradually adding flour a little at a time, until smooth and does not stick. (you do not need to use all 8 cups of flour)
8. Divide the dough into 4 equal pieces (each will weigh about 1.25 pounds).
9. Place dough in 4 lightly oiled bowls, cover loosely with a layer of plastic wrap and then a kitchen towel and let rise an hour and a half in a warm place, until doubled in size.


Roll and Assemble the Dough
10. Spread a clean sheet or cloth over your entire table so that it is covered.
11. Sprinkle with a couple of tablespoon to a handful of flour (use sparingly)
12. Place dough on the sheet and toll the dough out with a rolling pin, starting in the middle and working your way out, until it measures roughly 10-12 inches in diameter.
13. Spoon 1 to 1.5 teaspoons of melted butter on top of the dough.
14. Using the tops of your hands, stretch dough out from the center until the dough is thin and uniformly opaque. You can also use your rolling pin if you prefer.
15. As you work, continually pick up the dough from the table, not only to help in stretching it, but also to make sure that it isn't sticking.
16. When you think the dough is thin enough, try to get it a little thinner. It should be so thin that you can see the color and perhaps pattern of the sheet underneath.
17. Spoon filling evenly over dough until covered, leaving a small border of dough.
Pumpkin Butter- yum!!
18. Lift the edge of the cloth and gently roll the dough like a jelly roll.

19. Once the dough is rolled up into a rope, gently lift it up and place it into a greased loaf pan in the shape of a "U", with the ends meeting in the middle. You want to coil the dough around itself, as this will give the dough its characteristic look when sliced.
20. Repeat with the remaining three loaves, coiling each rope of dough in its own loaf pan.

21. Brush the top of each loaf with a mixture of ½ cup of cold, strong coffee and 2 tablespoons of sugar. If you prefer, you can also use egg whites in place of the coffee mixture.
22. Cover pans lightly with plastic wrap and allow to rest for approximately 15 minutes.
23. Preheat oven to 350℉.
24. Remove plastic wrap from dough and place into the preheated oven and bake for about 15 minutes.
25. Turn oven temperature to 300℉ and bake an additional 45 minutes, or until done.
26. Remove bread from oven and brush with melted butter.
27. Check the bread every 30 minutes to ensure that the bread is not getting too brown. You may cover the loaves with a sheet of aluminum foil if you need to.
28. Remove from the oven and allow to cool in the pan on a wire rack for 20-30 minutes.
29. Remove from pan, allow to cool fully before cutting. The best way to cut the loaves is by turning the loaf upside down and slice with a serrated knife.

Traditional Walnut Filling (enough for one loaf)
1¾ cups ground English Walnuts
¼ cup Whole Milk
¼ cup unsalted butter
1 egg yolk from a large egg, beaten
¼ teaspoon pure vanilla extract
½ cup sugar
¼ teaspoon unsweetened cocoa powder
¼ teaspoon cinnamon

1. In a large bowl, mix together the ground walnuts, sugar, cinnamon, and cocoa
2. Heat the milk and butter to boiling
3. Pour liquid over the sugar/nut mixture.
4. Add the egg and vanilla and mix throughly
5. Allow to stand at room temperature until ready to be spread on the dough.
6. If the mixture thickens, add a small amount of warm milk.

Pumpkin Spice Filling (makes 3 cups of pumpkin butter)
1 (28 oz) can pumpkin puree- NOT pumpkin pie filling
¾ cup apple juice
2 teaspoons ginger
¼ teaspoon cloves
¼ teaspoon mace
2 teaspoons cinnamon
1 teaspoon nutmeg
1½ cups granulated sugar

1. Combine all ingredients in a large saucepan. Bring to a boil, then reduce to a simmer and cook, stirring often, for 30 minutes, or until mixture thickens.
2. Let cool to room temperature before using.

Cinnamon-Apple Filling (makes 4 cups of apple butter)
1 cup packed brown sugar
½ cup honey
¼ cup apple cider
1 tablespoon ground cinnamon
¼ teaspoon ground cloves
⅛ teaspoon ground mace
10 medium apples, peeled cored and cut into large chunks (about 2 ½ pounds)

1. Combine all ingredients in a 5-quart slow cooker. Cover and cook on low for 10 hours, or until apples are very tender.
2. Place a fine mesh sieve over a bowl, spoon a third of the apple mixture into the sieve and push through using the back of the spoon. Repeat until all the apple mixture has been through the sieve.
3. Return the apple mixture to the slow cooker and cook uncovered on high for 1- 1½ hours or until mixture is thick, stirring occasionally.
4. Let cool to room temperature before using.

Pecan Filling
4 tablespoons unsalted butter
½ cup packed light brown sugar
½ cup light corn syrup
½ teaspoon salt
2 cups chopped toasted pecans
1-2 tablespoons bourbon (optional)
1 teaspoons vanilla extract
1 egg, lightly beaten.

1. In a medium saucepan, combine the butter, brown sugar, corn syrup and salt. Bring to a boil over medium heat, stirring constantly. Boil for 1 minutes.
2. Remove pan from heat, stir in nuts, bourbon, if using, and vanilla. Set the mixture aside to cool slightly, about 5 minutes.
3. Whisk the beaten egg into the filling until smooth.

Monday, October 10, 2011

Ciabatta Bread

So it's shadowy- but the bread is yummy!
The stand off is in week two: I am still denying that the weather is too hot for soup, and mother nature continues to go on her merry upper 70's way. I have the feeling I'm going to win. I just have to wait long enough. So I'm sure you've guessed, I made another soup this past weekend. I'm not giving up on my new soup each weekend in October goal.

Along with our soups, I've been making bread each weekend, because really, what goes better with homemade soup than a nice hot out of the oven homemade bread? I've long loved ciabatta bread (read: nearly obsessed with it) but never made it myself. I was glad to find that this is an easy, no knead bread. Delicious, crusty on the outside and nice and springy on the inside. Just the way bread should be! If you choose to make this, plan on it taking 2 days (mostly inactive time) because this requires you to make a sponge a day in advance. I also used our pizza stone to bake these, as the original recipe calls for a baking stone or 4-6 unglazed "quarry" tiles. I bet it would work on just baking sheets if you don't have a baking stone.

Ciabatta Bread (makes two loaves)
adapted from Gourmet

For the sponge:
⅛ teaspoon active dry yeast
2 tablespoons warm water (105°- 115℉)
⅓ cup room-temperature water
1 cup bread flour

1. In a small bowl, stir together yeast and warm water. Let stand 5 minutes, or until creamy.
2. In another bowl, stir together yeast mixture, room-temperature water and flour. Stir 4 minutes. The mixture should begin to combine and clean the sides of the bowl.
3. Cover bowl with plastic wrap. Let sponge stand at cool room temperature at least 12 hours and up to 1 day.

For bread:
½ teaspoon active dry yeast
2 tablespoons warm milk (105°- 115℉)
⅔ cup room-temperature water
1 tablespoon olive oil
2 cups bread flour
1 ½ teaspoons salt
Dough hook in action! You know it's ready to begin timing now.
1. In a small bowl, stir together yeast and milk and let stand 5 minutes, or until creamy.
2. In the bowl of a mixer fitted with a dough hook blend together milk mixture, sponge, water, oil and flour at low speed until flour is just moistened. Continue to mix an additional three minutes. Add salt and beat an additional 4 minutes.
3. Scrape dough into an oiled bowl  and cover with plastic wrap. Let dough rise at room temperature until doubled, about an hour and a half.
4. Prepare two well floured 12x6 inch pieces of parchment paper.
5. Turn dough out onto a well-floured work surface and cut in half. Transfer each half to a parchment sheet and form into an irregular oval about 9 inches long.
6. Dimple loaves with floured fingers and dust tops of loaves with flour.
7. Cover loaves with a dampened kitchen towel. Let loaves rise at room temperature until almost doubled in size, 1-2 hours.
8. About 45 minutes before baking, if using a baking stone, preheat oven to 425℉. Place baking stone on oven rack placed in the lowest position of the oven.
9. Transfer 1 loaf to the baking stone, sliding onto the baking stone. If you can fit the second loaf onto your stone, go ahead and transfer it. If not, you can bake the second when the first is done.
10. Bake loaves for 20 minutes, or until pale golden. When finished, transfer loaves to a rack to cool.

Monday, February 14, 2011

"faux-garden" Breadsticks

Along with the lasagna and red velvet cupcakes, for Valentine's I made breadsticks that are very similar to my favorite restaurant breadsticks from a shall-remain-unnamed chain Italian restaurant. As a child I remember being excited to eat there simply because it meant I automatically got to have the breadsticks. This home-made version makes a less-greasy breadstick, which I thought was an improvement. The last few times I ate at the restaurant I thought the breadsticks just had a little too much topping or whatever on them.

The recipe itself is really simple, using ingredients I had on hand already. I also have a focaccia recipe I really enjoy for Italian meals, but I have the feeling that these may take over the "go to recipe" spot. My one issue (which really was a non-issue, but the time saved would help on a week night or busy day) was my usual complaint that a hand mixer just doesn't do bread doughs very well. I mixed in the first couple cups of flour (I did them one at a time and put in the water alternately because I was using the hand mixer, I doubt this is necessary with a stand mixer) but ended up doing the last half by hand. Now I wasn't in a rush, and kneading dough is actually quite stress relieving, but this would be leagues simpler with a stand mixer, I am sure. Yes, there is one on the wedding registry. I think that may have been one of the first things we actually scanned with the gun. So now, onto the recipe!

Ingredients:
1 package active dry yeast
1/4 cup warm water, 1 1/4 cup plus 2 tablespoons warm water
2 tablespoons unsalted butter, softened
4 1/4 cups all purpose flour
2 tablespoons sugar
1 tablespoon salt

Topping ingredients:
3 tablespoons unsalted butter, melted
1/2 teaspoon salt
1/4 teaspoon garlic powder
pinch oregano

1. Place 1/4 cup warm water in bowl of mixer, sprinkle in yeast and set aside until foamy (5 minutes). Add flour, butter, sugar, salt and additional warm water; mix until slightly sticky dough forms, about 5 minutes.

2. On a lightly floured surface, knead dough by hand until smooth and soft, about 3 minutes. Roll into a 2 foot long log, cut into 16 1 1/2 inch long pieces. Knead each piece slightly and shape into a 7 inch long breadstick.

3. Arrange breadsticks 2 inches apart on parchment lined baking sheets. Cover with a clean cloth, let rise in a warm spot until almost doubled, about 45 minutes.

4. Preheat oven to 400° F. Make the topping: brush 1 1/2 tablespoons of the butter and sprinkle with 1/4 teaspoon salt. Bake until lightly golden, about 15 minutes.

5. Meanwhile, combine the remaining 1/4 teaspoon salt with the garlic powder and oregano. Brush warm breadsticks with the remaining 1 1/2 tablespoons melted butter and sprinkle with the flavored salt.

Tuesday, November 2, 2010

Potato Soup & Bread bowls

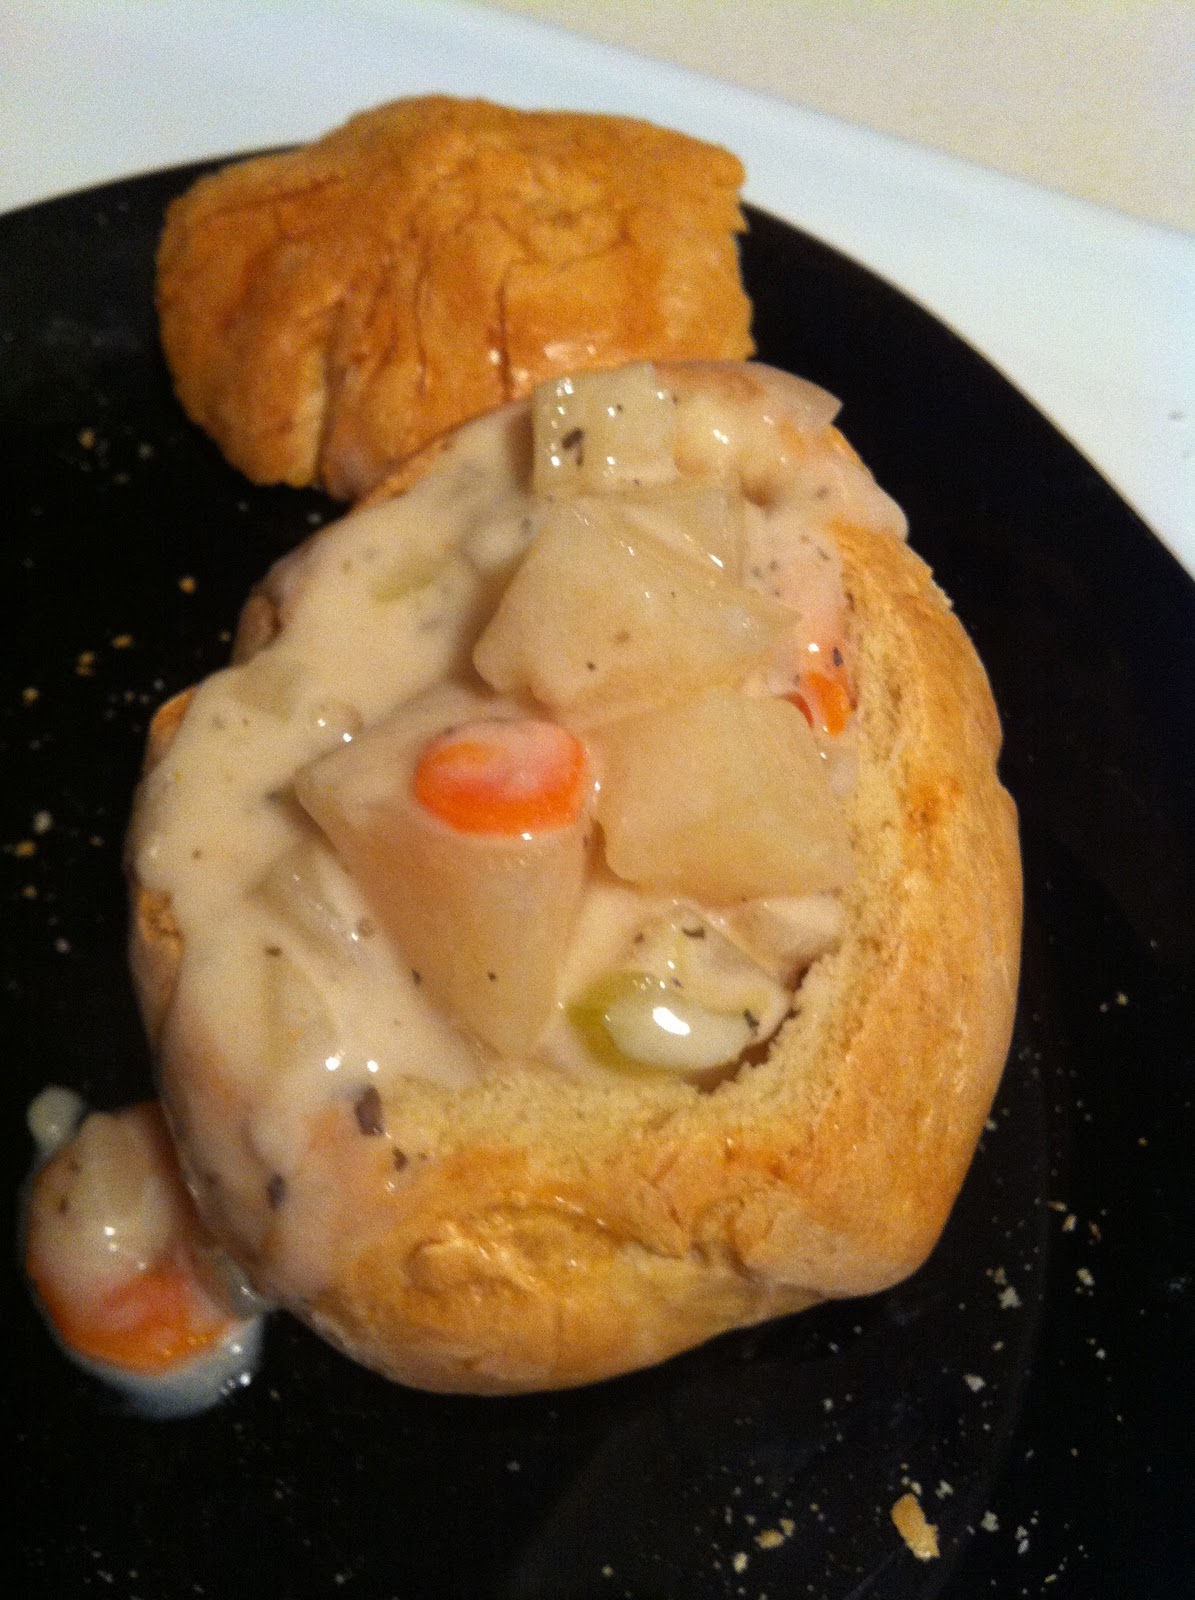
I'll admit, this recipe is basically word for word from Southern Living via MyRecipes.com , but it presented some challenges that I had to remedy on my own. First of all- I was certain that a KitchenAid was going to be on my wedding registry, but I'm doubly sure of it now. I can remember making breads with my grandmother (who had a KitchenAid herself) and doing tons of kneading, which was a fun "old-fashioned" experience for me. But I found my little hand mixer just wouldn't get all 7 cups of flour into the dough and ended up doing a lot of it by hand. Also, the bread bowls seemed really small. I may just be used to Panera's gigantic sourdough bread bowls, but it didn't seem like you could get a whole serving of soup in there.

Luckily the soup was pretty low maintenance. Just throw a bunch of stuff in the crockpot, set the timer and forget about it. I think the recipe is a good basic potato soup but I think it could be much better if you played around with different ingredients and maybe some additional spices. Overall, a good recipe for a fall day.

Italian Bread Bowls
2 1/2 cups warm water
2 (1/4 oz) envelopes active dry yeast
2 teaspoons salt
2 tablespoons vegetable oil
7 cups all- purpose flour
1 tablespoon cornmeal
1 egg white
1 tablespoon water

1. Stir together 2 1/2 cups water and yeast in a large bowl. Let stand 5 minutes. Stir in salt and oil.

2. Add flour gradually, beating at medium speed with an electric mixer until soft dough forms.

3. Turn dough out onto a floured surface; knead until smooth and elastic (4-6 minutes). Place in a lightly greased bowl, turning to grease top. Cover and let rise in a warm place, free from drafts, 35 minutes or until doubled in bulk.

4. Punch dough down and divide into 8 equal portions. Shape each portion into a 4 inch round loaf. Place loaves on lightly greased baking sheets sprinkled with cornmeal.

5. Cover and let rise in a warm place, free from drafts, 35 minutes or until doubled in bulk.

6. Stir together egg white and 1 tablespoon water, brush over loaves.

7. Bake at 400 degrees for 15 minutes. Brush with remaining egg mixture, and bake 10-15 minutes more or until golden. Cool on wire racks. Freeze up to 1 month if desired.

8. Cut a 1/2 inch thick slice from top of each loaf; scoop out centers, leaving 3/4 inch thick shells. Reserve centers for other uses. Fill bread bowls with hot soup and serve immediately.

Potato Soup
6 potatoes, peeled and cut into 1/2 inch cubes
2 medium onions, diced
2 carrots thinly sliced
2 celery ribs thinly sliced
2 (14 1/2 oz) cans reduced sodium chicken broth
1 teaspoon basil
1 teaspoon salt
1/2 teaspoon pepper
1/4 cup flour
1 1/2 cup half and half

1. Combine first 8 ingredients in 4 1/2 quart slow cooker.

2. Cook, covered at HIGH for 3 hours or until vegetables are tender.

3. Stir together flour and half and half; stir into soup. Cover and cook 30 minutes or until thoroughly heated. Serve in bread bowls.