Friday, November 4, 2011

Cute Cut-out Tortilla Chips


Ghosts, pumpkins and bats, oh my!
Although I made these fun semi-homemade tortilla chips for Halloween, you can use any kind of cookie cutter you like and have these for any occasion. I stumbled upon these fun chips while searching for an appetizer to take along to the costume party that our friends throw every year. But this year it couldn't be just ANY appetizer. I had to go all out and make something truly ridiculous. You see, I was Martha Stewart (sans ankle bracelet) for Halloween this year. I wore the homemade apron with classical composer names my mother made me for Christmas last year (because I don't sew... I'm not that crafty) and a fabric flower that looks homemade, but I really bought it. I rounded out the "costume" with these delicious tortilla chips, homemade guacamole and the mango-lime black bean salsa I love to make when there is any kind of excuse.


These chips are delicious and the only hard part about making them is getting the cookie cutters to fully cut through the tortillas. Mine are plastic and I had to pound on them with the smooth side of a meat tenderizer to cut through. I imagine that metal cookie-cutters may cut easier. 


Ingredients:
cooking spray
24 assorted large tortillas- I picked up sun dried tomato, spinach and herb, jalapeño cheddar and plain
coarse salt


Preheat oven to 350 degrees. Coat a baking sheet with cooking spray. Using a few Halloween inspired cookie cutters, cut shapes from tortillas. Arrange as many shapes as can fit in a single layer on oiled sheet. Coat tortillas with cooking spray, and season with salt. Bake until slightly darkened and crisp, 10 to 12 minutes. Transfer to a wire rack to cool. Repeat with remaining tortilla shapes, using a clean, cooled baking sheet.


That's it! They are seriously good and simple. 

Thursday, October 27, 2011

Daring Bakers October, 2011- Povitica!

Pecan, Pumpkin Spice, Apple Cinnamon and Traditional Walnut Povitica

The Daring Baker's October 2011 challenge was Povitica, hosted by Jenni of The Gingered Whisk. Povitica is a traditional Eastern European Dessert Bread that is as lovely to look at as it is to eat!


I have the distinct honor to call this month's challenge host my close friend. In fact, she was the matron of honor at my wedding this past summer. Jenni's parents and my parents were friends in college, and we have been best friends probably for as long as I can remember! So you might think I had an inkling of what this challenge was before it officially dropped on the 1st. You'd be wrong. I have no idea how she kept this fabulous challenge a secret, but all I heard from her was "I'm hosting in October, wait until you see what I've got in store for you!" She wasn't kidding. I was super excited for the croissant challenge, and a little nervous about the chocolates challenge, but making Povitica is probably going down on the "I can't believe I made this!" list.

The recipe Jenni gave us produces 4 loaves of this beautiful sweet bread. She asked us to make at least one of the four with the traditional walnut filling, but left the other three fillings up to us. Although the weather decided to take a strange turn back to summer, I refuse to give up on Autumn. I thought perhaps if I make some seriously Autumn inspired fillings, the weather would go ahead and cool back down from the upper 70's (in Wisconsin. In October. What is this madness?!). I looked to some of my favorite Autumn desserts for inspiration: apple pie, pecan pie and pumpkin pie.

I'll put the recipe for the basic dough and assembly first and follow up with my filling recipes. Because I made 4 different fillings, I found it easiest to simply have them all made before making the dough. If the nut fillings become too thick and set before you want to spread them, you can stir in some warm milk until it is at a spreadable consistency. *Note: the pumpkin and apple fillings make much more than necessary for the bread recipe, but then you have some lovely homemade apple and pumpkin butter  to continue ushering in the cooler weather!

This month's playlist is fairly eclectic. I tried to pick some Eastern European inspired artists, but most of the ones I am familiar with aren't actually on Spotify. So, I did some searching and found a fun mix of artists I already knew and some brand new finds. There are also two classical pieces by Borodin and Mussorgsky that just screamed "play me!" while I was planning this recipe. Also, be sure to check out the Serbian group doing a cover of "Living La Vida Loca"!! So to check it out, click here: Povitica Playlist on Spotify Again, let me know what you think, I am having fun finding music to listen to while I go about each challenge! I think having "The Great Gate of Kiev" playing as you take the povitica out of the oven is the perfect fanfare for this amazing bread!
*Warning: "Immigrant Punk" by Gogol Bordello has a few- quickly passing- obscenities. You may not want to listen to that one with impressionable ears around.*

Povitica (makes 4 loaves)

To activate the yeast:
2 teaspoons sugar
1 teaspoon all-purpose flour
1/2 cup warm water
2 tablespoons dry yeast

Dough:
2 cups whole milk
3/4 cup sugar
3 teaspoons table salt
4 large eggs, beaten
1/2 cup unsalted butter, melted
8 cups all purpose flour, measure first, then sift, divided

Activate Yeast:
1. In a small bowl, stir sugar, flour, warm water and yeast together.
2. Allow to stand for 5 minutes

Make Dough
3. In a medium saucepan, heat the milk to just below boiling (180℉), stirring constantly so that a film does not form on the top of the milk. You want it hot enough to scald you, but not boiling. Allow to cool slightly, until it is about 110℉.
4. In a large bowl, mix the scalded milk, ¾ cup sugar and the salt until combined.
5. Add the beaten eggs, yeast mixture, melted butter and 2 cups of flour.
6. Blend thoroughly and slowly add remaining flour, mixing well until the dough starts to clean the bowl.
7. Turn dough out onto floured surface and knead, gradually adding flour a little at a time, until smooth and does not stick. (you do not need to use all 8 cups of flour)
8. Divide the dough into 4 equal pieces (each will weigh about 1.25 pounds).
9. Place dough in 4 lightly oiled bowls, cover loosely with a layer of plastic wrap and then a kitchen towel and let rise an hour and a half in a warm place, until doubled in size.


Roll and Assemble the Dough
10. Spread a clean sheet or cloth over your entire table so that it is covered.
11. Sprinkle with a couple of tablespoon to a handful of flour (use sparingly)
12. Place dough on the sheet and toll the dough out with a rolling pin, starting in the middle and working your way out, until it measures roughly 10-12 inches in diameter.
13. Spoon 1 to 1.5 teaspoons of melted butter on top of the dough.
14. Using the tops of your hands, stretch dough out from the center until the dough is thin and uniformly opaque. You can also use your rolling pin if you prefer.
15. As you work, continually pick up the dough from the table, not only to help in stretching it, but also to make sure that it isn't sticking.
16. When you think the dough is thin enough, try to get it a little thinner. It should be so thin that you can see the color and perhaps pattern of the sheet underneath.
17. Spoon filling evenly over dough until covered, leaving a small border of dough.
Pumpkin Butter- yum!!
18. Lift the edge of the cloth and gently roll the dough like a jelly roll.

19. Once the dough is rolled up into a rope, gently lift it up and place it into a greased loaf pan in the shape of a "U", with the ends meeting in the middle. You want to coil the dough around itself, as this will give the dough its characteristic look when sliced.
20. Repeat with the remaining three loaves, coiling each rope of dough in its own loaf pan.

21. Brush the top of each loaf with a mixture of ½ cup of cold, strong coffee and 2 tablespoons of sugar. If you prefer, you can also use egg whites in place of the coffee mixture.
22. Cover pans lightly with plastic wrap and allow to rest for approximately 15 minutes.
23. Preheat oven to 350℉.
24. Remove plastic wrap from dough and place into the preheated oven and bake for about 15 minutes.
25. Turn oven temperature to 300℉ and bake an additional 45 minutes, or until done.
26. Remove bread from oven and brush with melted butter.
27. Check the bread every 30 minutes to ensure that the bread is not getting too brown. You may cover the loaves with a sheet of aluminum foil if you need to.
28. Remove from the oven and allow to cool in the pan on a wire rack for 20-30 minutes.
29. Remove from pan, allow to cool fully before cutting. The best way to cut the loaves is by turning the loaf upside down and slice with a serrated knife.

Traditional Walnut Filling (enough for one loaf)
1¾ cups ground English Walnuts
¼ cup Whole Milk
¼ cup unsalted butter
1 egg yolk from a large egg, beaten
¼ teaspoon pure vanilla extract
½ cup sugar
¼ teaspoon unsweetened cocoa powder
¼ teaspoon cinnamon

1. In a large bowl, mix together the ground walnuts, sugar, cinnamon, and cocoa
2. Heat the milk and butter to boiling
3. Pour liquid over the sugar/nut mixture.
4. Add the egg and vanilla and mix throughly
5. Allow to stand at room temperature until ready to be spread on the dough.
6. If the mixture thickens, add a small amount of warm milk.

Pumpkin Spice Filling (makes 3 cups of pumpkin butter)
1 (28 oz) can pumpkin puree- NOT pumpkin pie filling
¾ cup apple juice
2 teaspoons ginger
¼ teaspoon cloves
¼ teaspoon mace
2 teaspoons cinnamon
1 teaspoon nutmeg
1½ cups granulated sugar

1. Combine all ingredients in a large saucepan. Bring to a boil, then reduce to a simmer and cook, stirring often, for 30 minutes, or until mixture thickens.
2. Let cool to room temperature before using.

Cinnamon-Apple Filling (makes 4 cups of apple butter)
1 cup packed brown sugar
½ cup honey
¼ cup apple cider
1 tablespoon ground cinnamon
¼ teaspoon ground cloves
⅛ teaspoon ground mace
10 medium apples, peeled cored and cut into large chunks (about 2 ½ pounds)

1. Combine all ingredients in a 5-quart slow cooker. Cover and cook on low for 10 hours, or until apples are very tender.
2. Place a fine mesh sieve over a bowl, spoon a third of the apple mixture into the sieve and push through using the back of the spoon. Repeat until all the apple mixture has been through the sieve.
3. Return the apple mixture to the slow cooker and cook uncovered on high for 1- 1½ hours or until mixture is thick, stirring occasionally.
4. Let cool to room temperature before using.

Pecan Filling
4 tablespoons unsalted butter
½ cup packed light brown sugar
½ cup light corn syrup
½ teaspoon salt
2 cups chopped toasted pecans
1-2 tablespoons bourbon (optional)
1 teaspoons vanilla extract
1 egg, lightly beaten.

1. In a medium saucepan, combine the butter, brown sugar, corn syrup and salt. Bring to a boil over medium heat, stirring constantly. Boil for 1 minutes.
2. Remove pan from heat, stir in nuts, bourbon, if using, and vanilla. Set the mixture aside to cool slightly, about 5 minutes.
3. Whisk the beaten egg into the filling until smooth.

Monday, October 10, 2011

Ciabatta Bread

So it's shadowy- but the bread is yummy!
The stand off is in week two: I am still denying that the weather is too hot for soup, and mother nature continues to go on her merry upper 70's way. I have the feeling I'm going to win. I just have to wait long enough. So I'm sure you've guessed, I made another soup this past weekend. I'm not giving up on my new soup each weekend in October goal.

Along with our soups, I've been making bread each weekend, because really, what goes better with homemade soup than a nice hot out of the oven homemade bread? I've long loved ciabatta bread (read: nearly obsessed with it) but never made it myself. I was glad to find that this is an easy, no knead bread. Delicious, crusty on the outside and nice and springy on the inside. Just the way bread should be! If you choose to make this, plan on it taking 2 days (mostly inactive time) because this requires you to make a sponge a day in advance. I also used our pizza stone to bake these, as the original recipe calls for a baking stone or 4-6 unglazed "quarry" tiles. I bet it would work on just baking sheets if you don't have a baking stone.

Ciabatta Bread (makes two loaves)
adapted from Gourmet

For the sponge:
⅛ teaspoon active dry yeast
2 tablespoons warm water (105°- 115℉)
⅓ cup room-temperature water
1 cup bread flour

1. In a small bowl, stir together yeast and warm water. Let stand 5 minutes, or until creamy.
2. In another bowl, stir together yeast mixture, room-temperature water and flour. Stir 4 minutes. The mixture should begin to combine and clean the sides of the bowl.
3. Cover bowl with plastic wrap. Let sponge stand at cool room temperature at least 12 hours and up to 1 day.

For bread:
½ teaspoon active dry yeast
2 tablespoons warm milk (105°- 115℉)
⅔ cup room-temperature water
1 tablespoon olive oil
2 cups bread flour
1 ½ teaspoons salt
Dough hook in action! You know it's ready to begin timing now.
1. In a small bowl, stir together yeast and milk and let stand 5 minutes, or until creamy.
2. In the bowl of a mixer fitted with a dough hook blend together milk mixture, sponge, water, oil and flour at low speed until flour is just moistened. Continue to mix an additional three minutes. Add salt and beat an additional 4 minutes.
3. Scrape dough into an oiled bowl  and cover with plastic wrap. Let dough rise at room temperature until doubled, about an hour and a half.
4. Prepare two well floured 12x6 inch pieces of parchment paper.
5. Turn dough out onto a well-floured work surface and cut in half. Transfer each half to a parchment sheet and form into an irregular oval about 9 inches long.
6. Dimple loaves with floured fingers and dust tops of loaves with flour.
7. Cover loaves with a dampened kitchen towel. Let loaves rise at room temperature until almost doubled in size, 1-2 hours.
8. About 45 minutes before baking, if using a baking stone, preheat oven to 425℉. Place baking stone on oven rack placed in the lowest position of the oven.
9. Transfer 1 loaf to the baking stone, sliding onto the baking stone. If you can fit the second loaf onto your stone, go ahead and transfer it. If not, you can bake the second when the first is done.
10. Bake loaves for 20 minutes, or until pale golden. When finished, transfer loaves to a rack to cool.

Tuesday, October 4, 2011

Lemon-Chicken Soup with Orzo

This month my goal was to make a different soup every weekend, freeze half of it, and enjoy while the weather got colder. While I was growing up, my mom would make a dozen different kinds of soup as it started to get colder and freeze them. We ate homemade soup all winter and all we had to do was take a container out of the freezer. I thought that since neither my husband nor I are at home as much this winter, we could get our own soup bank started.

We made chili the last weekend of September and it was glorious to sit under a blanket on the couch, cuddle up with the husband, and warm up with some chili. Of course, this past weekend was really too warm to truly enjoy soup, but at least the recipe I picked was a nice light chicken soup.

This soup starts with making your own chicken stock. After making my own, I will never go back to store-bought stock. It is ridiculously easy and ridiculously delicious. Plus, I like to manage the amount of sodium I'm taking in, so making my own stock is the way to go!

Lemon-Chicken Soup with Orzo
adapted from Cooking Light


Stock Ingredients:
1 4lb whole chicken
2 carrots, peeled and cut into 1 inch pieces
2 celery stalks, cut into 1 inch pieces
1 medium onion, peeled and sliced
6 garlic cloves, crushed
4 sprigs fresh flat-leaf parsley
2 teaspoons whole black peppercorns
2 bay leaves
6 cups water

1. Remove and discard giblets and neck from chicken. Place chicken in a large Dutch oven. Add the rest of the ingredients to the pan and bring to a simmer. Reduce heat and simmer for 45 minutes.


2. Remove chicken from pan, place aside to cool for about 15 minutes. Discard the skin. Remove meat from the bones, discarding the bones. Chop (or shred with your fingers) chicken into bite-sized pieces. Place meat into a covered container and refrigerate.

3. Strain broth mixture through a sieve into a large bowl. Discard the solids. Cool broth to room temperature. Cover and chill for 8-24 hours (allowing the fat to rise to the surface and solidify). Skim fat from surface and discard.


Lemon-Chicken Soup Ingredients
1 ⅓ cups chopped carrot
1 ¼ cups chopped onion
1 cup chopped celery
2 teaspoons salt
8 oz uncooked orzo
¼ cup chopped fresh flat-leaf parsley
2 ½ teaspoons grated lemon rind
¼ cup fresh lemon juice

4. Add water to broth to equal 9 cups, place broth mixture in a large Dutch oven. Add the carrot, onion, celery and salt to pan and bring to a boil. Cover, reduce heat and simmer for about 15 minutes or until vegetables are tender. Add the chicken meat and simmer for about 3 minutes.


5. Meanwhile, cook the orzo according to the package directions, omitting salt and fat. Add the pasta to the pan with the chicken and broth mixture. Stir in parsley, lemon rind and lemon juice.


Tuesday, September 27, 2011

Daring Bakers September 2011- Croissants!

 The Daring Bakers go retro this month! Thanks to one of our very talented non-blogging members, Sarah, the Daring Bakers were challenged to make Croissants using a recipe from the Queen of French Cooking, none other than Julia Child!


Croissants have been on my to-bake list ever since I got the Julia Child cookbook for Christmas. I looked at the recipe and thought to myself "12 hours is much too long for a just-any-day recipe. I'll make them for Christmas next year". Then the September challenge was posted, and I was so excited. And a little nervous. This recipe takes a long time to make (if you're counting all the rising times, which isn't active baking time, so don't count it). It involves making layers of dough and butter and getting it all rolled out and perfect so it will be flakey and delicious. Don't worry so much about that. Make sure your butter is cold and you're good to go. And that you didn't just begin a weights program for your arms the day before rolling all this stuff out.
Cinnamon-Sugar flaky deliciousness!
I made the original Julia recipe and two off-shoots. The first was fairly straightforward: cinnamon and sugar croissants. The second was in homage to my husband, who for whatever reason loves white chocolate: raspberry white chocolate croissants. Because really, I didn't get to work with chocolate enough in the last challenge.  The raspberry white chocolate croissant definitely won the day. Everyone who tried it at our Packer Party loved it and it was by far my favorite of the three. Even with white chocolate. I found it fairly easy to just roll whatever filling into the croissant, so the possibilities are truly endless. Next time I'll try some different variations!
Look at that yummy raspberry oozing out!

Croissants (basic recipe, ala Julia Child)
One dozen 5½ inch croissants

1¼teaspoon dry-active yeast
3 Tablespoons warm water (not over 100℉)
1 teaspoons sugar

1. Proofing the yeast: mix the yeast in the warm water with the sugar and let liquefy (a foam should form on the top of the mixture, this shows that the yeast is "alive")

1 ¾ cups all purpose flour
2 teaspoons sugar
1½ teaspoon salt
⅔ cup milk warmed to tepid in a small sauce pan
2 tablespoons tasteless oil (such as vegetable oil)

1. Measure the flour into a large mixing bowl. Dissolve the sugar into the tepid milk.
2. Combine oil, yeast and milk mixture into the bowl with the flour. Blend with a rubber spatula until completely combined.
3. Turn dough out onto a surface that has been lightly floured. Let rest for 2-3 minutes while you wash and dry the mixing bowl.
4. Start kneading by lifting near the edge, using a scraper or spatula to help, and flipping it over to the other side. Rapidly repeat from one side to the other and end over end 8-10 times until the dough feels smooth.

5. Place dough back into the large bowl, cover with plastic wrap or plastic bag. I then placed the bowl into the oven, slightly ajar, with the oven light on. Allow the dough to rise for about 3 hours, or until tripled.
6. Deflate by loosening dough with a rubber spatula, and turn out onto a lightly floured surface. Pat and push the dough into a rectangle (8x12 inches) with the palms of your hands. Fold the bottom third up, and the top third down, like a business letter. Return dough to bowl, cover again with plastic and let rise for about 1 ½ hours, or until doubled. (At this point, the second rise may be done overnight in the refrigerator)
7. Loosen dough from edges of the bowl and turn out onto a plate. Cover airtight and refrigerate for 20 minutes.


1- 1¾ sticks chilled unsalted butter

1. Julia advises that if this is your first try at making croissants, use only 1 stick of butter. If you've done this a few times the larger amount may be used.
2. Beat butter with a rolling pin to soften it.
3. Smear the butter out with the heel of your hand or a scraper or spatula until it is an easy spreading consistency but still cold. If it gets too warm (i.e. oily and soft), return it to the refrigerator for a bit.

4. Place the chilled dough onto a lightly floured surface. Push and pat it out into a rectangle 14x8 inches.
5. Spread butter as evenly as possible over the upper two thirds of the dough, leaving a 1/4 inch unbuttered boarder all around.
6. Fold the bottom third of the dough up, and the top third down (again, like a business letter).

7. Turn the dough so the edge of the top flap is to your right, as though it were a book. Roll the dough into a rectangle, about 14x7 inches. Roll rapidly, starting an inch from the near end and going to within an inch of the far end.
8. Fold again in three. Wrap in plastic and refrigerate for 1- 1½ hours.
9. Unwrap dough, deflate by tapping lightly several times with a rolling pin. Cover and let rest 8-10 minutes.
10. Being sure that the top and bottom of dough are lightly floured, roll dough into a rectangle 14x6 inches. If you notice that butter has congealed into hard flakes, beat dough with firm taps for a minute or so to soften.
11. Fold rectangle in three again. Wrap and chill for 2 hours, or leave overnight (put something heavy on top so it doesn't rise too much)

12. Forming croissants: unwrap chilled dough and place on a lightly floured surface. Deflate by tapping several times with rolling pin. Cover with plastic and let rest 10 minutes.
13. Roll dough into a rectangle 20x5 inches, cut in half crosswise, chill one of the halves.
14. Roll the piece of dough into a rectangle 15x5 inches, cut into three equal pieces. Chill two of the pieces.
15. Roll the piece of dough into a 5½ inch square and cut into two triangles. Stretch the triangle to transform from a right triangle to an isosceles triangle.
16. Roll the croissant first by folding the large end forward onto itself. Then, holding the point with the fingers of one hand, roll the larger end up with the other.
17. Bend the two ends down to form a crescent shape and place on a lightly buttered baking sheet, with the point resting into the curve and against the surface of the baking sheet. (Formed croissants may be wrapped airtight and frozen for a week, if the dough was not previously frozen.)
18. Repeat with the remaining pieces of dough. Cover croissants loosely with a large sheet of plastic wrap. Let rise for 1½ hours.


1 egg, beaten with 1 teaspoon water, for egg wash

1. Just before baking, paint the croissants with the egg wash.
2. Set in the middle of a preheated 475℉ oven. Bake for 12-15 minutes or until croissants are nicely puffed and brown. Cool on a rack for 10-15 minutes before serving.


Variants:
Cinnamon Sugar Croissants: Sprinkle cinnamon and sugar on dough just before rolling to form croissant.

Raspberry White Chocolate Croissants: Spread dough with raspberry preserves and roll a piece of white chocolate in the larger end of the croissant.

Edit: I forgot!! I thought that since I'm  a musician by trade it might be fun for me to upload a playlist of music I listened to while making each challenge. This one is decidedly French, full of artists I love to listen to regardless of whether or not I'm knuckle deep in croissant dough and covered in flour. So here is a link to my "croissant" play list on Spotify. Let me know what you think about this idea- I'm still playing around with how to share the playlists, so if you have any tips on that, do share!


Saturday, September 17, 2011

Beef with Couscous


The school year has started, Autumn is making itself known, and my time in the kitchen has been greatly diminished. This last week I only had one night that I was home before 9pm, and that was Monday. I can't say that I'm not enjoying all the activity that is keeping me out of the kitchen, I love my new job at the school and am having a good time networking with people. I simply miss having all the good cooked food that is the result of fun time in the kitchen.

Last weekend, my husband and I finally had some time to spend together, and in the kitchen. My goal for this fall is to get him more into cooking, since I'd be happy spending the whole weekend in the kitchen and the weekend is the only time we get to spend together. It is a bit selfish, I know. But I go to his gigs!! So, Dave spent Saturday and Sunday evening in the kitchen with me, helping me cut up vegetables and making rice (I can make truffles, but I cannot make rice that isn't soggy and gloopy to save my life!)

We had this dish on Sunday and it was a nice change from our usual Italian and Tex-Mex dishes. Also, I got to go to Penzey's and buy a new spice mix.
I just love that place! I'm sure you've noticed. I picked up some of their Garam Masala mix, which smells like heaven. I'm looking forward to using it in future Indian-inspired recipes. Chicken Tikka Masala, here we come!

Beef with Couscous
1 tablespoon vegetable oil
1 medium onion, chopped
2 garlic cloves, crushed with garlic press
1 teaspoon minced, peeled fresh ginger
1 pound lean ground beef
1 tablespoon curry powered
1 teaspoon garam masala spice mix
1/2 teaspoon salt
1 small yellow summer squash, cut into 1/2 inch chunks (I think you could substitute whatever is currently in season)
1 cup chicken broth
1 cup frozen peas (I forgot to pick these up, so we used corn. it was still good!)
1/2 cup loosely packed fresh cilantro leaves, chopped
1 cup plain couscous
1/2 cup golden raisins

1. In nonstick 12-inch skillet, heat oil over medium-high heat. Add onion and cook 3 minutes or until golden. Stir in garlic and ginger; cook 1 minute.

2. Stir in ground beef and cook, breaking up meat with side of spoon, about 5 minutes, or until meat is no longer pink. Stir in curry powder, garam masala, and salt; cook 30 seconds. Add squash and cook 2 minutes.

3. Add broth and frozen peas; cook until slightly thickened and flavors blend. Stir in cilantro.

4. Meanwhile, prepare couscous as label directs but add raisins with water.

5. Fluff couscous with fork and serve with beef mixture. Enjoy!


Saturday, August 27, 2011

The Daring Bakers August 2011


The August 2011 Daring Bakers’ Challenge was hosted by Lisa of Parsley, Sage, Desserts and Line Drive and Mandy of What the Fruitcake?!. These two sugar mavens challenged us to make sinfully delicious candies! This was a special challenge for the Daring Bakers because the good folks at http://www.chocoley.com offered an amazing prize for the winner of the most creative and delicious candy!


My first Daring Baker's Challenge. I had been crossing off the days on the calendar, with a mix of excitement and trepidation. I've seen what kind of things show up in these Challenges. But when you don't actually have to produce one of these delicious treats, you think "oh, I could totally do that!". Until you see your first challenge. And it is TEMPERED CHOCOLATES. Now, I live in a world where chocolate is a food group. At the biggest part of the food pyramid. But I'd never attempted to make truffles. I have to admit that I was scared beyond belief to do this challenge. Then I sat down, read through it again and told myself it would all turn out okay, and even if it came out looking ugly it would still taste good. It did all turn out okay, even though my Chocolate Caramel Fleur de Sel Truffles didn't come out just how I wanted, and I was hopeless at tempering. Can't do everything perfectly the first time, I guess. Tempering is now on my list of things to practice (yum!), but I didn't tackle it right away since we are having the family over to celebrate our birthdays and I have quite a menu to execute. I'm telling you, though, I WILL get this tempering down. I'm too excited about giving beautiful, shiny truffles to all my new co-workers at the school for Christmas this year. 


This being my first challenge, I decided to take it easy (and since I was so darn scared) and do two of the recipes verbatim from the challenge posting. Then I would branch out (and try the whole frightening tempering thing). So I made Strawberry Paté de Fruits, Milk Chocolate and Hazelnut Praline Truffles, and Chocolate Caramel Fleur de Sel Truffles.


Strawberry Paté de Fruits


Recipe by Elizabeth LaBau, About.com Guide
Makes about 40-64 squares depending on size cut, recipe easily doubled or halved
Ingredients:
3 cups (16 oz/450 gm) Strawberries, fresh or defrosted from frozen
1 tablespoon (15 ml) Lemon juice, fresh
2 cups (16 oz/ 450 gm) Granulated White Sugar
2½ tablespoons (38 ml) Liquid Pectin

Directions:
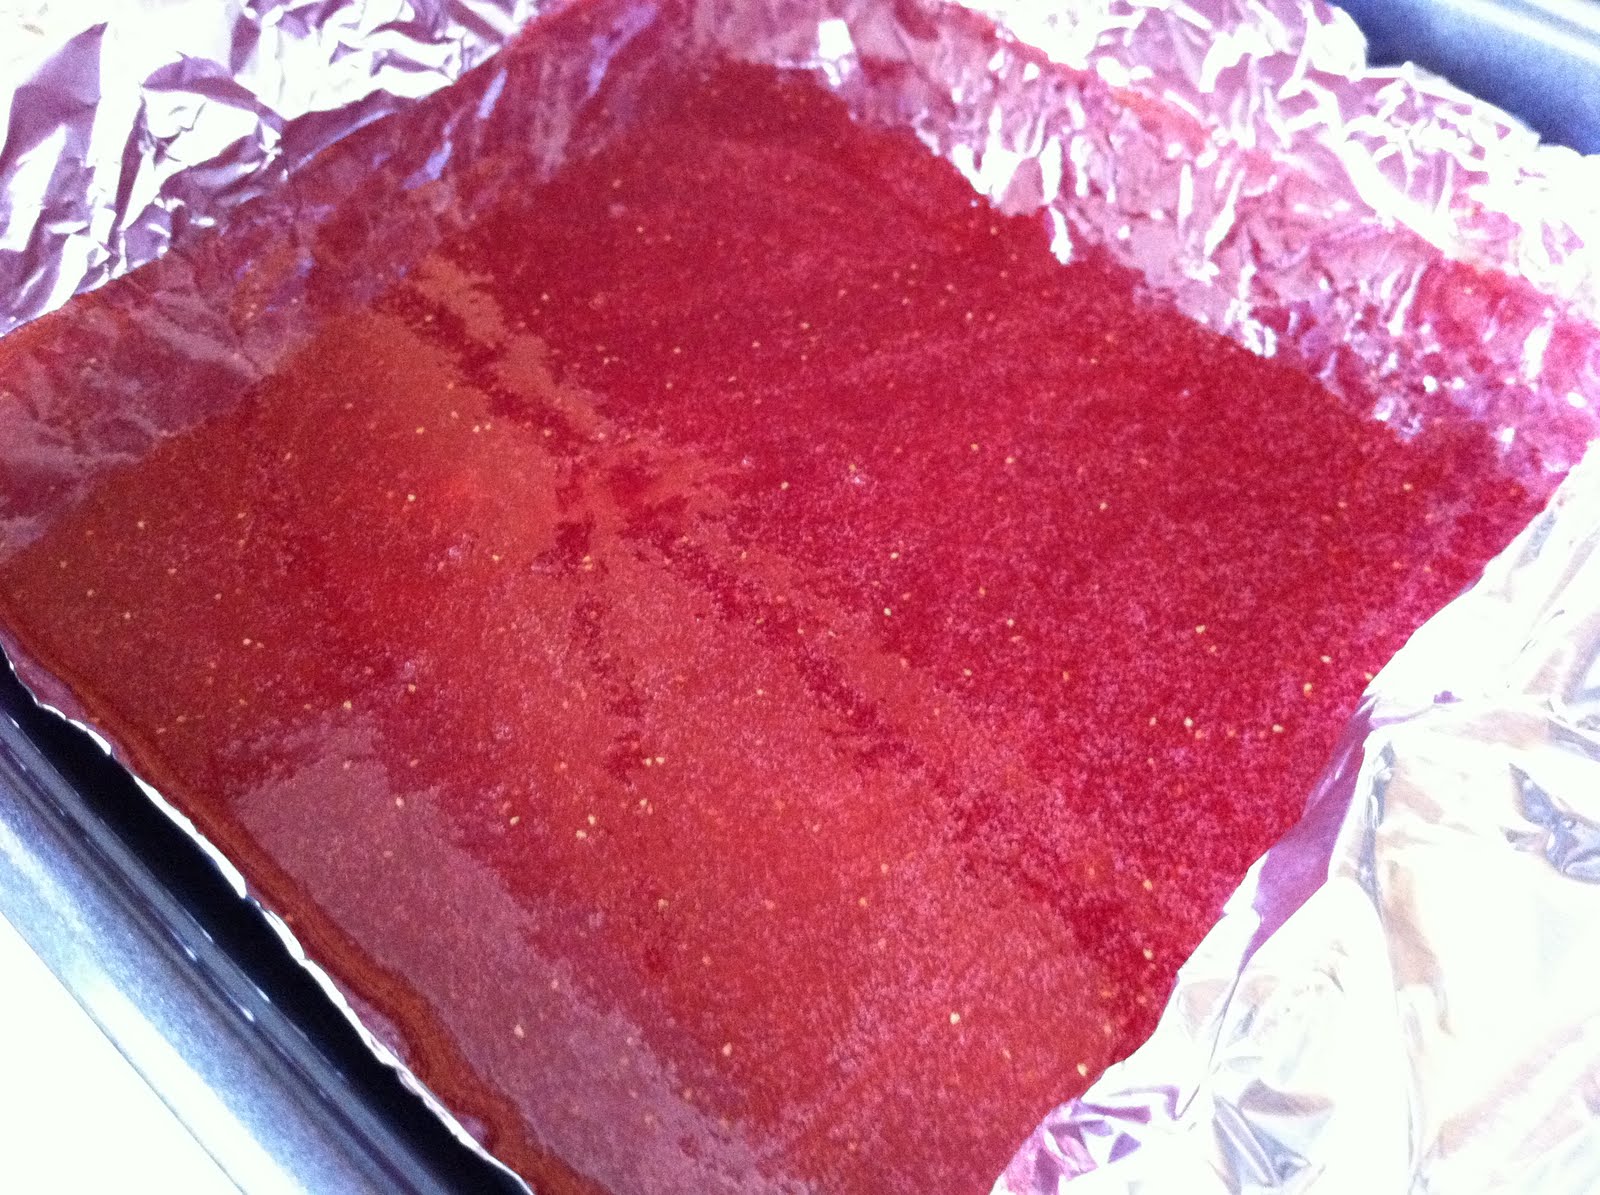
1. Prepare an 8”x8” (20cmx20xm) pan by lining it with aluminium foil or parchment paper and spraying it with non-stick cooking spray.
2. Place the strawberries in a blender or food processor and process until very well pureed.


3. Pour them through a mesh strainer into a medium saucepan, discarding any remaining fruit chunks. Stir in the lemon juice and 1/2 cup of the sugar, place the pan over medium-high heat, and insert a candy thermometer.
4. Cook the mixture, stirring constantly, until it is hot, around 140°F/60°C. Add the remaining 1.5 cups of sugar and the liquid pectin, and lower the heat to medium.


5. Continue to cook, stirring frequently, until the mixture registers 200°F/93°C. At this point, turn the heat to low and hold it at 200°F/93°C for 2-3 minutes. After this, return the heat to medium and bring it up to 225°F/107°C. This process will take some time, especially with the heat on medium, so have patience and be diligent in stirring frequently so the bottom doesn't scorch.
6. Once the fruit paste reaches 225°F/107°C, turn the heat to low and keep it at that temperature for an additional 2-minutes.
7. Remove the pan from the heat and scrape (Note from Lisa: I poured it in, it should still be quite liquid) the strawberry pate de fruit mixture into the prepared pan, smoothing it into an even layer.


8. Allow the pate de fruit mixture to set at room temperature for several hours, until completely cool and firm. Use a sharp knife to cut it into very small squares, and roll the individual pieces in granulated sugar.
9. The strawberry pate de fruits can be served immediately, or refrigerated in an airtight container for up to a week. If refrigerated, the pieces may need to be re-rolled in granulated sugar before serving.
Note: 
"Some paté de fruits take quite a long time to cook. If you think about what's happening, you're cooking all of the liquid out of the fruit puree and reducing it to a very thick paste. The exact amount of time depends on a lot of factors, like how much water was in your puree to begin with, the capabilities of your stove, and the quality of the pan you use. But you can expect the process to take at least 30 minutes and sometimes up to an hour. I do want to add that this is easier on a gas range, but can absolutely be done on an electric stove - in fact, I use a very old electric stove at home and it works fine." - Elizabeth LaBau

Milk Chocolate & Hazelnut Praline Truffles


Servings: Makes +- 30 truffles, recipe easily doubled or halved
Adapted from the Cook’s Academy Curriculum, Dublin
Active Time: 1 - 2hrs
Ganache Setting Time: 2 - 4hrs or Overnight
Praline Ingredients:
½ cup (2 oz/60 gm) hazelnuts, shelled & skinned
½ cup (4 oz/115 gm) granulated white sugar
2 tablespoons (30 ml) water

Directions:
1. Preheat oven to moderate 180°C / 160°C Fan Assisted (convection oven); 350°F / 320°F convection / Gas Mark 4
2. Place whole hazelnut on a non-stick baking tray and dry roast for 10mins
3. Allow to cool
4. Place hazelnuts in a clean dry kitchen towel and rub to remove the skins
5. Line a baking tray with parchment paper or a silicon mat
6. Place the skinned hazelnuts onto the prepared tray
7. Combine the sugar and water in a saucepan over medium low heat, stirring until the sugar is dissolved
8. Turn the heat up and bring to the boil (do not stir), brushing down the sides of the pot with a pastry brush dipped in water to remove any sugar crystals
9. Boil until the mixture turns amber (160°C - 170°C / 320°F- 340°F on a candy thermometer)
10. Remove from heat immediately and pour the syrup over the hazelnuts
11. Allow to cool completely
12. Break into small pieces
13. Transfer pieces to a food processor and process until desired texture, either fine or rough
14. Set aside
½ - 1 cup Crushed or Ground Roasted Hazelnuts for coating

Ganache Ingredients
1¾ cup (9 oz. / 255 g) Milk chocolate, finely chopped
½ cup (4 oz. / 125 ml) Double/Heavy Cream (36% - 46% butterfat content)
2-3 Tablespoons (1-1 ½ oz. / 30ml – 45 ml) Frangelico Liqueur, optional
Directions:
1. Finely chop the milk chocolate
This looks like heaven. Little pieces of chocolate heaven.

2. Place into a heatproof medium sized bowl
3. Heat cream in a saucepan until just about to boil
4. Pour the cream over the chocolate and stir gently until smooth and melted
5. Allow to cool slightly, about 10 minutes
6. Stir in the praline and (optional) liqueur

7. Leave to cool and set overnight or for a few hours in the fridge
8. Bring to room temperature to use
Forming the truffles:
1. Using teaspoons or a melon baller, scoop round balls of ganache
2. Roll them between the palms of your hands to round them off
Tip: Handle them as little as possible to avoid melting
Tip: I suggest wearing food safe latex gloves, less messy and slightly less heat from your hands
3. Finish off by rolling the truffle in the crushed roasted hazelnuts
This is how I crush nuts in lieu of a food processor. Also good for stressful days. 

Tip: You can also roll them in hazelnut praline
4. Place on parchment paper and leave to set
Tip: They look great when put into small petit four cases and boxed up as a gift!
I have to agree, they do look great. And they are delicious!


Last, but not least, The One That Got Away, so to speak. I had all sorts of trouble with this one. From the caramel not cooking right (all the caramel's fault, not mine of course) to struggling with keeping my chocolate at the right temperature. These are still decadent, the balance between the salt and sweet just makes them perfect (if you keep your eyes closed when choosing one). 


Chocolate Caramel Fleur de Sel Truffles

Only shiny because they are still wet- not because they are tempered.

Total time: 12 hours (active time is 1 hour)
Makes: approx 35-40 truffles

Ingredients:
8 oz dark chocolate, finely chopped
12 oz same quality chocolate, chopped into larger pieces
⅓ cup sugar
⅔ cup half and half
2 tablespoons water
¼ teaspoon Fleur de Sel (you can use Sea Salt, but I saw this at Penzey's and needed to buy it. You know how that goes)
¾- 1 cup cocoa powder (for dusting)

1. Create a double boiler- or if you have lots of cabinet space, just use your handy dandy ready made one- by placing a mixing bowl (glass or metal) on top of a saucepan with about an inch of water inside. Add the 8 oz of chopped chocolate. Do not turn on the heat yet. 
2. In another saucepan, mix together the sugar and water. Pour cream in a bowl and place nearby. 
Ganache looks so pudding-y delicious.
3. Heat the sugar and water mixture over medium heat. Look but don't touch! Heat the chocolate while the caramel is cooking, stirring constantly to encourage even melting. Remove chocolate from heat when it is all melted. 
4. When the caramel mixture is a dark amber color (320-340℉) remove from heat. Wait a few moments then stir in the cream until it is well mixed and smooth. Pour the caramel mixture into the warm, melted chocolate. Stir in the Fleur de Sel. Cover ganache with plastic wrap and refrigerate 3 hours. 
5. Remove ganache from fridge. Using a melon baller or spoon, create small balls (about ¾") from the ganache. Roll each ball in your hands to shape and roll in the cocoa powder. Place on a baking sheet lined with waxed paper. Refrigerate 8 hours or overnight.

6. Temper your remaining 12 oz of chocolate. I used the "seeding method" outlined here:

• Finely chop chocolate if in bar/slab form (about the size of almonds).
• Place about ⅔ of the chocolate in a heatproof bowl
• Set aside ⅓ of the chocolate pieces
• Place bowl over a saucepan of simmering water (make sure the bowl does not touch the water)
Tip: Make sure that your bowl fits snuggly into the saucepan so that there’s no chance of steam forming droplets that may fall into your chocolate. If water gets into your chocolate it will seize!
• Using a rubber spatula, gently stir the chocolate so that it melts evenly
• Once it’s melted, keep an eye on the thermometer, as soon as it reaches 45°C / 113°F remove from heat (between 45°C-50°C / 113°F-122°F for dark chocolate)
• Add small amounts of the remaining ⅓ un-melted chocolate (seeds) and stir in to melt
• Continue to add small additions of chocolate until you’ve brought the chocolate down to 27°C/80.6°F (You can bring the dark chocolate down to between 80°F and 82°F)
• Put it back on the double boiler and bring the temperature back up until it reaches its working temperature of the chocolate (milk, dark or white) as seen in the above chart. (32°C/89.6°F for dark, 30°C/86°F for milk and 29°C/84.2°F for white)
• If you still have a few un-melted bits of chocolate, put the bowl back over the simmering water, stirring gently and watching the thermometer constantly.
IMPORTANT: You really need to keep an eye on the temperature so that it doesn’t go over its working temperature
It’s now tempered and ready to use

7. Drop cocoa dusted chocolates into the tempered chocolate. Gently pick up with a fork, tap on the edge of the bowl to remove excess chocolate. Place onto baking pan lined with wax paper. Sprinkle a few granules of Fleur de Sel on top and allow to set.