Thursday, June 27, 2013

The Daring Bakers June 2013: perfectly pleasing pies!


Rachael from pizzarossa was our lovely June 2013 Daring Bakers’ host and she had us whipping up delicious pies in our kitchens! Cream pies, fruit pies, chocolate pies, even crack pies! There’s nothing like pie! :)


I knew this month would be a "must-do" because, as I'm sure I've mentioned before, my husband loves pie. Wanted wedding pies instead of a wedding cake kind of love for pie. I've also been wanting to experiment with different pie crusts because I haven't quite found that one recipe that I really like as my go-to. When I was looking through the 4 different recipes Rachael provided, I was intrigued by the crostata. I am always looking for a use for my tart pan and the idea of using fresh summer fruits as a filling really sounded great. I used peaches, plums and blueberries in my crostata, although you can use any combination of fruits or jams that you like! I love a flexible recipe.
When I was making the dough I was so pleased with the fresh smell from the lemon zest and the wonderful texture as I rolled it out. This is a great dough recipe! The only issue I ran into was that my tart pan is a bit bigger than the original recipe called for, so I didn't have quite enough to make the lattice top look great. That could also be due to me being a little lazy with the rolling and cutting and actually putting the lattice pieces on. Either way, I'll definitely be using this dough recipe again!

A quick update on project babies: At the writing of this post, we are 37 weeks into the pregnancy. By the time this gets posted, we will be one day away from holding our two little ones in our arms (or will have had them already! crazy thought!) Now that school is finished for the summer and I am just waiting for labor to begin at any moment, I find myself planning kitchen projects that are a bit more optimistic than the realities of my physical situation will allow. This was a great, simple project that I could handle, even when I can barely reach the counter due to my giant stomach being in the way. I can't roll out dough without having a line of flour on my shirt, nor can I wash dishes by hand without also giving the front of whatever I am wearing a good soaking as well. I don't mind too much, and the babies must be getting lots of happy endorphins from me being in the kitchen, because they are always dancing around when I'm happily cooking away.

Stone Fruit Crostata (filling adapted from Ina Garten's Summer Fruit Crostata )

Ingredients:
Pasta Frolla (basic Italian pie pastry)

2/3 cup unsalted butter, room temperature
1/3 cup sugar
1 large egg, room temperature
1 teaspoon vanilla extract
grated zest of 1 medium lemon
1-2/3 cups all-purpose (plain) flour
pinch salt

Fruit Filling
1 pint blueberries
1 lb firm peaches (peeled)
1/2 lb firm black plums
1 tbs flour
1 tbs sugar
2 tbs orange juice

Pastry
1. Using a paddle attachment on a stand mixer or an electric hand mixer or whisk, cream the butter and sugar until pale and fluffy, 2 -5 minutes. The amount of time you cream the butter will affect the final
dough - longer means lighter which in turn means a softer, more fragile dough which is less easy to work, but I prefer the texture of the cooked pastry this way because it's lighter too. If you want to do a more intricate lattice, I'd recommend a shorter creaming time so you have a firmer dough.

2. Add the egg, vanilla and lemon zest, one at a time, mixing thoroughly after each addition.

3. Add the flour and salt and mix until the dough comes together but remains soft, about 1 minute using a stand or electric mixer or a wooden spoon if mixing by hand. Don't over-mix.

4. Wrap dough in plastic wrap and refrigerate for 30 minutes to one hour. When getting ready to bake, rest dough at room temperature for about 30 minutes.

5. Lightly grease a shallow metal pie or tart pan. On either a piece of parchment or a lightly floured surface, roll 2/3 of the dough out to a circle to generously line the pie dish.

6. Transfer the dough to the pie dish, press in gently and roll the edges to form a good surface for attaching the lattice later. Prick all over the bottom with a fork.

7. Refrigerate the dough-lined pie dish for 30 minutes to reduce shrinkage during baking. Preheat oven to moderate 350°F.

8. Line pastry with parchment and fill with dry beans or pie weights. Bake until set, around 15 minutes.

9. Remove the weights and parchment and allow to cool. If using a springform or loose based pie dish, remove the side of the pan.

10. Preheat oven to moderately hot 400°F. Roll the remaining dough to fit the pie dish and cut it into roughly half inch wide strips.

11. Spread the filling over the par-baked crust. Arrange the strips of dough in a lattice over the filling, trim as needed and lightly pinch the ends onto the rolled edge of the bottom crust.

12. Place pie dish on a baking sheet and place in center of oven. Bake until lattice is golden, around 20 minutes.

Filling
1. Cut the peaches and plums in wedges and place them in a bowl with the blueberries. Toss them with 1 tablespoon of the flour, 1 tablespoon of the sugar, and the orange juice. (that's it. simple, right?!)

Monday, May 27, 2013

The Daring Bakers May 2013:Traditional Swedish Prinsesstårta

Korena of Korena in the Kitchen was our May Daring Bakers’ host and she delighted us with this beautiful Swedish Prinsesstårta!


This one came in just under the wire, kids. As in, I finished the recipe about 5 minutes ago. This month was truly a challenge (as they all have been recently- I know, I know, quit whining about being pregnant and tired) in more ways than one. First, I didn't quite get the sponge cake spongey enough, so it didn't rise as much as it should. Second, I had to make two batches of pastry cream and neither one was up to my standards (although, the second was usable where the first was just disgusting.) Third, I had plans to make and use marshmallow fondant rather than marzipan, which is great, but I've never made nor used marshmallow fondant before so there was a bit of swearing and tantrum throwing before I finally wised up and used enough icing sugar to make it not stick to the counter.
Updated to add this photo of the awesome layers!
We haven't cut into it yet, but I'm excited to try it. I'll edit this post with more photos after we have some. The best part is all the layers inside! I think that with practice this would not be a very difficult cake to make, and it sure looks impressive. I'll put this recipe into the "try again another time" pile and hopefully in the future give it another go. Until then, I'm going to put my feet up and wait the 5 or so more weeks until my own little baking projects arrive!

Here is a link to the recipe on The Daring Kitchen website.

Saturday, April 27, 2013

The Daring Bakers April 2013: Savarin


Natalia of Gatti Fili e Farina challenges us to make a traditional Savarin, complete with soaking syrup and cream filling! We were to follow the Savarin recipe but were allowed to be creative with the soaking syrup and filling, allowing us to come up with some very delicious cakes!

Yep, still alive. Yep, still bad at updating the blog. I kept looking at all the wonderful challenges and telling myself I'd make it later, but then next thing I knew it was the posting date and I hadn't done the challenge. This month I made a concerted effort to find the time to do the challenge and we enjoyed it at a brunch with friends. This was a delicious cake that was well worth the work. This is a great recipe to make when you're in the 3rd trimester with 5 lbs of babies kicking around inside of you and you need to sit down frequently while cooking. 

I decided to simply follow the delicious looking recipe that Natalia had provided, as I was lucky to be doing the challenge in the first place. The peach flavors were a lovely fresh addition to our brunch. I'd definitely like to experiment with different flavor combinations in the future. 

Savarin Servings:8/10

Ingredients
21⁄2 cups  bread flour
2 tablespoons water, lukewarm
6 large eggs at room temperature, separated
1⁄2 satchel  instant yeast 
4 teaspoons sugar
2/3 stick  butter at room temperature
1 tablespoon  orange and lemon zest (optional) 
1 teaspoon salt
1⁄4 cup butter for greasing the work surface, hands, dough scraper & baking pan

Directions:
Sponge
In a small bowl mix 2 tablespoons lukewarm water, 3 tablespoons flour and yeast , cover with cling film and let rise 60 minutes

Dough
1. After 30 minutes put the egg whites in the mixer bowl and start working with the paddle at low speed adding flour until you have a soft dough that sticks to the bowl (about 2 cups) and work until it comes together , cover with cling film and let rest 30 min
2. Add the sponge to the mixer bowl along with a tablespoon of flour and start mixing at low speed (if you wish to add the zests do it now)
3. When it starts pulling away from the sides of the bowl add one yolk and as soon as the yolk is absorbed add one tablespoon of flour
4. Add the second yolk , the sugar and as soon as the yolk is absorbed add one tablespoon of flour
5. Raise the speed a little
6. Add the third yolk and the salt and as soon as the yolk is absorbed add one tablespoon of flour
7. Keep on adding one yolk at the time and the flour saving a tablespoon of flour for later
8. Mix the dough until is elastic and makes “threads”
9. Add the butter at room temperature and as soon as the butter is adsorbed add the last tablespoon of flour
10. Keep on mixing till the dough passes the “window pane test”
11. Cover the dough with cling film and let it proof until it has tripled in volume (2 to 3 hours)
12. You can prepare the Pastry cream now if you chose to use it, and refrigerate it
13. While you wait prepare your baking pan buttering it very carefully not leaving too much
butter on it
14. Grease your dough scraper, your hands and your work surface and put the dough on it and fold with the Dough Package Fold two or three times around (5 folds twice or three times). Cover with cling foil and let it rest 15 minutes on the counter
15. Turn the dough upside down and with the help of your buttered dough scraper shape your dough  in a rounded bun
16. Make a hole in the center with your thumb and put it in the prepared pan
17. Cover with cling film and let rise in a warm spot until the dough reaches the top of the pan (about 1 hour)
18. Pre-heat oven to moderate 340°F
19. Bake the Savarin for about 40 minutes until the top is golden brown
20. Meanwhile prepare the Syrup
21. When the Savarin is done take it out of the oven and let it cool.
22. You have two choices now : you can immerse it in syrup right now or you can let it dry out (so
it will lose some of his moisture that will be replaced by the syrup) and soak it later on.
23. To immerse it in syrup it is a good idea to place it in the mold you baked it in (I’m afraid a
spring-form one wouldn’t work for this) and keep adding ladles of syrup until you see it along the rim of the pan. Or you can just soak it in a big bowl keeping your ladle on top of it so it doesn’t float. Once the Savarin is really well soaked carefully move it on a cooling rack positioned over a pan to let the excess syrup drip.
24. The soaked Savarin gains in flavor the next day
25. Whatever you decide the day you want to serve it glaze it and fill the hole with your filling of
choice and decorate it. You can serve the Savarin with some filling on the side.
26. Enjoy it!

Peach Flavored Syrup:
Servings: 1 savarin
Ingredients
11⁄2 cups peach tea
11⁄2 cups peach juice
11⁄2 cups water
1 cup sugar 
zest of one lemon
one cinnamon stick

Directions:
1. Combine tea, water, sugar, lemon zest and cinnamon stick and bring to a boil
2. Let boil 5 minutes and remove from the stove
3. When cooled a bit add the peach juice.

Glaze:
Servings:1 savarin
Ingredients
2 tablespoons apricot Jam 
2 tablespoons water
Directions:
1. In a saucepan mix jam and water and warm up
2. When the savarin is cool and soaked brush it with the glaze

Pastry Cream and Chantilly:
Servings: 1 savarin plus some for serving
Ingredients
2 cups milk
1⁄4 cup sugar
zest of one lemon
2 large egg yolks
1 large egg
2 tablespoons cornstarch 
1⁄4 cup sugar
1 cup  heavy cream

Directions:
1. In a saucepan bring to a boil milk and sugar
2. In a bowl whisk together egg yolks, egg, cornstarch and sugar
3. Add the hot milk to the eggs one tablespoon at the time to temper it
4. Pour in the saucepan again and bring to a boil stirring constantly
5. When the cream thickens remove from the stove
6. Put cling film onto the cream (touching the surface) and cool
7. Pour 1 cup cold heavy cream in mixer bowl with the whisk attachment
8. Beat until whipped
9. Combine with the cooled pastry cream adding a tablespoon at the time of whipped cream until it gets to the right consistency. (or it looks right to you!)

Storage & Freezing Instructions/Tips:
You can store the dried savarin for 5 days in a closed container. If you have soaked it cover well with cling foil and store it in the refrigerator for up to 5 days.

Sunday, January 27, 2013

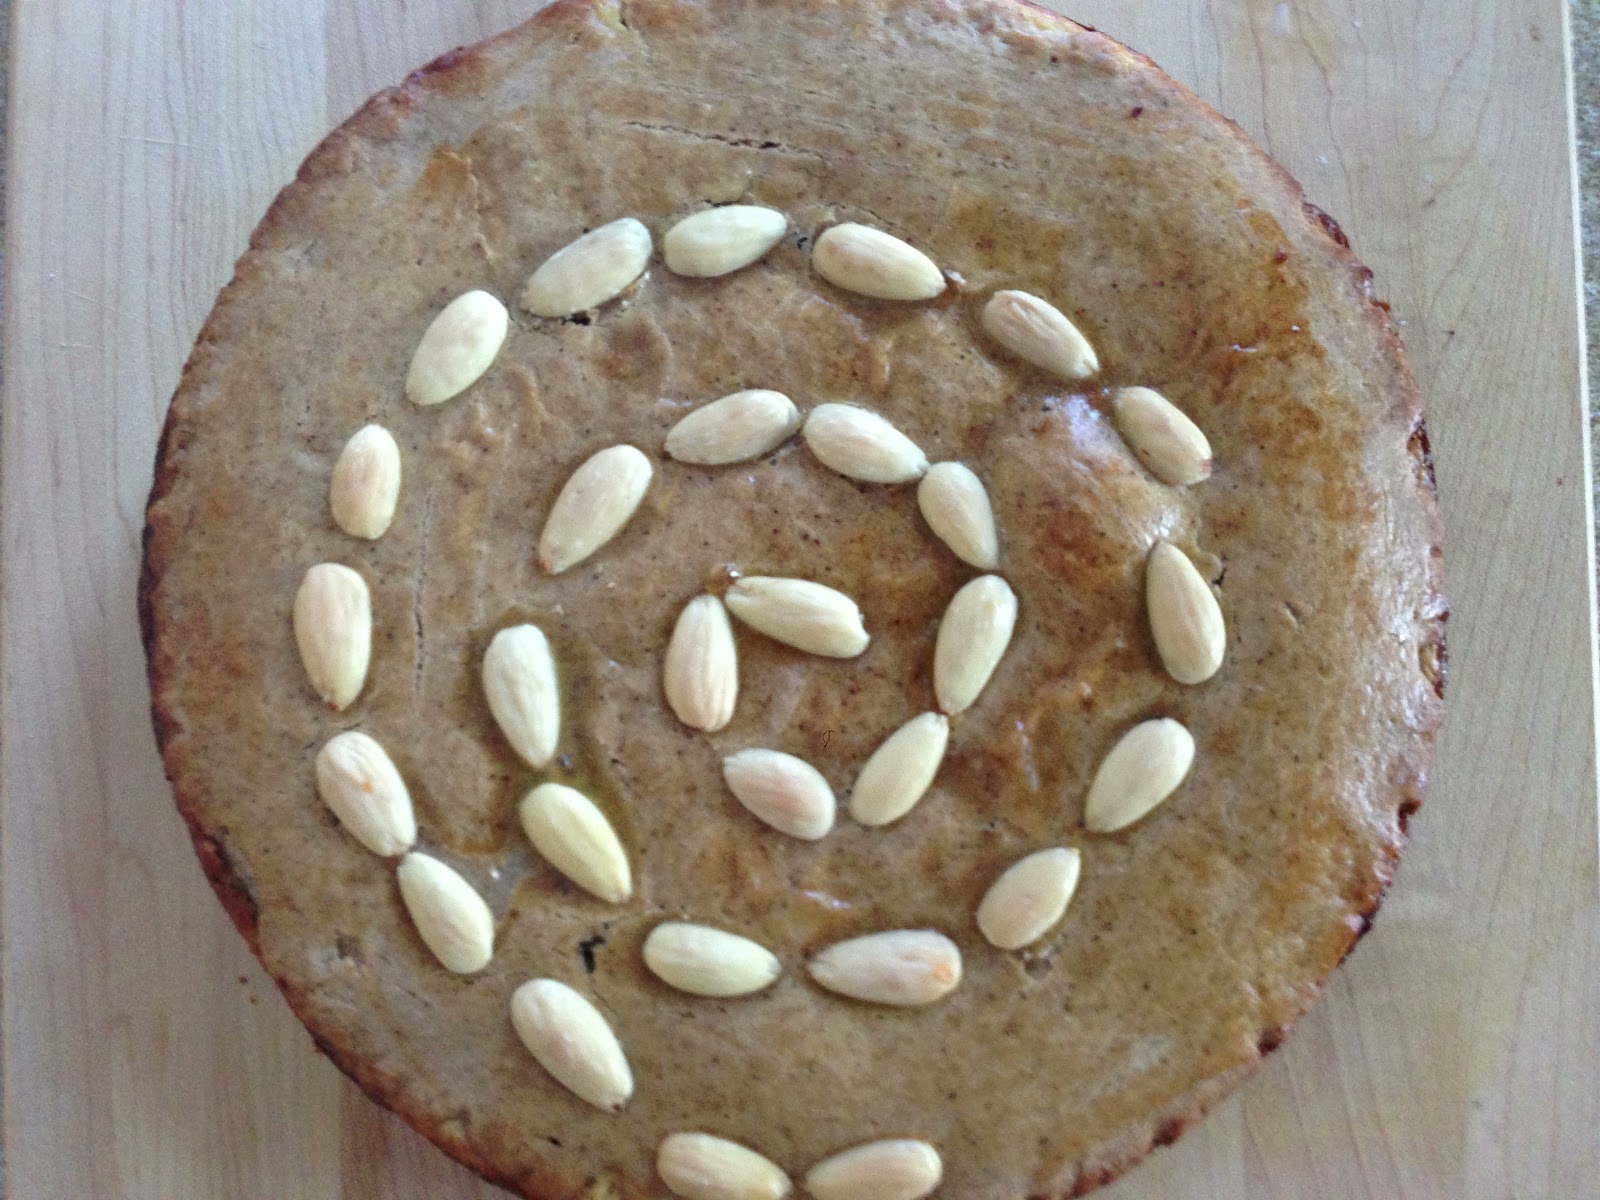
Daring Bakers January 2013: Gevulde Speculaas


Francijn of Koken in de Brouwerij was our January 2013 Daring Bakers’ Hostess and she challenged us to make the traditional Dutch pastry, Gevulde Speculaas from scratch! That includes making our own spice mix, almond paste and dough! Delicious!

Well, this is not only the first challenge of the new year, but it is also my first challenge back post the  nausea and exhaustion of my first trimester. At the holidays I really wanted to try December's challenge, but since my family was coming for the first official Christmas in our new house and I didn't feel well in general I knew it wasn't going to happen. But when I saw that the January challenge was a Dutch recipe, I knew that it was a sign. I was going to feel better someday and I would finally rejoin the ranks of Daring Bakers the world over. You see, I'm some percentage Dutch and anytime I get a chance to make a recipe with a nod to my heritage I'm very excited.

Two Christmases ago I made speculaas cookies simply because they were a Dutch cookie. And I fell in love with the spice mixture. I love how all these spices work so well together and none takes over the flavor completely. So when I saw that this was January's challenge, I was in!

This was the perfect recipe to test the waters of being back in the kitchen. You can do it in small steps, which I really appreciated since one of the twins has decided that they like pinching a nerve on the left side of my body and my leg goes numb when I stand too long. It is a recipe that can even be done over the course of a couple days, although I did it it just one.

The spice mixture which takes this just from a simple spice cake to out of this world delicious is very easy to put together and store what you don't use. Reading through the recipe, I noticed that the spices could be used in a cheesecake. My mouth started watering. Definitely make more than you need because you will want to use them again!


Speculaas Spices
Speculaas spices can be bought in a store. But it's more fun to make your own mixture, so that you can adjust the flavor. Here is a representative recipe from the extensive Dutch tradition.


Mandatory spices: cinnamon, ground cloves, mace, ginger
Optional spices: white pepper, cardamom, coriander, anise, nutmeg
Take at least 1 or 2 teaspoons of ground cloves, ½ or 1 teaspoon of mace and ½ or 1 teaspoon of ginger.
Add to taste ½ or 1 teaspoon of white pepper, ½ or 1 teaspoon of cardamom, ½ or 1 teaspoon of coriander, ½ or 1 teaspoon of anise, and 1 or 2 teaspoons of nutmeg.
Measure or weigh the amount of spices you have now, and add an equal amount of cinnamon.

Almond Paste

Ingredients:
7/8 cup raw almonds (or 1-1/3 cups ground almonds)
5/8 cup  granulated sugar
1 large egg
1 teaspoon lemon zest


Directions:
If the raw almonds still have their brown skins, remove them as follows. Bring water to a boil, add the almonds, cook them for one minute, drain immediately and let cool for a few minutes. Rub them between your fingers to remove the skins.

1. Grind the almonds for one or two minutes in a food processor, until you see nothing but very small pieces. (Or skip this step if you use ground almonds.)

2. Add the sugar, and grind for another one or two minutes. It must be very fine after this step.

3. Add the egg and lemon zest and let the food processor combine it - if it is powerful enough. Otherwise you will have to combine it with your fingers.

Store the almond paste in an airtight container in the refrigerator. Although the flavor gets better as days pass by, it is not wise to store the paste for too long, as it contains a raw egg. For the same reason you should not eat the paste unbaked.

Speculaas Dough

Ingredients:
1¾ cups all purpose (plain) flour
1 teaspoon baking powder
¾ cup brown sugar, firmly packed
a pinch salt
2 tablespoons speculaas spices
¾ cup (1½ stick) unsalted butter

Directions:


1. Put flour, baking powder, sugar, salt and spices in a bowl. Cut the butter in dices and add.
2. Knead until smooth. Feel free to add a little milk if the dough is too dry.
3. Wrap in clingfoil and put in the refrigerator for two hours.


Assembling and baking the Gevulde Speculaas

Ingredients:
speculaas dough
almond paste
whole almonds without skins for decoration 1 large egg
shallow baking pan, 8x10 inch or, round with 10 inch diameter

Directions:
1. Grease the pan.
2. Preheat the oven to moderate 350°F
3. Divide the dough into two portions.
4. Roll out both portions on a lightly floured surface, until they are exactly as big as the baking pan.
5. Put one of the layers in the pan and press it lightly to fill the bottom.

6. Lightly beat the egg with a teaspoon cold water.
7. Smear 1/3 of the egg over the dough in the pan.
8. Roll out the almond paste between two sheets of clingfoil, until it is exactly as big as the pan, and put it on the dough in the pan. (If you chose to make the paste soft, you can smear the paste instead of rolling it.)

9. Press the paste lightly down to fit in the pan, and smear the next 1/3 of the egg over it.
10. Now put the second layer of dough on top of the paste, press it lightly, and make as smooth as possible.
11. Smear the last 1/3 of the egg over the dough.

12. Decorate the pastry with the almonds.
13. Bake for 40 minutes in the preheated oven.
14. Let cool completely in the pan, then cut it in portions as you like.
15. If you wrap the stuffed speculaas in clingfoil, after it has cooled completely, you can store it a few days at room temperature. Freezing is possible, but fresh speculaas tastes better.


Tuesday, January 1, 2013

A different kind of baking

So, friends. You have probably noticed (or just not, because in the absence of posts, my blog doesn't show up in readers) that I have been quiet lately.

That is because I have been working on a project that has taken up pretty much all of my energy and even made me not want to be in the kitchen all that much lately. I have been cooking and baking, of course it was the holiday season, the kitchen has been busy. But I haven't been up to documenting.

I've been working on a long term project, that won't even be ready until this summer for the debut. As projects usually do, this one got even bigger than I had expected it to in December. This long term project- a nine month project to be exact- turned out to be not one, but TWO babies in my future. My husband and I found out that we were expecting twins on the Fateful Day of Monday, December 3rd, and our lives haven't been the same since.

I hope you can understand that wrapping your head around twins takes quite a bit of time. I've been lucky enough to not be too sick, but food has not been appetizing for quite a while now. Some days getting everything ready for spaghetti and meatballs was too much for my queasy stomach to handle. Understandably, mega kitchen projects like Daring Bakers and Cooks were just not going to be manageable. I'm hoping that as I ease into the next phase of this pregnancy in my second trimester I can be back in the kitchen.


So here's a little image of what I've been busy making. I've got a little bunk bed in my belly, I guess. 

Happy New Year! 

Wednesday, November 14, 2012

The Daring Cooks November 2012: Brining


Audax of Audax Artifax was our November 2012 Daring Cooks’ host. Audax has brought us into the world of brining and roasting, where we brined meat and vegetables and roasted them afterwards for a delicious meal!

I have brined chicken before, so I knew that this was going to be a delicious challenge but I wanted to do something a little different. I did a little research and decided to do a maple-brined pork chop. Anytime anything is titled "maple" anything, I'm in. Especially in November when you're just starting to realize that those 60 degree days aren't coming back for a long while. To me, maple just says comfort like sitting cuddled up in a blanket in front of the fireplace.

The added bonus of this recipe is that the brining solution called for Juniper berries. My dad (who is the king of unique ingredients) bought me some Juniper Berries to use and I just haven't had a chance to use them until now. If you're lucky enough to have a Penzey's (yes again...) they do have them there. Juniper berries can be used to flavor any type of game or something as simple as pork.

The roasted portion of our meal was a recipe that accompanied the maple brined pork chop recipe that I knew we had to have. The words "Roasted Pear Chutney" should just make your mouth water. The pears smelled unbelievable while they roasted in the oven, and the combination of that sweet, caramelized flavor with the vinaigrette is pretty cool.

Now I've done a lot of talking up of this recipe. On paper, I think it looks to die for. In execution, I'm not so sure. The pork came out just ultra salty and I was not a big fan of the chutney. Dave loved the chutney and was so-so on the pork. Perhaps my measurements were a bit off or something, but it doesn't mean the end of brining for us.

Maple-Brined Pork Chops (slightly adapted from Epicurious)

Brine
1 cup kosher salt
3/4 cup sugar
1 cup maple syrup
2 teaspoons hot red pepper flakes
2 tablespoons juniper berries
1/2 teaspoon whole cloves
1/4 cup fresh rosemary, chopped
2 tablespoons chopped fresh thyme
12 garlic cloves, smashed
2 tablespoons chopped fresh ginger


8 cups water
4 center-cut loin pork chops, 1 1/2 inches thick
Freshly ground black pepper


1. Mix all of the brine ingredients together in a nonreactive pot and bring to a boil. Turn off the heat and stir the brine to ensure that the salt, sugar, and maple syrup have dissolved. Let the brine cool, then put it in a large nonreactive container and add the pork chops. Cover and refrigerate for no more than 12 hours.


2. Remove the pork from the brine and pat dry (without rinsing). Season with pepper (no salt- they've already been brined!)

3. Heat 2 tbs of olive oil in a large skillet over medium high-heat. Sear the chops, about 2 minutes on each side. Watch carefully, as soon as they are browned flip them. Lower the heat and cover the pan. Allow to cook for a few more minutes on each side, until the chops register at least 145 on your meat thermometer. Remove from pan and allow to sit a few minutes before serving.

Roasted Pear Chutney (Epicurious)

2 ripe Bosc pears, peeled and cut in half
2 tablespoons freshly squeezed lemon juice
1/4 cup plus 1 tablespoon sugar
3/4 teaspoon ground cinnamon
1/4 teaspoon ground cloves
2 tablespoons vegetable oil
1/4 cup pure maple syrup
1 small red onion, cut into 1/2-inch slices
1 garlic clove, chopped
1 teaspoon grated fresh ginger
3 tablespoons golden raisins
1/2 cup white wine vinegar
1 teaspoon hot red pepper flakes
1 teaspoon chopped fresh thyme


1. Preheat the oven to 350°F.
2. Toss the pears with the lemon juice, 1 tablespoon of the sugar, the cinnamon, and cloves. Coat a sheet pan with half the vegetable oil. Set the pears cut side down on the pan. Brush the pears with the remaining oil. Roast until caramelized and tender, 40 to 50 minutes, depending on the degree of ripeness. Remove from the oven and allow to cool.
3. While the pears are roasting, bring the remaining ingredients to a boil in a nonreactive saucepan. Reduce the heat and simmer for 5 minutes. Remove from the heat and allow to cool.
4. Using a small spoon or a melon baller, scoop out the cores of the cooked pears. Cut the pears into 1/2-inch slices.
5. Combine the pears and the onion mixture. Cover and refrigerate for at least 1 day before serving.


Monday, October 29, 2012

Daring Bakers October 2012: Mille Feuille


Our October 2012 Daring Bakers’ challenge was hosted by Suz of Serenely Full. Suz challenged us to not only tackle buttery and flaky puff pastry, but then take it step further and create a sinfully delicious Mille Feuille dessert with it!

I almost didn't make this month's challenge, but I sure am glad I did! My kitchen helper (Bingley the adorable dog) decided that he was going to do a quality control check of the ingredients before I got started and ate three sticks of butter and at least 2 oz of bakers chocolate. So instead of making the puff pastry dough, I spent an afternoon/evening trying to make sure that my kitchen helper (Bingley the still adorable but slightly naughty dog) didn't have any adverse reactions to said ingredients. He's got a stomach of steel and I was probably more traumatized by the whole event than he was. Lesson learned, do not leave butter out to soften where the dog can reach. 

My in-laws came over this past weekend to help us do a little bit of work around the house. My mother in law and I made cheese ravioli from scratch while my husband and father in law ran speaker wires through the walls and under the floor. I think I had the better job of the two. We had a delicious dinner of the cheese ravioli, homemade (family recipe! yum!) pasta sauce and finished it all off with the Mille Feuille. 

I couldn't resist adding a picture of our delicious dinner!
I had never made puff pastry from scratch before, but I will no longer be paying the nice people at Pepperidge Farm or any other company to make it for me. This was not a difficult laminated dough (I thought it was much easier to work with than the croissant dough, and I really enjoy making croissants) and if you've got a few hours where you can do a little bit and go do something else for a half hour, I say make the puff pastry yourself! 

Pâte feuilletée /Puff Pastry


Servings: Makes 8-10 mille-feuille (yields: 675g pastry)

Ingredients
1¾ cup (250g) plain/all-purpose flour
Scant ¼ cup (55 ml) (1¾ oz)(50g) unsalted butter, chilled and cubed
1 teaspoon (5ml) (6 gm) salt
½ cup plus 2 tablespoons (5/8 cup)(150 ml) cold water

14 tablespoons (210 ml) (7 oz) (200g) butter (for the beurrage), room temperature
3½ tablespoons (55ml) (30g) plain flour (for the beurrage)

Additional flour for rolling/turning

Directions:

1. Cut the larger quantity of butter into smallish pieces and set aside at room temperature.
2. Put the larger quantity of flour into a bowl with the salt and the cold, cubed butter.
3. Lightly rub the butter and flour between your fingertips until it forms a mealy breadcrumb texture.

4. Add the cold water and bring together with a fork or spoon until the mixture starts to cohere and come away from the sides of the bowl.
5. As the dough begins to come together, you can use your hands to start kneading and incorporating all the remaining loose bits. If the dough’s a little dry, you can add a touch more water.
6. Knead for three minutes on a floured surface until the dough is smooth.
7. Wrap in clingfilm and refrigerate for at least 30 minutes.
8. While the dough is chilling, take your room temperature butter and mix with the smaller amount of plain flour until it forms a paste.
9. Place the butter paste between two sheets of clingfilm, and either with a rolling pin or your hands (I found hands easiest) shape it into a 4.5”/12cm square. You can use a ruler (or similar) to neaten the edges.
10. Refrigerate for about 10-15 minutes so the butter firms up slightly. If it’s still soft, leave it a bit longer. If it’s too hard and inflexible, leave it out to soften a touch. You want it to be solid but still malleable.
11. Once the dough has chilled, roll it out on a floured surface into a 6”/15cm square. Place the square of butter in the middle, with each corner touching the centre of the square’s sides.
12. Fold each corner of dough over the butter so they meet the centre (you might have to stretch them a little) and it resembles an envelope, and seal up the edges with your fingers. You’ll be left with a little square parcel.
13. Turn the dough parcel over and tap the length of it with your rolling pan to flatten it slightly.
14. Keeping the work surface well floured, roll the dough carefully into a rectangle ¼ inch /6 mm in thickness.
15. With the longest side facing you, fold one third (on the right) inwards, so it’s covering the middle section, and ensure that it is lined up.
16. Then, fold the remaining flap of dough (on the left) inwards, so you’re left with a narrow three-layered strip.
17. Repeat steps 14, 15, 16.
18. Wrap up in clingfilm and chill for at least 30 minutes.
19. Repeat steps 14, 15, 16 twice.
20. Wrap up in clingfilm and chill again for at least 30 minutes.
21. Repeat steps 14, 15, 16 two final times.
22. Wrap up in clingfilm and refrigerate until needed. The dough keeps a couple of days in the fridge.


Pastry Cream / Crème Pâtissière:

(full batch; makes enough for 8-10 mille-feuille)

Ingredients
2 cups (450ml) whole milk
¼ cup (1¼ oz)(35 gm) cornflour/cornstarch
1 cup less 1 tablespoon (200gm) (7 oz) caster sugar
4 large egg yolks (if you’re making the royal icing, reserve two egg whites)
2 large eggs
¼ cup (2 oz) (60gm) unsalted butter, cubed
2 teaspoons (10 ml) vanilla essence

Directions:
1. Mix the cornflour/cornstarch with ½ cup of milk and stir until dissolved.
2. Heat the remaining milk in a saucepan with the sugar, dissolving the sugar and bringing the milk to the boil. Remove from heat.
3. Beat the whole eggs into the cornflour/milk mixture. Then beat in the egg yolks. Pour in 1/3 of the hot milk, stirring constantly to prevent the eggs from cooking.
4. Now, bring the remaining milk back to the boil, and add the eggy mixture, whisking as your pour. Keep whisking (don’t stop or it’ll solidify) on a medium heat until the mixture starts to thicken.
5. Remove the saucepan from the heat and thoroughly whisk the pastry cream. At this stage the pastry cream can look slightly lumpy, but a good whisking soon makes it smoother.
(N.B. If you’re worried about the pastry cream continuing to cook off the heat, you can transfer it to a stainless steel/ceramic bowl.)
6. Beat in the butter and vanilla until fully incorporated.
7. If you haven’t already, pour the pastry cream into a stainless steel or ceramic bowl, and then place clingfilm over the surface to stop a skin forming.
8. Refrigerate overnight to give the pastry cream time to further thicken.

Mille-Feuille/ Napoleon/ Custard Slice

Servings: Makes 8- 10

Ingredients
1 x batch pâte feuilletée/puff pastry (see above)
1 x batch crème pâtissière/pastry cream (see above)

2 ¾ cups (660 ml) (12⅓oz) (350gm) icing sugar
2 teaspoons (10 ml) lemon juice
2 large egg whites
½ cup (2¾ oz) (80gm) dark chocolate

Directions:

1. Preheat oven to moderately hot 200 °C /400°F/gas mark 6.
2. Lightly dust your work space with flour and remove your dough from the fridge.
3. Roll into a large rectangle, the thickness of cardboard. The recipe I followed specified no other dimensions, but I rolled mine to about 12”/30cm x 18”/46cm.
4. Cut into three equal pieces and place on a baking tray. If you don’t have space for all three, you can bake them separately.
5. Prick the pastry sheets all over with a fork.
6. Place another sheet of greaseproof paper over the top and then a heavy baking tray. This will prevent the layers from puffing up too much.
7. Bake each sheet for about 25 minutes in a moderately hot oven 200 °C /400°F/gas mark 6, removing the top layer of greaseproof paper/tray 10 minutes before the end for the tops to brown. Keep an eye on them and lower the temperature if you think they’re browning too much.
8. Remove the baked sheets from the oven and leave on a wire rack to cool.
9. Once the pastry has cooled, you’re ready to assemble your mille-feuille. Get a sturdy flat board, your pastry and the chilled crème pâtissière from the fridge.
10. Lay one sheet on the board and spread half the crème patisserie evenly over the top.
11. Take the second sheet and place it on top, pressing down lightly with your hands to ensure that it sticks to the filling.
12. Spread the remaining crème pâtissière and place the last sheet of pastry on top, pressing down again. (Don’t worry if there’s some oozing at the sides. That can be neatened later.)
13. Pop in the fridge while you prepare the icing / chocolate.
14. Melt the chocolate in a bain marie, stirring periodically. Once melted, transfer to a piping bag (or plastic bag with end snipped), resting nozzle side down in a glass or other tall container.
15. To make the icing, whisk 2 egg whites with 2 teaspoons lemon juice until lightly frothy.
16. Whisk in about (2 cups) 300gm of the icing sugar on a low setting until smooth and combined. The mixture should be thick enough to leave trails on the surface. If it’s too thin, whisk in a bit more icing sugar.
17. Once ready, immediately pour over the top of the mille-feuille and spread evenly. I found that I didn’t quite need all of the icing.
18. Still working quickly, pipe a row of thin chocolate lines along the widest length of your pastry sheet. You can make them as far apart/close together as you like.
19. STILL working quickly (phew), take a sharp knife and lightly draw it down (from top to bottom) through the rows of chocolate. A centimeter (½ inch) or so further across, draw the knife up the way this time, from bottom to top. Move along, draw it down again. Then up. And so on, moving along the rows of chocolate until the top is covered in a pretty swirly pattern.
20. Once you’ve decorated your mille-feuille (no doubt far more beautifully than I did), with a clean knife mark out where you’re going to cut your slices, depending on how big you want them to be and leaving space to trim the edges. I got ten out of mine – two rows of five.
21. Chill for a couple of hours to give the icing (etc.) time to set.
22. With a sharp knife, trim the edges and cut your slices.
23. Dig in!


Wednesday, October 17, 2012

The Daring Cooks October 2012: Brazilian food!


Rachel Dana was our October 2012 Daring Cooks' Challenge hostess! Rachel brought Brazil into our lives by challenging us to make Feijoada and Farofa along with some other yummy side dishes traditionally served with Feijoada, which is a delicious black bean and pork stew.

This was a delicious Brazilian dish that was perfect for the cooler weather we've been having. Of course, after it looked like it was finally transitioning into a real fall, last week had temperatures forecast of 70℉.  I really enjoyed getting to sample quite a few different foods with this challenge. A real winner! 

We didn't care too much for the collard greens, but I don't think it was because of this specific preparation, I don't think we like collard greens in general. Everything else was really tasty. 


Bottom: Feijoada. Top left: Farofa. Top right: Collard Greens

Vinagrete (I forgot to put it on the plate and take a pic, so this is what you get)
Here is the Daring Cooks page with the recipe for Feijoada, Farofa, Vinagrete, Collard Greens and the Onion-Garlic base that was the flavoring that tied much of the meal together. 

Sunday, September 30, 2012

Autumn Dessert: Butternut Squash & Pear Crisp


I'm really enjoying the cool weather and yummy fall foods that we've been having lately. I love that fall weather actually encourages you to be outside and be comfortable while you're there, unlike summer where you're sweating and sticky the whole time. The air feels nice and crisp and the leaves are beginning to burst into color. Autumn is my favorite season, hands down.

I also love the puppy cuddles that come with cool mornings and evenings, even if they are just using you for warmth.


I was in the mood last weekend for a crisp of some kind and went sleuthing for something other than just your run of the mill apple crisp. When I stumbled upon a Bon Appetit recipe for pumpkin and pear crisp, I knew I had found the one. I substituted butternut squash for the pumpkin, and pecans for the walnuts because that's what I had. This was a delicious dessert that we enjoyed for a few days. I especially appreciated that you bake the crisp in ramekins. It made my weekday post dinner ritual that much easier. 

Butternut Squash and Pear Crisp (adapted from Bon Appetit)
Streusel Ingredients:
¼ cup old fashioned oats
¼ cup pecans
1 large egg white
¼ cup packed dark brown sugar
¼ cup (½ stick) chilled unsalted butter, cut into ½" cubes
3 tablespoons unbleached all purpose flour
3 tablespoons whole wheat flour
½teaspoon ground cinnamon

Compote Ingredients:
2 cups ¼" cubes peeled, seeded butternut squash (about ½lb)
¼ cup pure maple syrup
¼ cup golden raisins
2 tablespoons fresh lemon juice
1 tablespoon packed dark brown sugar
2 teaspoons ground cinnamon
¼ teaspoon ground cloves
1 ½ cup water
3 large pears, peeled, cored, cut into 1/4" cubes 
½ teaspoon vanilla extract

Streusel Directions:
1. Preheat oven to 375℉. Combine all ingredients in the bowl of a food processor and pulse until crumble forms. 
2. Spread on a rimmed baking sheet. Bake until golden and crispy, occasionally breaking up clumps, 18-20 minutes. Let cool. 

Compote Directions:
1. Preheat oven to 375℉. Bring first 8 ingredients to a simmer in a large saucepan over medium heat. Cover and simmer until squash is just tender, about 7 minutes. 

2. Add pears and vanilla; cook uncovered, stirring often, until pears are tender, about 10 minutes. 

3. Transfer pumpkin and fruit mixture to a medium bowl. Simmer syrup in pan until reduced to ½ cup, 3-5 minutes. 

4. Arrange 8 6 oz. ramekins on a rimmed baking sheet. Divide compote among ramekins. Drizzle each with 1 tablespoon reserved syrup.

5. Bake until filling is bubbling at edges, 25-30 minutes. Top with streusel and serve. 

Saturday, September 29, 2012

Daring Bakers September 2012: Empanadas

Patri of the blog, Asi Son Los Cosas, was our September 2012 Daring Bakers’ hostess and she decided to tempt us with one of her family’s favorite recipes for Empanadas! We were given two dough recipes to choose from and encouraged to fill our Empanadas as creatively as we wished!

I know, I know. I'm two days late in posting. Blame my job or my procrastination, either way I'm late. One of my goals now that school has been happening for a full month is to do a better job blogging. Right now that means two specific things: posting on time for challenges and taking the time to take better photos. Hold me to those things, people! Please!


This was a delicious recipe that was perfect for the cooler weather we've been having lately. Something about meat and veggies baked in dough just screams autumn comfort food. We had the inaugural fire in the fireplace in our house and enjoyed the feeling of bellies full of yummy empanada as we relaxed last weekend.

I'd made dessert empanadas before (okay, I mostly cheated with canned apple pie filling and probably store-bought dough) and was looking forward to trying the savory kind. I could have made this a little easier on myself by buying a rotisserie chicken instead of roasting my own, but with whole chickens under a dollar a pound I couldn't really justify not doing the whole recipe from scratch.

Chicken and Bell Pepper Empanadas

Dough Ingredients:
5-1/3 cups (1280 ml) (750 gm) bread flour

2 cups (480 ml) of lukewarm water (about 85°F/30oC)
approximately
1 satchel (1 tablespoon) (15 gm) dry yeast or (1 oz) (30 gm) fresh yeast

2 teaspoons (10 ml) (11 gm) salt

4 tablespoons (60 ml) oil (you can use oil from the pan where you have cooked the filling)
1 large egg, for egg wash


For the filling:
1 3-pound chicken
Sea salt and black pepper to taste
½ cup extra-virgin olive oil
1 green bell pepper, seeded and thinly sliced
1 red bell pepper, seeded and thinly sliced
1 medium Spanish onion, thinly sliced
4 garlic cloves, minced
8 ripe plum tomatoes
1 fresh thyme sprig
2 bay leaves
½ cup dry white wine
2 teaspoons sweet pimentón (Spanish smoked paprika)


Dough Directions:
1. Measure out all the ingredients. Sift the flour into a big bowl and make a well in the middle. Rub the yeast in with your fingers.

2. In a small bowl, mix the water and the salt.  Using your fingers or a wooden spoon, start adding the water and mixing it with the 
flour-yeast mixture. Keep on working with your fingers or spoon until you have added 
enough water and all the flour has been incorporated and you have a messy ball of dough.

3. On a clean counter top, knead the dough for approximately 10 minutes
(You could do all the above using a stand mixer, in that case mix the ingredients with the 
paddle attachment until mixed and then switch to a dough hook and knead on low for about 6 
minutes.)

4.Clean and oil the big bowl you used for mixing and place the kneaded dough in it. Cover it 
with a napkin or piece of linen and keep it in a warm, draught-free place for approximately 40 to 50 minutes.

5. Once risen, turn the dough back into a floured counter and cut it in half. Cover one half with the napkin to prevent drying.

6. Spread the other half of the dough using a rolling pin. You can use a piece of wax paper over the counter, it will make it easier to move the dough around. Depending on the shape of your oven pan or cookie sheet, you will make a rectangle or a round.

7. Now, the thinness of the dough will depend on your choice of filling and how much bread you like in every bite. For your first time, make it about 3mm thin (about 1/10th of an inch) and then adjust from that in the next ones you make.

Filling Directions:
1. Preheat the oven to 375℉

2. Season the chicken, inside and out, with salt and pepper and place on a rack set on top of a baking sheet. Roast the chicken for 45 minutes and let cool. Remove all of the meat from the chicken, discarding the skin and bones. Shred the meat and set aside.

3. Heat the olive oil in a medium saucepan over medium-low heat. Add the peppers, onions and garlic and cook, stirring occasionally, until the onions and peppers are tender and golden brown, about 30 minutes.

4. Meanwhile, slice the tomatoes in half. Place a grater over a mixing bowl. Rub the cut surface of the tomatoes over the grater until all of the flesh is grated. Set the pulp aside and discard the skins.

5. Add the thyme and bay leaves to the onions and peppers and continue to cook until the mixture turns brown, about 5 minutes more. Add the wine and cook until it evaporates.

6. Stir in the tomato pulp and pimentón, reduce the heat to medium and cook slowly until the oil separates from the mixture and the tomato becomes dark brown in color, about 20 minutes more.

7. Add the shredded chicken and cook for 5 more minutes. Remove from the heat, season to taste with salt. Transfer the mixture to a strainer set over a mixing bowl to drain and let cool. Discard liquid.

To Assemble:
1. Turn a 13x18 inch baking sheet over on a work surface and brush the back of the pan with olive oil. Transfer one rectangle of dough to the baking sheet.

2. Spoon the filling into the center of the dough and spread to about 1 inch from the edge. Beat the egg in a small bowl with a little water and brush the egg wash along the edge of the dough.

3. Place the second rectangle of the dough on top of the filling. Fold the dough over, crimping the edges to seal. Brush the top of the dough with the remaining egg wash and prick the dough with a fork to allow the steam to escape.

4. Bake until golden brown, about 30 minutes. Allow the empanada to come to room temperature before slicing.

Sunday, September 16, 2012

Daring Cooks September 2012: Paella


I know, I'm a little late in this posting, but better late than never, right? I swear, now that school has started I'm lucky to remember my name at the end of the day much less how to cook.

Our Daring Cooks’ September 2012 hostess was Inma of la Galletika. Inma brought us a taste of Spain and challenged us to make our very own delicious Paella!

I was so excited when this challenge was posted, paella is a dish I love to eat, love to make, and I have fond memories of my trip in Spain every time I eat it. The first time I ate paella I was a little nervous when the waiter put the plate down in front of me- there were crawfish placed around the lip of the plate just staring at me. I avoided the crawfish and their creepy eyes, but as soon as I had my first mouthful I was enamored.

When I got back from the trip my first request for a birthday present was a paella pan. Since then I've made the dish quite a few times but always when I know I'm going to be feeding quite a few people. This time around we invited friends over and planned a night of sangria, paella and Monopoly. One of our guests is not a big fan of seafood so I adjusted the recipe to accommodate his tastes as well as those of us who love shrimp. I am saving the recipe that Inma gave us for another time, I'm very interested to try another very authentic recipe.

I have one very yellow photo of this dish because I was too busy cooking and talking and drinking sangria to take more. But this is really a beautiful dish and wonderful to eat!

Paella (adapted from Williams Sonoma)

½ tsp saffron threads
1lb large shrimp, peeled and deveined
¼ cup olive oil
salt and freshly ground pepper, to taste
1 yellow onion, finely chopped
3 garlic cloves, minced
½ cup roughly chopped canned peeled tomatoes
2-3 lbs chicken pieces (I used thighs because that's what I had this time, I've also done it with a whole chicken that I broke down into pieces)
2 cups short grain rice
2 tsp smoked paprika
½ cup dry white wine
4 cups chicken broth
½ cup water
½ cup red bell pepper strips, 1/4 inch wide
½ cup thawed frozen peas
2 lemons, each cut into 8 wedges

1. Preheat oven to 350℉.
2. In a paella pan (or large skillet) over medium heat, cook chicken pieces in 1-2 Tbs olive oil for 15 minutes, turning from time to time. Remove and keep warm.
3. Toast saffron in paella pan, stirring constantly until fragrant, about 1 minute. Transfer to a small bowl, let cool and crumble with fingers, set aside.
4. In another bowl, combine the shrimp, 2 Tbs of olive oil, salt and pepper. Stir to coat. Cover and refrigerate until ready to use.
5. In the paella pan over medium heat, warm 2 Tbs olive oil. Add the onion and cook, stirring occasionally, until soft and translucent, about 7 minutes. Stir in the garlic and cook for 30 seconds. Add the tomatoes and cook, stirring, until most of the liquid has evaporated and the tomatoes have darkened slightly, 6-7 minutes.
6. Add the rice, saffron, and paprika and cook, stirring constantly, until the grains are evenly coated with the tomato mixture, about 2 minutes. Add the wine, chicken broth, and water and season with salt and pepper. Spread the rice evenly over the bottom of the pan, increase the heat to medium-high and bring to a boil.
7. Cover the pan tightly with aluminum foil and transfer to the oven. Cook until rice has absorbed most of the liquid, about 20 minutes. Remove the pan from the oven.
8. Arrange the chicken evenly around the pan and press into the rice. Place the shrimp on top. Lay the bell pepper strips over the seafood and scatter the peas on top. Re-cover the pan with the foil and return the pan to the oven. Cook until the shrimp are opaque and the chicken is cooked through, 17-20 minutes, removing the foil during the last 5 minutes of cooking.
9. To create a brown crust on the bottom of the rice, set the pan over medium-high heat and cook, turning the pan occasionally so the bottom browns evenly, 4-6 minutes. Remove from the heat and let stand for 5 minutes. Serve the paella with lemon wedges alongside.

Monday, August 27, 2012

Daring Bakers August 2012: Pate a choux Swans


Kat of The Bobwhites was our August 2012 Daring Baker hostess who inspired us to have fun in creating pate a choux shapes, filled with crème patisserie or Chantilly cream. We were encouraged to create swans or any shape we wanted and to go crazy with filling flavors allowing our creativity to go wild!


I knew as soon as I saw this challenge that I would be using this to introduce my neighbors to my baking obsession. I could have made a half batch that would have still been too much for just me and my husband, but when you can take something like this over to the neighbors, what an introduction! They all looked at me kind of strange and asked "you just did this.... for no reason?" and I had to explain about the monthly challenges I do with the assurance that this would be the first of many food presents.

Bingley would like a swan, please.


I have never done pate a choux before, and looking at other bakers' pictures I think mine was a little runny. It didn't take too much time and wasn't all that difficult so I'm not too intimidated to give this another try. I think that these would be so much fun for baby showers or similar events.


Pate a choux
Ingredients
½ cup (120 ml) (115 gm) (4 oz) butter
1 cup (240 ml) water
¼ teaspoon (1½ gm) salt
1 cup (240 ml) (140 gm) (5 oz) all-purpose flour
4 large eggs

Directions:
Line at least two baking sheets with silicone mats or parchment paper, or grease pans well.
Preheat oven to moderately hot 375°F/190°C/gas mark 5 .
In a small saucepot, combine butter, water, and salt. Heat over until butter melts, then remove from stove.
Add flour all at once and beat, beat, beat the mixture until the dough pulls away from the sides of the pot.
Add one egg, and beat until well combined. Add remaining eggs individually, beating vigorously after each addition. Resulting mixture should be somewhat glossy, very smooth, and somewhat thick.
Using a ¼” (6 mm) tip on a pastry bag, pipe out about 36 swan heads. You’re aiming for something between a numeral 2 and a question mark, with a little beak if you’re skilled and/or lucky.
Remove the tip from the bag and pipe out 36 swan bodies. These will be about 1.5” (40 mm) long, and about 1” (25 mm) wide. One end should be a bit narrower than the other.
Bake the heads and bodies until golden and puffy. The heads will be done a few minutes before the bodies, so keep a close eye on the baking process.
Remove the pastries to a cooling rack, and let cool completely before filling.

Assembly
Take a swan body and use a very sharp knife to cut off the top 1/3rd to ½.
Cut the removed top down the center to make two wings.
Dollop a bit of filling into the body, insert head, and then add wings.

Vanilla Crème Patissiere

(Half Batch)

Ingredients:
1 cup (225 ml.) whole milk
2 Tbsp. cornstarch
6 Tbsp. (100 g.) sugar
1 large egg
2 large egg yolks
2 Tbsp. (30 g.) unsalted butter
1 Tsp. Vanilla

Directions:
Dissolve cornstarch in ¼ cup of milk. Combine the remaining milk with the sugar in a saucepan; bring to boil; remove from heat.
Beat the whole egg, then the yolks into the cornstarch mixture. Pour 1/3 of boiling milk into the egg mixture, whisking constantly so that the eggs do not begin to cook.
Return the remaining milk to boil. Pour in the hot egg mixture in a stream, continuing whisking.
Continue whisking (this is important – you do not want the eggs to solidify/cook) until the cream thickens and comes to a boil. Remove from heat and beat in the butter and vanilla.
Pour cream into a stainless steel/ceramic bowl. Press plastic wrap firmly against the surface. Chill immediately and until ready to use.