Tuesday, March 27, 2012

The Daring Bakers March 2012: Dutch Crunch!


Sara and Erica of Baking JDs were our March 2012 Daring Baker hostesses! Sara & Erica challenged us to make Dutch Crunch bread, a delicious sandwich bread with a unique, crunchy topping. Sara and Erica also challenged us to create a one of a kind sandwich with our bread!


Dutch Crunch Topping
2 tablespoons active dry yeast
1 cup warm water (105-110℉)
2 tablespoons sugar
2 tablespoons vegetable oil
½ teaspoon salt
1 ½ cups rice flour

1. Combine all ingredients in a large bowl and beat with a whisk; beat hard to combine. The consistency should be like stiff royal icing- spreadable but not too runny. If you pull some up with your whisk it should drip off slowly. Add more water or rice flour as necessary. Let stand 15 minutes.
2. Coat the top of each roll with a thick layer of topping. Err on the side of too much- too little will not crack properly.
3. Let stand, uncovered, for any additional time your recipe recommends. For the rolls I made, I put them straight in the oven at this point.
4. When baking, place pans on a rack in the center of the oven and bake your bread as you ordinarily would. The dutch crunch topping should crack and turn a nice golden-brown color.

Soft White Roll
1 tablespoon active dry yeast
¼ cup warm water
1 cup warm milk
1 ½ tablespoons sugar
2 tablespoons vegetable oil
1 ½ teaspoons salt
up to 4 cups all purpose flour

1. In the bowl of an electric mixer or large mixing bowl, combine yeast, water, milk and sugar. Stir to dissolve and let sit for about 5 minutes (the mixture should start to bubble or foam and smell yeasty.)
2. Add in vegetable oil, salt and 2 cups of flour. Using the dough hook attachment or a wooden spoon, mix at medium speed until the dough comes together.
3. Add remaining flour a quarter cup at a time until the dough pulls away from the sides of the bowl (from  an additional 1½ to 2 cups of flour)
4. Turn out onto a lightly floured surface and knead for about 4 minutes, until smooth and elastic.
5. Place in a lightly greased bowl and cover with plastic wrap. Let rise for 1 hour, or until doubled (or more) in size.
6. Once the dough has risen, turn it out onto a lightly floured surface and divide it into 6 equal portions. Shape each into a ball and place on a parchment lined baking sheet.
7. Cover with plastic wrap and let rise for 15 minutes while you prepare the topping.
8. Coat the top of each roll with the topping as described above.
9. Bake in a preheated 380° oven for 25-30 minutes, until well browned. Let cool completely on a wire rack before eating.

Sauteed Portabella Sandwiches
4 Portabella mushrooms. Remove stems and gills, wash and wipe clean.1 ripe tomato, sliced4 slices mozzarella cheeseOlive oil
1. Heat olive oil in pan. Place portabella caps in hot oil, cap side down and allow to cook 1-2 minutes per side. 
2. Build sandwich in whatever order you wish. Really these are a simple, delicious sandwich that you can add different spices (think: basil leaves, garlic, parmesan cheese shavings, balsamic vinegar) but is pretty great in this minimalist form as well. 

Wednesday, March 14, 2012

The Daring Cooks, March 2012: Braising

The March, 2012 Daring Cooks’ Challenge was hosted by Carol, a/k/a Poisonive – and she challenged us all to learn the art of Braising! Carol focused on Michael Ruhlman’s technique and shared with us some of his expertise from his book “Ruhlman’s Twenty”.


Man, I was excited when I saw that this month's challenge was such a basic technique. That I hadn't yet tried, not really, because, well it takes time, you know? But, like making croissants, the time is one of those false fronted, seemingly imposing buildings. If you see it from the right angle, you see that it is just a big distraction from the truth: braising gives you a delicious, tender meat (if you're using meat) and you don't have to stand over the stove for the entire time. Totally worth it!


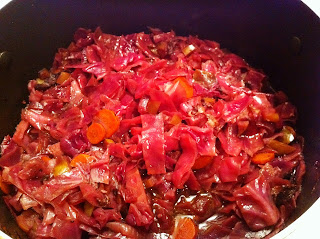
All the recipes that were provided for us looked truly delicious. But we had some pork chops in the freezer, so I turned to the ever trustworthy Julia Child. I found a recipe for pork chops and red cabbage braised in red wine that looked pretty promising. I wasn't so sure about the cabbage- I hate to say I haven't had a lot of experience with cooking, eating or even choosing cabbage. I figured, hey, there's red wine in here, I'll try cabbage for that. The resulting dish was truly delicious, although we only had 4 pork chops, so the ratio of pork to cabbage was a little off. It was yummy, but a little too much cabbage for me.


Side note- when this challenge was announced, I told my husband "see I need one of those Le Creuset dutch ovens." Proof he is the best husband ever: "okay, so go buy one." We didn't. But sometime it is just knowing that he supports everything you do that is important. I think the fact that he gets to eat everything I make for these challenges helps a little :)


Pork Chops and Red Cabbage braised in Red Wine (Julia Child)
  • 1 package boneless pork chops (1/2" thick - about 5 chops)
  • 1 Tbsp. Olive Oil
  • Salt & pepper
  • 1/4 lb. bacon
  • 1/2 cup thinly sliced carrots
  • 1 cup slice onion
  • 3 Tbsp. butter
  • 2 lbs (6 or 7 cups) red cabbage, cut into 1/2" slices
  • 2 cups diced tart apples
  • 2 cloves mashed garlic
  • 1/4 tsp ground bay leaf
  • 1/8 tsp clove
  • 1/8 tsp nutmeg
  • 1/2 tsp salt
  • 1/8 tsp pepper
  • 2 cups good, young red wine (Bordeaux, Chianti)
  • 2 cups beef stock
  • Salt & pepper to taste

Preheat oven to 325 degrees and tie on the apron - It's time to cook with Julia!

Remove the rind (if you get a chunk of bacon) and cut into strips 1 1/2" long & 1/4" across. Simmer for 10 minutes in 1 quart of water. Drain.

Cook the bacon, carrots and onion in the butter slowly in an oven-proof pan for 10 minutes without browning. Stir in the cabbage leaves and when well covered with the butter and vegetables, cook slowly for 10 minutes. Add all additional ingredients. Bring to a simmer on top of the stove. Cover and place in middle of preheated oven. Regulate heat so cabbage bubbles slowly for 3 to 3 1/2 hours. 


Season the pork chops with salt and pepper and brown in 1 Tbsp. olive oil. Add to cabbage, cover and return pan to oven for 1 to 1 1/2 hours more and all the liquid has been absorbed by the cabbage. Taste carefully for seasoning. 

Can be made ahead - this is even better when reheated the next day! Serves 6 people.